Intermediate 2-3 Hours to Learn, Ongoing for Projects Worsted yarn

Worked on the glider, counted out loud —

5 Wonderful Fancy Crochet Stitches: Step-by-Step Guide

Learn 5 wonderful fancy crochet stitches—shell, granny, puff, fan, and V-stitch—with this step-by-step guide for blankets, garments, and accessories.

Jump to the rounds

What this one is

This fancy shell stitch pattern creates a gorgeous scalloped texture that instantly elevates any project from simple to stunning. Unlike basic single or double crochet, this stitch combines multiple stitches worked into the same space to form elegant, fan-like clusters that repeat beautifully across a row. It's the kind of stitch that makes people stop and ask 'how did you do that?' Perfect for crocheters who've mastered the basics and are ready to add real visual interest to their work, this pattern rewards a little patience with a seriously impressive payoff.

The core technique here revolves around working several stitches into a single stitch or space to create the signature shell shape, then alternating with skipped stitches to let the scallops pop. You'll be working across just 2 rounds per repeat, which makes the rhythm easy to memorize once you get going. This sits comfortably at an intermediate skill level—you don't need advanced shaping skills, but you should be confident counting stitches and recognizing your pattern repeat so the scallops stay even from edge to edge.

Once you get into the groove, the fabric this stitch produces has a lovely undulating, lace-like drape that's both soft and structured. It's fantastic for large-scale projects like blankets, coat edges, and scarves, where the repeat has room to shine across a big surface. Worked up in a full project, this stitch reads as a designer detail—the kind of textured finish you'd expect from a boutique piece, making it a wonderful handmade gift that feels genuinely special.
Variations

I fell in love with this fancy shell stitch the moment I saw how those scallops caught the light along an edge. There's something so satisfying about working several stitches into one spot and watching a little fan bloom right there in your hands—it feels like a small magic trick every single round. What I really love is how forgiving the 2-round repeat is once you get the rhythm down; it becomes almost meditative, perfect for evening TV-watching stitching sessions. This isn't a stitch that demands constant pattern-checking once you've done a repeat or two—your hands just know what to do. I also love how adaptable it is: the same technique that makes a stunning blanket border works just as well dressing up a plain scarf or adding drama to a garment hem. It's the kind of stitch that makes even simple worsted-weight yarn look elevated and intentional. Honestly, once you've made a few shells, you'll start looking for excuses to use this stitch on everything—that's just what happens when a technique is this rewarding to repeat.

Common mistakes

  • Losing track of the stitch repeatPlace a stitch marker at the start of every repeat as you work the first row so you can quickly count back and confirm you're staying consistent before moving to the next round.
  • Working too tightly into the baseLoosen your tension slightly on the foundation stitch or size up your hook just for that base row—this gives you enough room to comfortably work multiple stitches into the same spot.
  • Skipping the wrong number of stitchesCount out loud or use a row counter app to track exactly how many stitches to skip each time—write the skip count on a sticky note next to your pattern until it becomes automatic.
  • Not counting rounds accuratelyAfter finishing round 2, lay your work flat and visually check that the scallops are lining up symmetrically before starting the next repeat—catching a misalignment early saves major frogging later.
  • Choosing a yarn with too much drapeStick to a smooth worsted-weight yarn like Super Saver or Vanna's Choice for your first attempt so you can clearly see and correct your stitch definition as you learn the pattern.
  • Working the shells into the wrong loopDouble-check whether the pattern calls for both loops or just the back/front loop before beginning each round—working into both loops typically gives the fullest, most defined shell shape.

The rounds, in full

Written out, round by round

Intermediate2-3 Hours to Learn, Ongoing for ProjectsWorsted

Materials

Everything this one takes, in the order you will reach for it.

  • Worsted weight yarn
  • Crochet hook (size to suit your yarn)

keep this to hand

Abbreviations

US crochet terms, as used in this pattern.

  1. dcdouble crochet
  2. puffpuff stitch
  3. shellshell stitch

Shell Stitch

The shell stitch is a classic stitch that creates a beautiful scalloped effect, perfect for edges and decorative sections.

Foundation Start with a chain that is a multiple of 6 plus 1.

  1. Row 1In the 5th chain from the hook, work 5 dc (this forms the shell). Skip 2 chains, then work 1 shell in the next chain ; repeat to the end of the row.
  2. Row 2Chain 3, turn. In the center of the previous row's shell, work 5 dc to create the next shell. Continue to work shells in the center of each shell from the previous row.

Granny Stitch

The granny stitch is often used in granny squares, but it can also be worked in rows for beautiful fabric.

Foundation Start with a chain that is a multiple of 3.

  1. Row 1In the 4th chain from the hook, work 3 dc. Chain 1, skip 2 chains, work 3 dc in the next chain . Repeat to the end of the row.
  2. Row 2Chain 3, turn. In the chain space from the previous row, work 3 dc, chain 1, then work another 3 dc in the same space. Continue this pattern for additional rows.

Puff Stitch

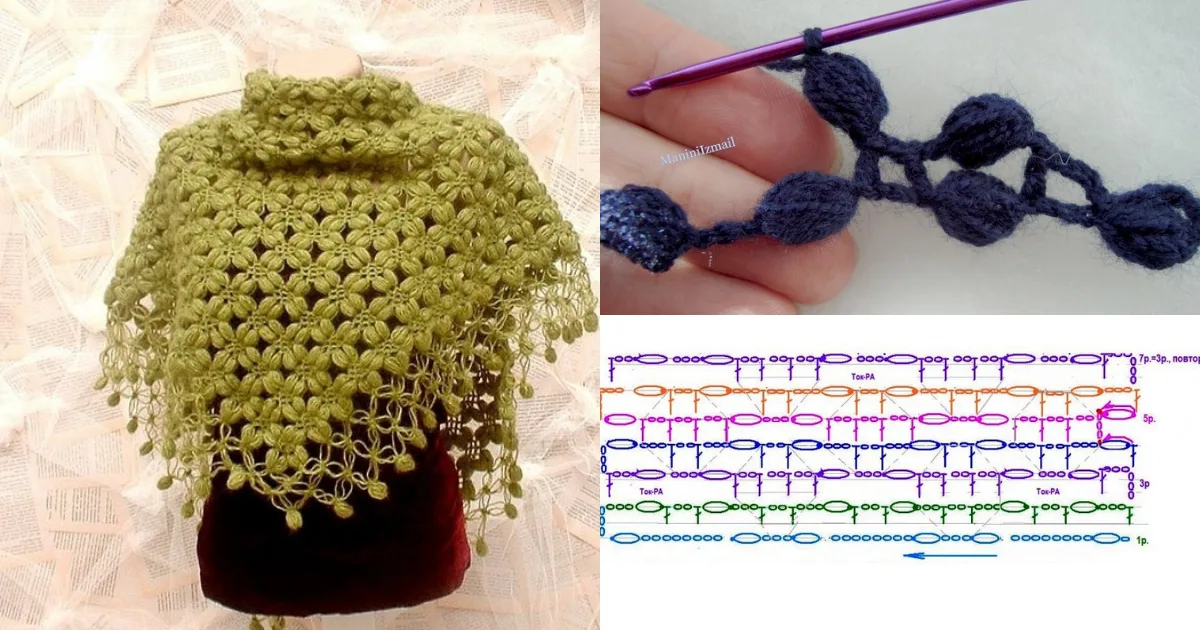
The puff stitch creates a textured, three-dimensional look that adds depth to any project.

Foundation Start with a chain that is a multiple of your desired width.

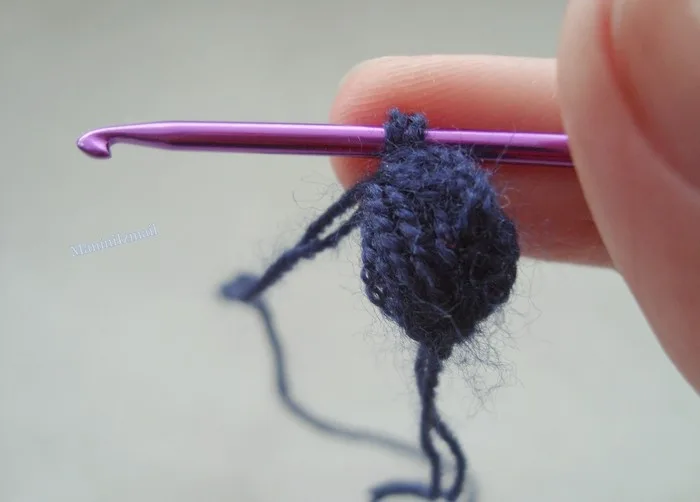
  1. Row 1In the 4th chain from the hook, yarn over, pull through, yarn over again, and pull through the first two loops on the hook. Repeat this process three times in the same stitch, then yarn over and pull through all loops on the hook.
  2. Row 2Chain 1, skip to the next chain space and work another puff stitch. Continue until the end of the row.

Fan Stitch

The fan stitch creates a beautiful and airy design that is perfect for lightweight garments.

Foundation Start with a chain that is a multiple of 6 plus 1.

  1. Row 1In the 5th chain from the hook, work 5 dc (this forms the fan). Skip 2 chains, and work 1 dc in the next chain . Repeat this pattern until the end.
  2. Row 2Chain 3, turn. In the center of the fan from the previous row, work 5 dc to form the next fan. Continue to work fans in the centers of previous fans.

V-Stitch

The V-stitch is an easy and lovely stitch that creates a visual "V" shape, adding a nice texture to your work.

Foundation Start with a chain that is a multiple of 3.

  1. Row 1In the 4th chain from the hook, work 1 dc, then chain 1. In the same chain, work another dc (this forms the V). Skip 2 chains, and repeat in the next chain.
  2. Row 2Chain 3, turn. In the chain space of the previous row, work 1 dc, chain 1, and another dc.

Important notes

Note 01

💡 Use a hook one size smaller than you'd normally choose for your yarn weight if you want crisper, more pronounced shell definition—this stitch tends to look best with slightly firmer tension.

Note 02

💡 Place a removable stitch marker at the beginning of every shell repeat during your first few rows—this makes it dramatically easier to count and correct mistakes before they multiply across the whole piece.

Note 03

💡 Block your finished piece by pinning out the scallop edges before steaming or wet-blocking—this really opens up the shell shape and makes the decorative effect pop.

Note 04

💡 If you're working this across a large project like a blanket, calculate your total stitch count in multiples of your repeat before starting your foundation chain, so your pattern lines up perfectly edge to edge.

Note 05

💡 Worsted weight yarn with good stitch definition (avoid anything too fuzzy or splitty) will show off this stitch's texture best, especially for beginners still learning to spot their repeats.

Note 06

💡 Practice the 2-round repeat on a small swatch first—about 20-30 stitches wide—before committing to a full-size project, so the rhythm feels natural once you start your real piece.

More photos

FAQs

Asked on the glider

the ones that come up on the glider

What skill level do I need for this fancy shell stitch pattern?

This is best suited for intermediate crocheters who are comfortable working multiple stitches into a single space and can confidently follow a repeating pattern. If you've made basic shell stitch borders before, you'll pick this up quickly.

What yarn weight works best for this stitch?

Worsted weight yarn shows off the shell texture beautifully and is the easiest weight to learn the stitch with. Once comfortable, you can experiment with DK or chunky weights depending on your project.

Can I use this stitch for a whole blanket, or just as a border?

Absolutely both! This fancy stitch pattern is designed to work beautifully as an all-over pattern for large projects like blankets and scarves, as well as a decorative border or edging on garments.

How do I keep my shells even across the whole row?

The key is consistent counting—use stitch markers at the start of each repeat and double-check your skipped stitch count between shells. Laying your work flat periodically to visually compare shell spacing also helps catch mistakes early.

What hook size should I use with worsted weight yarn for this pattern?

A standard 5.0mm-5.5mm (H/8 to I/9) hook works well with worsted weight yarn for this stitch, though sizing down slightly can give you a firmer, more defined shell shape if you prefer that look.