Beginner 4-6 Hours Worsted yarn

Worked on the glider, counted out loud —

Easy Crochet Soft Blanket Pattern for Cozy Winter Nights

Learn to crochet a soft, textured winter blanket with simple dc and sc stitches. Beginner-friendly written pattern with clear rows and a repeating design.

Jump to the rounds

Before you sit down

Chain a foundation length in a multiple of three to set your blanket's eventual width.

Work a setup row of double crochet across the chain, starting from the fourth chain from your hook.

Turn your work and begin the first texture row, grouping a single crochet with two double crochets while skipping stitches to create the clusters.

Place a stitch marker in the very first stitch of that row to help anchor your edge for future rows.

Turn again and work the companion row, using a post-stitch trick for height before working double crochet evenly across.

Mark the first stitch of this row too, then work straight dc all the way to the marked stitch from before.

Keep alternating between the cluster row and the straight dc row until the blanket reaches your desired length.

Finish your final repeat on the straight dc row so both the top and bottom edges lie flat and even.

What this one is

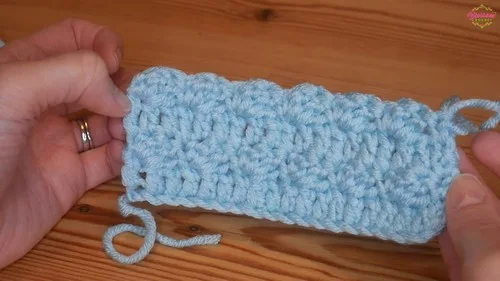
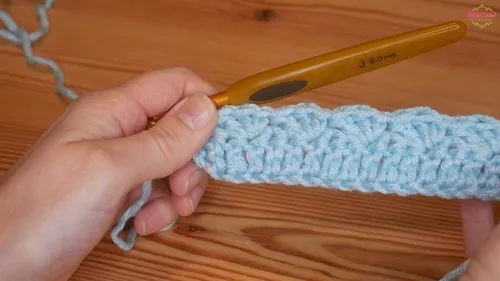
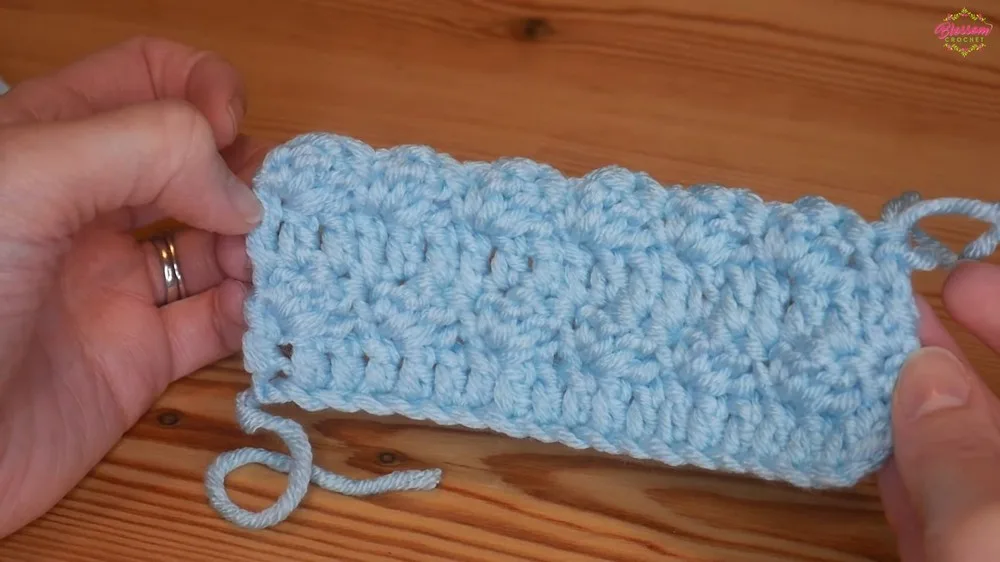
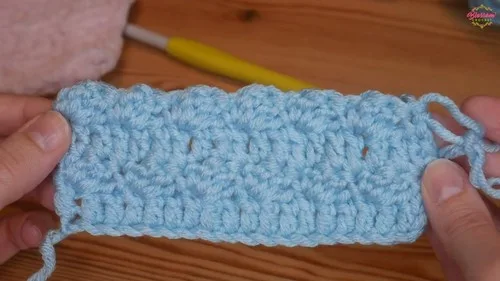
This blanket pattern is all about turning basic stitches into something with real texture and depth. Using just double crochet and single crochet in a clever alternating pattern, you get a fabric that looks far more intricate than the stitch count actually requires. It's the kind of project that's perfect for anyone who wants a cozy, substantial throw without wrestling with complicated charts or shaping.

The technique here revolves around a simple two-row repeat: one row builds little sc-and-dc clusters skipping stitches to create texture, while the next row works straight dc across using a clever post-stitch trick for a seamless edge. It's beginner-friendly once you get the rhythm down, though the stitch-marker placement takes a little attention at first. Expect to spend a few relaxed evenings or one solid weekend to finish a good-sized blanket.

The finished piece has a lovely raised, basket-like texture that traps warmth beautifully, making it ideal for draping over the couch or piling onto a bed in winter. It works up dense and substantial, with a slightly ridged surface that looks handmade in the best way. Because it's easy to resize by simply adjusting your foundation chain, it makes a thoughtful, personal gift for anyone who deserves a little extra warmth.

Variations

This pattern is a fantastic canvas for experimenting once you've got the row repeat down. For a classic winter look, try a deep charcoal grey paired with a single stripe of burgundy or forest green every eight rows — the textured stitch pattern will make the color change pop even more than it would on plain rows. If you want something softer, a chunky chenille or brushed acrylic yarn will exaggerate the basket-weave texture and give the whole blanket a fluffier, more tactile feel, though you'll want to size up your hook slightly to keep the drape soft rather than stiff. For gifting, consider working the blanket in a baby-safe cotton-acrylic blend in pale yellow or sage for a nursery throw — just shorten your foundation chain to make a smaller lapghan-sized piece perfect for a stroller or crib. Want texture on texture? Alternate two different worsted-weight yarns every few rows, mixing a solid with a subtle marled or self-striping yarn, so the clusters catch slightly different tones as the light hits them. If you're making this for a larger bed, simply increase your foundation chain in multiples of three until you reach your desired width, then keep repeating Rows 2 and 3 until you hit the length you want. You could also add a simple sc border around the entire finished piece in a contrasting color to frame the texture and give the edges a clean, finished look — it's a small extra step that makes the blanket feel much more polished for gifting or display.

I adore this blanket because it proves you don't need fancy stitches to make something that looks impressive. The magic is entirely in the repeat: once you've worked Row 2's sc-and-two-dc clusters and Row 3's clean dc line with that sneaky post-stitch trick, your hands just take over. There's something so satisfying about watching that basket-weave texture build up row after row, especially knowing it's really just sc and dc doing all the work. I also love that the pattern is endlessly forgiving in size — chain a little more, chain a little less, and you've got a lapghan, a throw, or a full bed blanket using the exact same instructions. The stitch marker trick for keeping your edges straight is a small detail that makes a huge difference, and once you've done a few rows you'll wonder why every simple pattern doesn't include it. This is the kind of project you can pick up during a movie night and set down without losing your place — pure, cozy, mindless comfort crochet.
Common mistakes

  • Losing track of which row comes nextUse a locking stitch marker or sticky note to track whether you just finished a cluster row or a straight dc row before you turn your work.
  • Skipping the stitch marker placement inAlways insert your marker into the designated first stitch as instructed — it's your anchor for keeping the edge column consistent across every repeat.
  • Forgetting to work into the fourthCount carefully and skip exactly three chains before placing your first dc; those skipped chains act as your turning chain height.
  • Misreading the post-stitch technique inSlow down on this stitch specifically — insert your hook behind the post of the previous stitch, yarn over, and complete it as directed to build proper height without a gap.
  • Ending the blanket on a Row 2 insteadAlways finish your last repeat on a Row 3 so both the top and bottom edges of the blanket lie flat and straight.
  • Choosing a foundation chain that isn'tDouble-check your starting chain count is divisible by three before beginning your setup row, adjusting up or down as needed for your desired width.

The rounds, in full

Written out, round by round

Beginner4-6 HoursWorsted

Materials

Everything this one takes, in the order you will reach for it.

  • Crochet hook
  • Yarn (worsted weight recommended)
  • Stitch markers

keep this to hand

Abbreviations

US crochet terms, as used in this pattern.

  1. chchain
  2. scsingle crochet
  3. dcdouble crochet
  4. ststitch
  5. sl stslip stitch

Main Pattern

Converted from the designer's UK terms to US terms.

Foundation Chain: Create a foundation chain in multiples of 3 (i.e., 3, 6, 9, 12, etc. up to the desired length).

  1. Round 1(Setup Row): Start in the fourth chain from the hook and work a dc. Work one dc into every chain to the end of the row, turn your work.Step by step for each dc stitch: yarn over, insert the hook into the stitch; yarn over and pull through to create three loops on the hook; yarn over and pull through the first two loops; yarn over and pull through the final two loops.
  2. Round 2In the first stitch, work a sc (insert stitch marker into this stitch to maintain straight edges), then in that same stitch make two more dc. Skip the next two stitches, and in the third, repeat the same group of stitches: a sc followed by two dc. Continue this pattern across to the end of the row, finishing with a sc in the top stitch of the turning chain.
  3. Round 3Turn your work, insert the hook into the first stitch and make one sc. Then go behind the vertical post of that stitch, yarn over, and complete another sc (this provides the height of a dc but without the gaps that a chain would create). Insert a stitch marker here. Work one dc into every single stitch all the way along, and when you reach the end, make your final dc into the stitch marker-marked stitch from the previous row.Alternate between Row 2 and Row 3 for the pattern repeat. Remember to finish on a Row 3 for a straight edge.

Important notes

Note 01

This pattern is written in US crochet terms, so double crochet (dc) here refers to the standard US stitch — no conversion needed if you're following along as written.

Note 02

Because the entire blanket alternates only two rows, it's worth working a small swatch first to get comfortable with the post-stitch technique in Row 3 before committing to a full-size project.

Note 03

Your foundation chain length determines the final width of the blanket, so measure a similar-weight finished project or swatch to estimate roughly how long to chain for your desired size.

Note 04

A worsted weight yarn with good stitch definition will show off the basket-weave texture best; very fuzzy or highly textured yarns can obscure the clusters this pattern is known for.

Note 05

Keep your tension relaxed and even throughout, since this stitch pattern naturally creates a dense, warm fabric — overly tight stitches will make the blanket stiff rather than cozy and drapey.

Note 06

Always count your stitches at the end of a few repeats early on to confirm you haven't drifted, since small counting errors compound quickly over many rows in a large blanket.

More photos

FAQs

Asked on the glider

the ones that come up on the glider

How much yarn do I need for a full-size blanket?

This depends heavily on your foundation chain length and desired final size, since the pattern scales with however long you chain. A good rule of thumb is to swatch first, measure your gauge, and calculate yardage based on your target blanket dimensions.

Can I make this blanket smaller for a baby or lapghan size?

Absolutely — simply start with a shorter foundation chain in a multiple of three and work fewer repeats until you reach your desired length. The same two-row pattern works beautifully at any size.

What does the stitch marker actually do in this pattern?

The stitch markers placed in Row 2 and Row 3 help you keep track of your first stitch of each row, which keeps the side edges straight and even. Without them, it's easy for the edge to gradually shift inward or outward over many rows.

Why does Row 3 use a post stitch instead of a regular chain?

Working behind the vertical post gives you the height of a double crochet without leaving the small gap a turning chain would create. This keeps the fabric dense and closes up any holes along that row.

Do I need to finish on a specific row for the edges to look right?

Yes, you'll want to end your blanket on a Row 3 rather than a Row 2 so both the top and bottom edges lie flat and straight. Ending mid-repeat on Row 2 will leave a scalloped, uneven top edge.