Intermediate 4-6 Hours Worsted yarn

Worked on the glider, counted out loud —

Easy Crochet Grimace Amigurumi Pattern

Make an adorable Grimace-inspired amigurumi with this easy crochet pattern featuring simple rounds, safety eyes, and jointed arms and legs for a huggable f

Jump to the rounds

Before you sit down

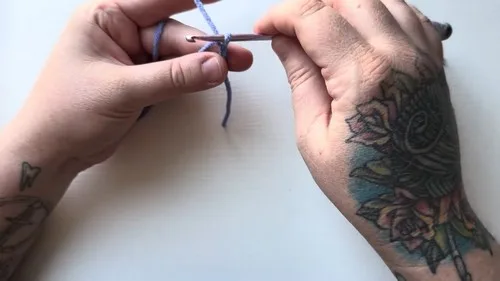
Start the head or body with a magic circle and work 6 single crochets into the ring to close it tight.

Continue increasing in rounds to build a smooth, rounded shape, using a stitch marker to track your first stitch each round.

Stuff the piece firmly with fiberfill in small amounts as the rounds progress to keep the shape even.

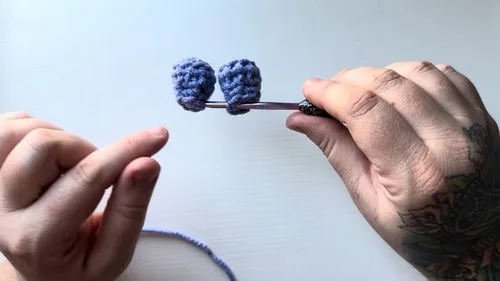
Crochet the two Arms separately over a few short rounds each, keeping stitches snug so stuffing won't peek through.

Work the two Legs over a few short rounds each, matching stitch counts so both legs stay symmetrical.

Join the Legs together over 4 rounds to form a single connected base for the body.

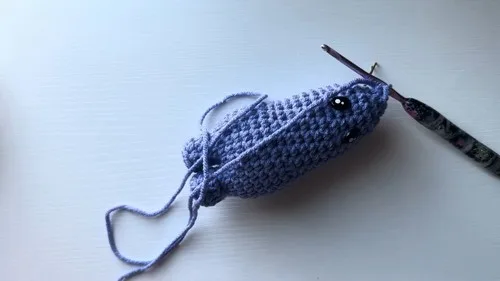
Attach the safety eyes after test-fitting their placement, then secure the backings once you're happy with the look.

Finish by weaving in all yarn tails, embroidering the mouth and eyelids, sewing on the arms just below the head, adding eyebrows with black yarn, and applying blush makeup lightly for the final cheerful touch.

What this one is

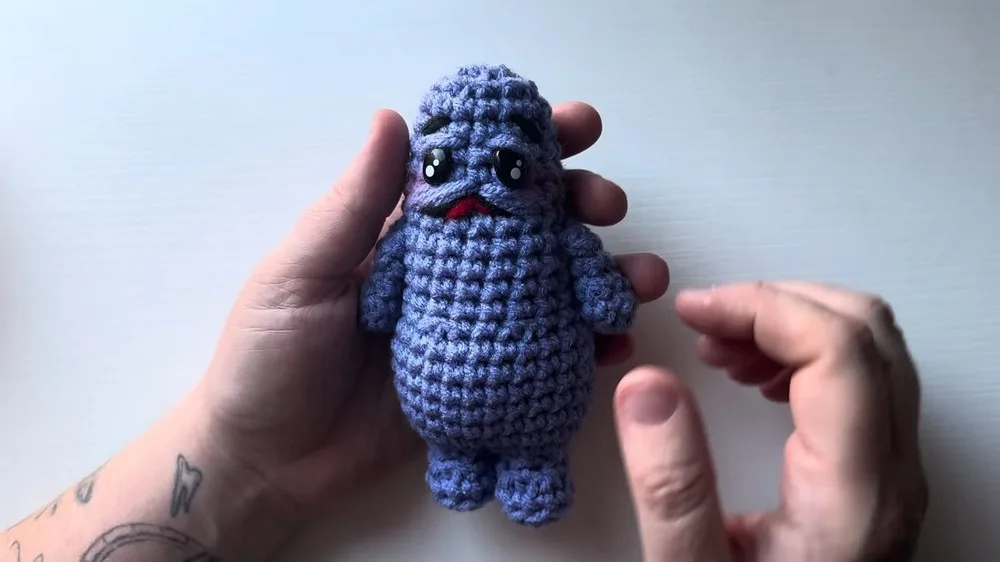
This pattern brings a beloved bright purple blob-shaped character to life in soft, huggable yarn form. Built from a magic circle and grown round by round, this amigurumi captures that signature round body, stubby limbs, and wide, expressive grin that fans instantly recognize. It's the perfect project for anyone who loves pop-culture-inspired crochet, wants a quick confidence-building make, or is hunting for a quirky handmade gift that will make someone smile the second they unwrap it.

You'll work primarily in single crochet, starting each piece with a magic circle before increasing outward to build the rounded shapes typical of amigurumi. The arms and legs come together in just a few short rounds each, making them fast, satisfying wins, while the leg-joining section (four rounds) teaches you how to connect separate pieces into one continuous base. This is a great pattern for confident beginners or intermediate crocheters ready to practice shaping, stitch counting, and finishing touches like safety eyes and blush.

The finished piece is a compact, palm-to-two-handed-sized amigurumi with a plump, rounded body, small stitched limbs, and a cheerful painted-blush face that gives it real personality. It has that soft, squeezable feel amigurumi lovers crave, and its bold, single-color body makes it a fun, low-fuss project to whip up in an evening or two. Whether it sits on a desk, rides along in a backpack, or gets wrapped up as a surprise gift, it's guaranteed to spark a smile.
Variations

I adore how quickly this little guy comes together — starting with that satisfying magic circle and 6 single crochets, you're building momentum from stitch one. There's something so meditative about working the increases into a smooth, rounded body, and the stitch marker trick for tracking your first stitch each round genuinely saves you from frogging rows later. The arms and legs are dreamy quick-wins: just a few short rounds each means you get that little dopamine hit of finishing a piece in minutes, not hours. Then joining the legs into one connected base in four rounds feels like real amigurumi-making magic — suddenly you've got a body taking shape in your hands. Adding the safety eyes and blush at the end is my favorite part; it's the moment this stops being a blob of yarn and becomes a character with real personality. It's a pattern that rewards patience in the early rounds and pays you back with an irresistibly cute, giftable little friend by the end.

Common mistakes

  • Losing track of the first stitchPlace a stitch marker in that very first single crochet the moment you make it, and move it up every round — this single habit prevents miscounted rounds later.
  • Pulling the magic circle closedTug each of the 6 single crochets snug before pulling the tail tight, and give the tail an extra firm pull once all stitches are in place to fully close the ring.
  • Working the Arms and Legs piecesUse a hook one size smaller than you would for a garment so your amigurumi fabric stays dense and tight enough to hold fiberfill without gaps.
  • Overstuffing or understuffing the smallStuff firmly but in small pinches, checking that the piece keeps its rounded shape without stretching the stitches or looking lumpy.
  • Rushing the Join the Legs sectionLay both completed legs side by side before joining to confirm they match in size and stitch count, adjusting stuffing evenly before connecting them into the body base.
  • Placing safety eyesInsert the eye posts without locking the backing on yet, step back to check spacing and symmetry, and only snap the safety backs in place once you're happy with the look.

The rounds, in full

Written out, round by round

Intermediate4-6 HoursWorsted

Materials

Everything this one takes, in the order you will reach for it.

  • Yarn
  • Crochet Hook
  • Fiberfill
  • Safety Eyes
  • Embroidery Needle
  • Stitch Markers
  • Scissors
  • Blush Makeup

keep this to hand

Abbreviations

US crochet terms, as used in this pattern.

  1. scsingle crochet

Arms (Make 2)

Start with a magic circle.

Work 6 single crochets (sc) into the magic circle.

  1. Round 11 sc in the first stitch (consider using a stitch marker). 1 sc in the next stitch. Work 2 sc in the third stitch. Repeat this pattern (1 sc in the next 2 stitches, then 2 sc in the third) around. You will have 8 stitches at the end.(8)
  2. Round 2Decrease round: 1 sc in the next two stitches, then a single crochet decrease (sc decrease). Repeat this around.
  3. Rounds 3-4Work 1 sc in each stitch around for two rounds.Finishing the Arm Close the arm by working 2 single crochets across both sides. Leave a long tail for sewing onto the body.

Legs (Make 2)

Start with a magic circle.

Work 5 sc into the magic circle.

  1. Round 1(Increase Round): Work 2 sc in each stitch around, giving you 10 sc in total. Tighten and secure the magic circle tail.(10)
  2. Round 21 sc in each stitch around, but in the back loop only, for a total of 10 stitches.(10)
  3. Rounds 3-4Continue by working 1 sc and then 4 sc decreases. Work a sc in the last stitch for a total of 6 stitches.(6)
  4. Round 51 sc in each stitch around, again totaling 6 stitches. Finish and cut, leaving a short tail.(6)

Join the Legs

First, stuff the legs. Then, join them by stitching across both legs with crochet stitches to begin forming the body.

  1. Round 1-6(7-12 on the body): Work 1 sc in each stitch around.
  2. Round 13(Decrease Round): The pattern is two sc then a decrease, repeated around. In Round 14-18: Continue working 1 sc in each stitch around.
  3. Round 19(Decrease Round): The pattern here is four sc and then a decrease, repeated around.
  4. Round 20-23Work 1 sc in each stitch around.
  5. Round 24(Decrease Round): Work 1 sc, followed by a sc decrease all the way around.Stuff the Body fully.
  6. Final DecreaseDecrease until you have five stitches left, and then finish off.(5)

Assembly

Step 1

Secure Safety Eyes between rounds 20 and 21.

Step 2

Mouth & Eyelids: Use yarn to embroider the mouth and create eyelids over the safety eyes.

Step 3

Sew on Arms: Stitch the arms to the body just below the head.

Step 4

Eyebrows: Add eyebrows above the eyes with black yarn.

Step 5

Blush: Apply a bit of blush makeup near the eyes for extra cute detail.

Important notes

Note 01

💡 Keep a stitch marker moving up through every single round — it's the easiest way to avoid miscounting on this pattern's continuous rounds.

Note 02

💡 Choose a hook a size smaller than the yarn label suggests so your stitches stay tight enough to fully contain the fiberfill.

Note 03

💡 Stuff the Arms and Legs pieces in small amounts as you go rather than all at once at the end, so the shape stays smooth and even.

Note 04

💡 Test the placement of your safety eyes before locking the washers on — once they're secured, they're permanent.

Note 05

💡 Use the embroidery needle to weave in all tails securely inside the stuffed pieces so nothing works loose with handling over time.

Note 06

💡 Apply blush makeup lightly with a cotton swab or small brush at the very end, building up color gradually rather than all at once.

More photos

FAQs

Asked on the glider

the ones that come up on the glider

What yarn weight works best for this pattern?

A worsted weight yarn gives you the classic amigurumi density and stitch definition this pattern is designed around. Cotton or acrylic worsted both work well — just match your hook size to keep stitches tight enough to hold the fiberfill.

Do I need safety eyes, or can I embroider the face instead?

Safety eyes give this design its signature bold, cartoonish look and are recommended for that authentic finish. If you prefer, you can embroider the eyes instead using your embroidery needle, though the proportions may look slightly softer.

How long does this project actually take to finish?

Most crocheters finish this amigurumi in about 4-6 hours of active crochet time, though it's easy to split across a couple of evenings. The Arms and Legs work up quickly, while the Join the Legs section takes a bit more focus.

Is this pattern beginner-friendly?

It's approachable for confident beginners who already know how to work a magic circle and single crochet, but the shaping and joining steps make it better suited to those with a little amigurumi experience. If you're brand new, practice a magic circle and basic increases first.

How do I keep my finished amigurumi's limbs symmetrical?

Work both Arms and both Legs back to back using the same stitch counts and stuffing amount so they match in size. Laying them side by side before attaching helps catch any differences early.