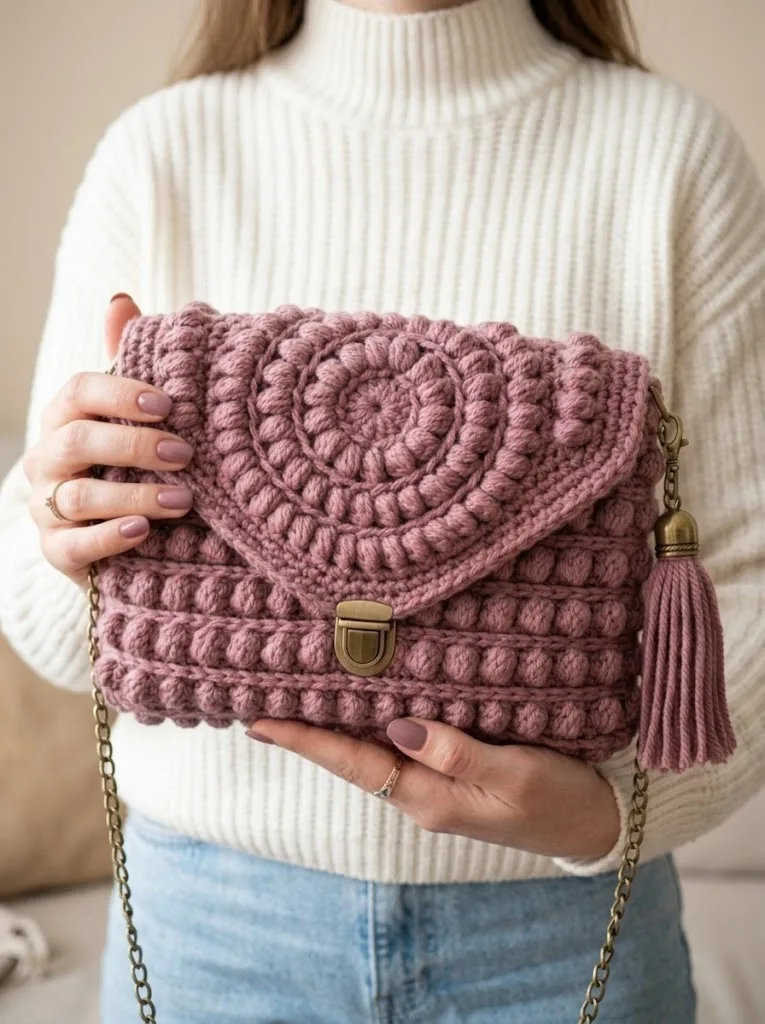
Intermediate 6-9 Hours Worsted yarn

Worked on the glider, counted out loud —

Dusty Rose Puff Stitch Envelope Bag Crochet Pattern

Crochet a dusty rose envelope bag with textured puff stitches and a heart-shaped flap. Free pattern with tips for a firm, boutique-quality finish.

Jump to the rounds

Before you sit down

Swatch and check gauge first, since a firm, dense fabric is essential for this bag to hold its shape.

Crochet the first body panel, alternating rows of single crochet with rows of puff stitches to build raised texture.

Repeat the process to crochet a second, matching body panel using the same stitch count and row sequence.

Work the heart-shaped flap separately in concentric puff stitch rounds, building the dimensional quilted look outward.

Wet block both body panels and the heart flap flat with pins to even out tension before assembly.

Seam the two body panels together along the sides and bottom to form the bag's main pouch shape.

Attach the heart-shaped flap to the top back edge of the bag body so it folds forward to close.

Add the D-rings, push clasp, chain strap, and tassel charm to finish the bag as a wearable crossbody.

What this one is

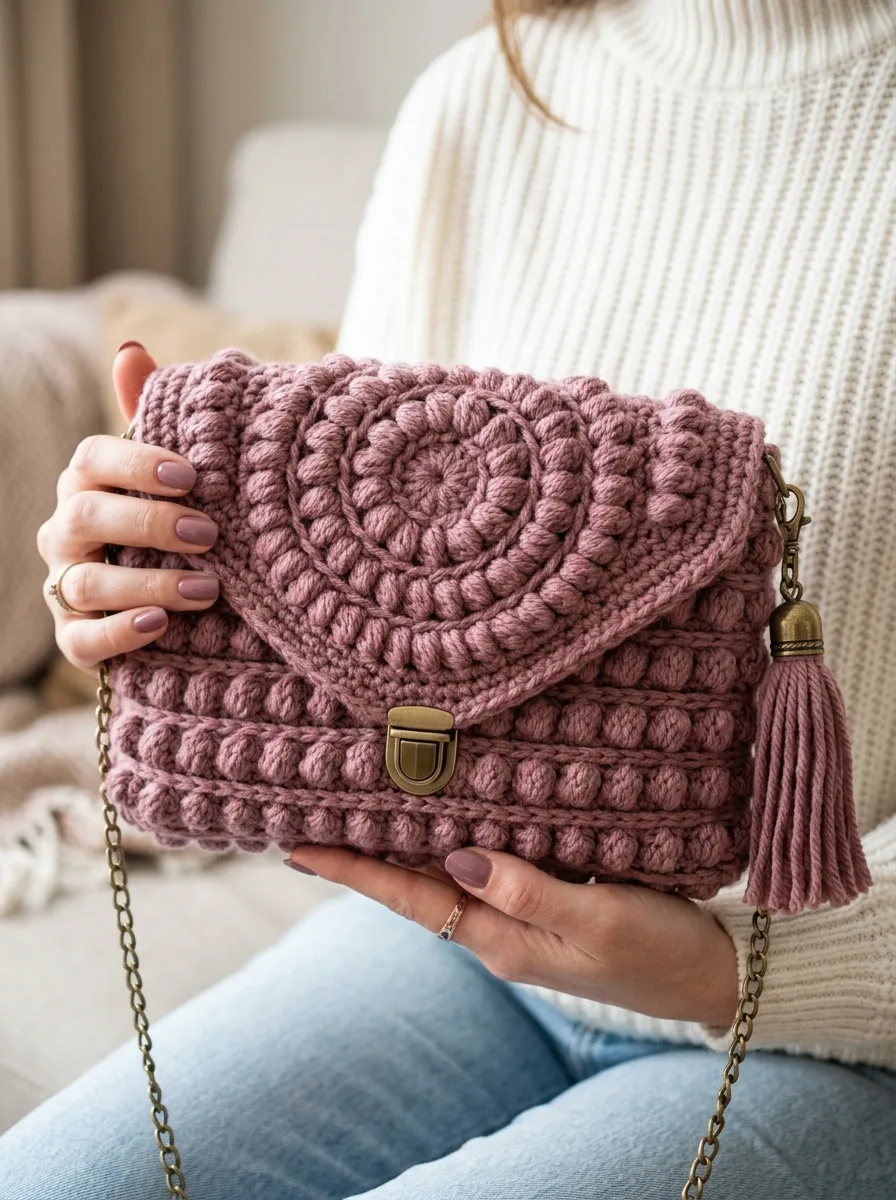
This Dusty Rose Puff Stitch Envelope Bag is a structured little crossbody that trades plain single crochet for something far more interesting: alternating rows of sc and puff stitches that build a raised, bobbly texture right into the fabric. Two identical panels form the body, and a dimensional heart-shaped flap becomes the centerpiece up front. It's perfect for makers who've mastered basic stitches and want their next project to actually look complicated, even though the stitch count stays approachable throughout.

The star technique here is the puff stitch, worked consistently in alternating rows to create raised bobble bands without adding bulk or weight. The heart flap takes it further, working the same puff stitch in concentric rounds for a quilted, almost padded look. Expect a comfortable intermediate skill level — nothing tricky beyond keeping puff heights even and counting carefully — and plan for roughly 6-9 hours between the two body panels and the 15-round flap.

Finished, this bag has real structure — firm enough to hold its shape on your shoulder, not floppy or stretched. The dusty rose cotton blend gives crisp stitch definition that shows off every puff, and paired with antique brass hardware, a chain strap, and a tassel charm, it reads as a genuinely polished accessory. It's a lovely handmade gift for anyone who loves textured details, or a satisfying make-it-for-yourself weekend project.

Variations

This pattern is endlessly customizable once you understand the puff stitch rhythm. For color, try sage green or mustard yarn with the same antique brass hardware for a completely different mood, or go classic black with silver clasps and a silver chain strap for an evening-ready bag. A color-blocked version — one panel in dusty rose, one in cream or blush — would also look striking against the same heart flap. For yarn substitutions, look 24/7 Cotton, We Crochet Dishie, or any tightly-twisted worsted cotton blend; the tight twist is essential for crisp, well-defined puff stitches, so avoid fuzzy or loosely spun yarns. If you want a bigger bag, add 10 more foundation chains to each panel as suggested, and extend the puff/sc row pattern proportionally so your bobble bands stay evenly spaced — plan on adding rows in the same alternating rhythm rather than tacking extra plain rows onto the end. For a mini clutch version, work fewer foundation chains and fewer rows, but keep at least two full puff rows so the texture still reads clearly. Seasonal spins are fun too: a cream bag with gold hardware and a pearl charm feels bridal, while a deep burgundy or forest green with a tassel in a contrasting metallic thread gives off cozy autumn energy. You could also swap the tassel charm for a small crocheted heart or flower motif that echoes the flap shape, or add tiny embroidered flowers directly onto the heart flap using satin stitch in a contrasting floss color, exactly as suggested — a sweet way to make each bag one-of-a-kind without changing the structure at all.
Common mistakes

  • Puff stitches end up uneven heightsPull up every loop of a puff stitch to the exact same height before yarning over and completing it — glance at your previous puff row as a height reference and match it every single time.
  • Losing count of stitches partwayCount your stitches at the end of every single row, not just occasionally. It takes seconds and prevents you from frogging multiple rows of puff stitches, which are much more tedious to rip out than plain sc.
  • Skipping the gauge swatch because itAlways swatch in the sc and puff stitch pattern before starting — bags need firm, dense fabric to hold their shape, and an off-gauge swatch means your finished bag could stretch out of shape under the weight of its contents.
  • The heart-shaped flap comes outPlace a stitch marker at the center top and bottom of the heart before you begin shaping, and check symmetry every few rounds by folding the piece in half to compare both sides while it's still on the hook.
  • Assembling the two panels beforeWet block both panels and the flap flat with pins before assembly. This evens out any minor tension differences between your puff and sc rows and makes seaming dramatically easier.
  • Using a fuzzy or loosely spun yarnChoose a tightly twisted worsted cotton blend like the dusty rose used here — the tight twist is what gives each puff stitch clean, sculptural definition instead of a blurred, halo-like look.

The rounds, in full

Written out, round by round

Intermediate6-9 Hours5.0 mmWorsted

Materials

Everything this one takes, in the order you will reach for it.

Yarn

  • Approximately 200 grams of worsted weight yarn (weight category 4)
  • I used a cotton blend in dusty rose, which gives excellent stitch definition
  • Look for yarn with tight twist for crisp puff stitches

Hook

  • 5.0mm crochet hook (US H/8)
  • Go down a size if your stitches feel loose. Bags need firm fabric.

Notions

  • Tapestry needle for weaving ends
  • Stitch markers (at least 4)
  • Push-style clasp lock in antique brass (approximately 3cm wide)
  • Two D-rings in antique brass (15mm)
  • Chain strap with lobster clasps (approximately 120cm)

Optional

  • Matching tassel charm

Gauge

  • 14 stitches and 12 rows = 4 inches in single crochet
  • Check your gauge. A bag that is too loose will stretch and sag.

keep this to hand

Abbreviations

US crochet terms, as used in this pattern.

  1. chchain: Wrap yarn over hook, pull through loop on hook. This creates your foundation.
  2. sl stslip stitch: Insert hook, yarn over, pull through stitch AND loop on hook in one motion. Used for joining.
  3. scsingle crochet: Insert hook, yarn over, pull up a loop (2 loops on hook), yarn over, pull through both loops.
  4. hdchalf double crochet: Yarn over, insert hook, yarn over, pull up a loop (3 loops on hook), yarn over, pull through all 3 loops.
  5. dcdouble crochet: Yarn over, insert hook, yarn over, pull up a loop, yarn over, pull through 2 loops, yarn over, pull through remaining 2 loops.
  6. puff stpuff stitch: This is the star of the show. Here is how to make one: *Yarn over, insert hook into stitch, yarn over, pull up a loop* repeat this sequence 4 times total (9 loops on hook), yarn over, pull through all 9 loops, ch 1 to close the puff. That closing chain is important. It locks the puff in place.
  7. incincrease: Work 2 stitches in the same stitch.
  8. skskip: Miss the indicated stitch and work into the next one.

Part 1: The Bag Body (Make 2 Panels)

You will crochet two identical rectangles for the front and back of the bag.

Foundation Row: Ch 33.

  1. Round 1Sc in 2nd ch from hook and in each ch across. (32 sts)
  2. Round 2Ch 1, turn. Sc in first st, *puff st in next st, sc in next st* repeat across, ending with sc in last st. (32 sts: 16 sc + 16 puff sts)
  3. Round 3Ch 1, turn. Sc in each st across, working 1 sc into the top of each puff and 1 sc into each sc. (32 sts)
  4. Round 4Ch 1, turn. Sc in first 2 sts, *puff st in next st, sc in next st* repeat to last 2 sts, sc in last 2 sts. (32 sts)

This offsets your puff stitches so they create a brick-like pattern instead of lining up in columns. Much prettier.

  1. Round 5Ch 1, turn. Sc in each st across. (32 sts)Rows 6 through 25: Repeat Rows 2 through 5 five more times. You should have approximately 6 horizontal puff stitch rows total.
  2. Rounds 26-27Ch 1, turn. Sc in each st across. (32 sts)Fasten off. Weave in ends. Make a second identical panel.

Part 2: The Heart-Shaped Flap

This is worked in continuous rounds from the center outward. Place a stitch marker at the start of each round.

Magic Ring: Create a magic ring (adjustable loop).

  1. Round 1Ch 1, work 6 sc into the ring. Pull ring tight. Do not join. (6 sts)
  2. Round 22 sc in each st around. (12 sts)
  3. Round 3*Sc in next st, 2 sc in next st* repeat around. (18 sts)
  4. Round 4*Sc in next 2 sts, puff st in next st* repeat around. (18 sts)
  5. Round 5*Sc in next 2 sts, 2 sc in next st* repeat around. (24 sts)
  6. Round 6*Sc in next 3 sts, puff st in next st* repeat around. (24 sts)
  7. Round 7*Sc in next 3 sts, 2 sc in next st* repeat around. (30 sts)
  8. Round 8*Sc in next 4 sts, puff st in next st* repeat around. (30 sts)
  9. Round 9*Sc in next 4 sts, 2 sc in next st* repeat around. (36 sts)
  10. Round 10Sc in each st around. (36 sts) Now we shape the heart. This is where it gets fun.
  11. Round 11(First Lobe): Sc in next 18 sts. Stop. You are now at the top center of the heart.
  12. Round 12Ch 1, turn. Sc in next 6 sts, puff st in next st, sc in next 4 sts, puff st in next st, sc in next 6 sts. (18 sts)
  13. Round 13Ch 1, turn. Sk first st, sc in next 5 sts, puff st in next st, sc in next 4 sts, puff st in next st, sc in next 4 sts, sk last st. (16 sts)
  14. Round 14Ch 1, turn. Sk first st, sc in next 14 sts, sk last st. (14 sts)
  15. Round 15Ch 1, turn. Sk first st, sc across to last st, sk last st. (12 sts) Fasten off. Return to Round 11. Join yarn to the 19th stitch (other side of heart).Repeat Rounds 12 through 15 for the second lobe.Fasten off. You now have a heart shape with two rounded lobes at the top.Edging Round: Join yarn at the bottom point of the heart. Sc evenly around the entire edge, working 3 sc into the bottom point and 2 sc into any corners to keep edges flat. Sl st to join.Final Puff Border: Ch 1, *sc in next st, puff st in next st* around the entire heart edge. Sl st to join. Fasten off.

Assembly

Step 1

Join the Body Panels: Hold both body panels together with wrong sides facing (puff stitches visible on outside). Starting at one bottom corner, sc through both layers along the bottom edge and up both sides. Leave the top open. This creates a pouch.

Step 2

Attach D-Rings: At each top corner of the back panel, fold down approximately 1 inch of fabric around a D-ring. Whip stitch securely in place. These hold your chain strap.

Step 3

Attach the Heart Flap: Position the heart flap at the back top edge of the bag, centered. The bottom point should hang down over the front of the bag. Whip stitch the straight top edge of the heart (between the lobes) to the back panel.

Step 4

Install the Clasp: This step depends on your specific hardware. Most push clasps have two parts: the decorative lock plate and the catch. Position the lock plate on the heart flap, about 1 inch up from the point. Mark the holes, cut small slits, and push the prongs through. Bend prongs flat on the back side. Close the flap naturally and mark where the catch should go on the bag front. Install the catch the same way. If cutting your fabric makes you nervous, you can also sew the hardware on using sturdy thread and small holes.

Step 5

Chain Strap: Clip your chain to both D-rings. Most chains come with lobster clasps that make this simple.

Step 6

Tassel: If you want the matching tassel, here is a quick method. Wrap yarn around a piece of cardboard about 4 inches tall, roughly 30 times. Tie a short strand tightly through the top loops. Cut the bottom loops. Wrap another strand around all the strands about 1 inch from the top to create the tassel head. Trim the ends evenly. Attach to your D-ring with a jump ring or lobster clasp.

Step 7

Weave in ALL ends. Seriously. Bags get handled a lot.

Step 8

Optional lining: For extra durability and to protect your items, you can sew a simple fabric lining inside. I use cotton quilting fabric.

Important notes

Note 01

💡 Place stitch markers at the start of every round on the heart flap since the concentric puff rounds don't have an obvious 'edge' to mark your place otherwise, and you'll need all 4+ markers to track increases.

Note 02

💡 Wind your dusty rose yarn into a center-pull cake before starting so you're not fighting tangles while trying to maintain even puff stitch tension.

Note 03

💡 Weave in ends as you finish each part rather than saving them all for the end — with two panels and a heart flap, leftover tails add up fast and are easier to manage in smaller batches.

Note 04

💡 Attach the D-rings and chain strap only after both panels are fully seamed and the flap is attached, so you can adjust hardware placement based on the bag's actual finished proportions rather than guessing beforehand.

Note 05

💡 Buy about 200 grams of yarn but consider having a little extra on hand — puff stitches consume more yardage than plain single crochet, and running short mid-flap is frustrating.

Note 06

📏 Finished Dimensions — Body: approximately 9 inches wide x 6 inches tall (23cm x 15cm) per panel. Flap: approximately 8 inches wide at top x 5.5 inches tall (20cm x 14cm). The heart shape adds decorative overhang beyond these measurements.

More photos

FAQs

Asked on the glider

the ones that come up on the glider

Why does my bag feel floppy instead of structured?

This usually means your gauge is too loose or you skipped the swatch step. Try going down a hook size and working your puff stitches a bit tighter, since bags need dense, firm fabric to hold their shape under weight.

Do I need to know puff stitches before starting this pattern?

Some familiarity helps, but the pattern is still beginner-friendly if you're comfortable with basic single crochet. Practice a small swatch of puff stitches first to get comfortable with pulling up even loop heights before diving into the body panels.

Can I substitute the antique brass hardware for something else?

Absolutely — silver clasps, D-rings, and a silver chain strap give the same bag a completely different, more modern look. Just make sure your clasp is roughly the same 3cm width so it fits proportionally on the flap.

How do I keep my two body panels identical?

Work both panels back to back if possible so your tension stays consistent, and count your stitches at the end of every row on both. Blocking them together before assembly also helps catch and correct any size discrepancies before you seam.