Intermediate 4-6 Hours Worsted yarn

Worked on the glider, counted out loud —

Free Crochet Triangle Shawl Pattern for Relaxed Stitching

Make a free crochet triangle shawl using simple sc, dc, tr triangle motifs. A relaxing, beginner-friendly project that grows into a beautiful wearable wrap

Jump to the rounds

Before you sit down

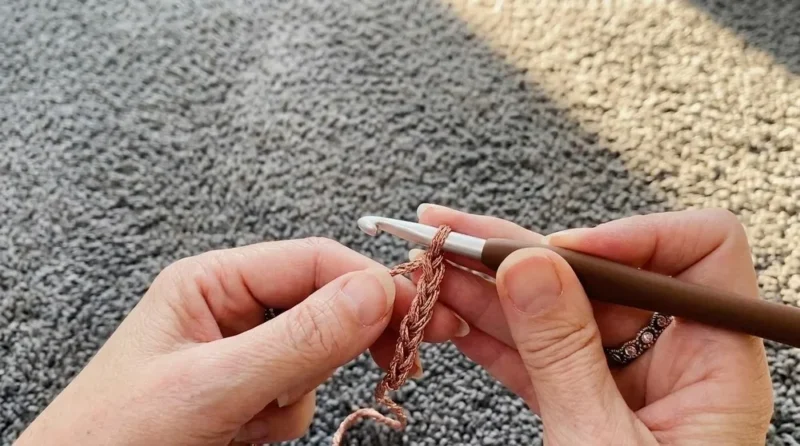
Start with a slip knot and a small foundation chain to form your very first triangle unit.

Work a single crochet, double crochet, and treble crochet into successive chains to complete that first triangle.

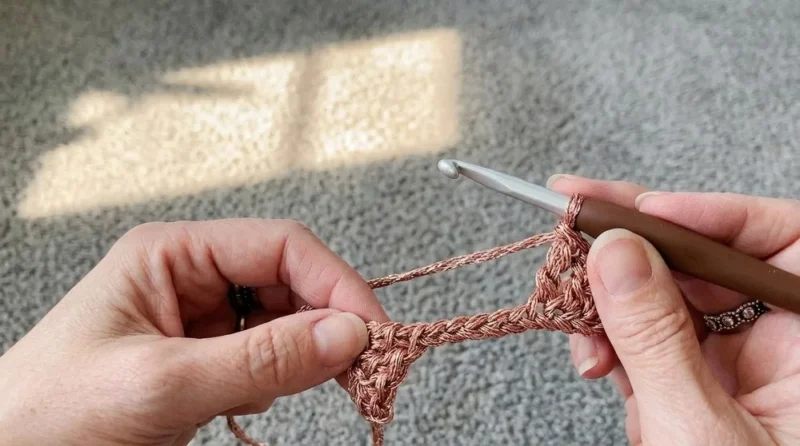
Begin each new triangle after the first with a longer starting chain so it attaches to the row before it.

Repeat the two-row rhythm, adding one new triangle on every even row to widen the shawl.

Keep building outward row after row until your piece reaches its fullest point at sixteen triangles.

Shift into decrease mode on even rows, removing a triangle each time to taper the shawl back inward.

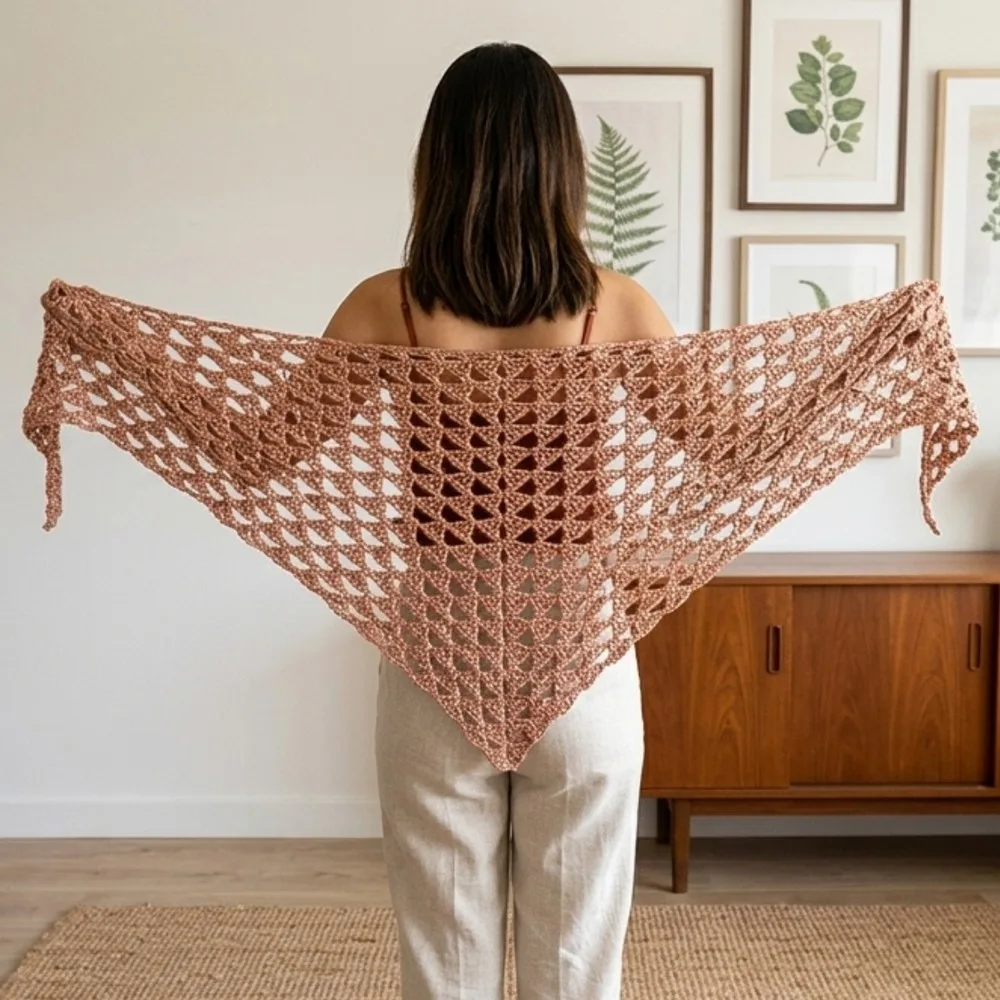
Continue the decrease rhythm until the shawl narrows into a neat, symmetrical point.

Weave in all loose ends with a tapestry needle and gently shape the finished triangles before wearing.

What this one is

This crochet triangle shawl pattern builds a beautiful wrap one small triangle unit at a time, each formed from a simple sc, dc, tr combination worked into successive chain stitches. What makes it special is how those tiny triangular building blocks stack together to create a fan-shaped shawl with natural texture and movement. It's perfect for crocheters who want a project that feels meditative, portable, and endlessly customizable in color and size.

The technique here revolves around repeating that sc-dc-tr triangle motif while increasing on even rows to widen the piece, then decreasing after the midpoint to shape the final points. Skill-wise, this sits comfortably in intermediate territory since you'll need to track your row count and manage the increase/decrease rhythm, but the stitches themselves stay basic throughout. Expect somewhere around 4 to 6 hours of stitching time, depending on how many triangles you work up to.

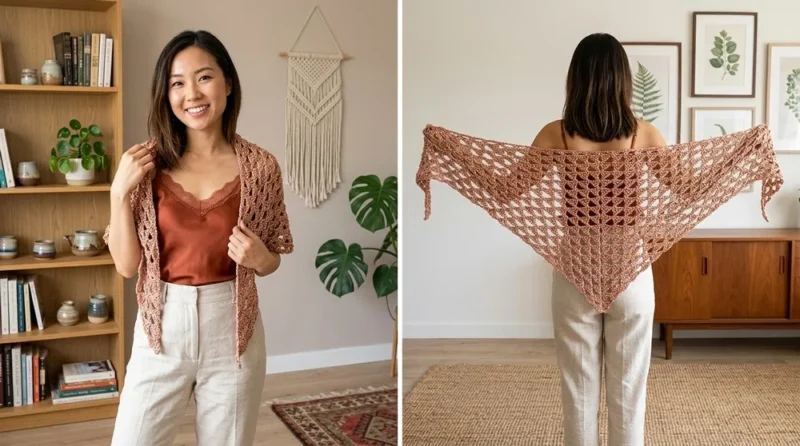
Once finished, you'll have a triangular shawl with a scalloped, textured edge created by all those little triangle points lining up in formation. It drapes beautifully over shoulders or clothing, feels substantial without being heavy in a medium weight yarn, and works equally well in bold statement colors or soft neutral shades. This is the kind of handmade piece that makes a thoughtful gift or a well-loved addition to your own wardrobe.

Variations

One of the easiest ways to make this shawl your own is through color. Try a rich ombre effect by shifting through five or six shades of the same color family as you work outward — a sunset gradient from deep coral to soft peach looks gorgeous in this triangle formation. For a bolder look, alternate two contrasting colors every few rows, like a moody charcoal gray paired with a bright mustard yellow, so the triangle points pop dramatically against each other. If you want something more subtle and giftable, stick to a single soft neutral like oatmeal or dusty rose using a brand like Vanna's Choice or Soft, both of which hold their shape nicely at the recommended weight. Size is just as easy to adjust. For a smaller, scarf-like version, stop increasing once you hit 10 or 12 triangles instead of the full 16 — this shortens your total working time and gives you a compact wrap that ties nicely around the neck. For a dramatic, floor-length statement shawl, keep increasing beyond 16 triangles before you begin the decrease rows, just be sure to work symmetrical decreases afterward to keep the shape balanced. For a seasonal twist, work the entire shawl in a soft mohair or alpaca blend for extra warmth and a fuzzy halo effect around each triangle point, which looks especially lovely in cream or heathered gray. You could also mix textures by using a metallic or sparkle-blended yarn for just the outer few rows, giving the shawl a subtle shimmer along its edges — a lovely touch for an evening-out accessory or a special occasion gift.

I love how this shawl starts so unassuming — just a chain of 6, a sc, a dc, and a tr — and yet those humble little triangle units multiply into something genuinely stunning. There's something so satisfying about watching each even row grow the fan wider as you add another triangle, then watching it taper back down as you decrease toward the end. It's rhythmic, almost meditative work once you get into the groove of repeating Rows 2 and 3. I also appreciate that the pattern is endlessly flexible; you can stop at fewer triangles for a smaller wrap or push toward the full 16 for a dramatic, sweeping shawl. The scalloped edge that forms naturally from all those triangle points is my favorite detail — it gives the finished piece a delicate, lacy look without any fussy edging work required afterward. Whether you're making this for yourself on a slow weekend or as a gift for someone who deserves something handmade and special, this shawl delivers a lot of visual impact for a relatively simple stitch combination.
Common mistakes

  • Losing track of which rowUse a stitch marker or a small notepad to mark every even row, since that's when you add a new triangle — a simple tally on paper keeps you from over- or under-increasing.
  • Starting subsequent triangles with the wrong chain length.Remember the first triangle begins with ch 6, but every triangle after that starts with ch 11 for attaching and increasing — double-check your chain count before working the sc, dc, tr sequence.
  • Working the sc, dc, tr sequenceSlow down and count carefully: sc goes into the 4th chain from the hook, dc into the next chain, and tr into the last chain — skipping or misplacing one throws off the whole triangle shape.
  • Using a yarn or hook combinationStick close to a medium weight yarn with an approximately 4.0 mm hook as suggested, and check your gauge on a few practice triangles before committing to the full piece.

The rounds, in full

Written out, round by round

Intermediate4-6 Hours4.0 mmWorsted

Materials

Everything this one takes, in the order you will reach for it.

Yarn

  • Any yarn (sample uses medium weight)

Hook

  • Suitable to yarn (sample uses approx. 4.0 mm)

Tools

  • Scissors
  • Tapestry needle (for weaving in ends)

keep this to hand

Abbreviations

US crochet terms, as used in this pattern.

  1. chchain
  2. scsingle crochet
  3. dcdouble crochet
  4. trtreble crochet
  5. sl stslip stitch
  6. reprepeat
  7. st(s)stitch(es)

Main Pattern

  1. Row 1First Triangle (Row 1): Make a slip knot. Ch 6. Sc in 4th ch from hook. Dc in next ch. Tr in last ch.

This forms your first triangle unit.

  1. Row 2Increase Row Ch 11. Sc in 4th ch from hook. Dc in next ch. Tr in next ch. Flip previous triangle.Sl st into chain space at the base of previous triangle (for joining).Increase: Ch 6, turn, sc in 4th ch, dc in next ch, tr in last ch, join with sl st to previous triangle.

You now have 2 triangles in Row 2.

  1. Row 3Ch 11. Sc in 4th ch from hook. Dc in next ch. Tr in next ch. Flip previous row, sl st in next chain space.Ch 6, turn, sc, dc, tr, join with sl st.Repeat until you have one more triangle than previous row (i.e., 3 triangles).Continue this increase pattern until you have 16 triangles in a row (Row 16) .Pattern Repeat: Rows 2 and 3 — Repeat Rows 2 and 3, increasing number of triangles every even row, until you reach 16 triangles. For each even row: Make an extra triangle at the end (increase). For odd rows: Follow standard triangle joining.
  2. Row 32(example) Work row as usual, but decrease at end: rather than building another triangle, sl st in the last triangle .

You now have one fewer triangle (e.g., from 16 to 15 triangles).

  1. Row 33Work as previous, maintaining triangle count without increasing.Repeat Row 32 and 33 , reducing the number of triangles by one each set, until you are left with just one triangle .
  2. Final RowCh 11. Make the triangle as usual. Turn, sl st in first triangle, sl st in second triangle. Fasten off, weave in ends.

Important notes

Note 01

💡 Keep a row counter or stitch marker on your working edge so you always know whether the next row is an increase row, since the whole shape depends on that even-row rhythm.

Note 02

💡 Practice the sc, dc, tr triangle unit a few times on scrap yarn first so the motion feels automatic before you commit to the full pattern.

Note 03

💡 Remember the ch 6 start is only for your very first triangle — every triangle after that begins with a ch 11, so don't fall back into the ch 6 habit out of muscle memory.

Note 04

💡 If you're using a variegated or self-striping yarn, work a swatch first to see how the color pooling interacts with the triangle shape, since it can either enhance or distract from the motif.

Note 05

💡 Block your finished shawl gently with pins to open up the triangle points and even out the scalloped edge before wearing or gifting it.

Note 06

💡 If you plan to stop before reaching 16 triangles, do so on an odd row so your shawl ends on a clean, symmetrical point rather than mid-increase.

Note 07

💡 Flip triangles before joining with a slip stitch so the shape aligns accurately as you work each new row.

Note 08

💡 If you're approaching a corner or row end, feel free to skip extra stitches as needed for a clean join — there's flexibility in exactly where you slip stitch.

More photos

FAQs

Asked on the glider

the ones that come up on the glider

How many triangles does this shawl pattern use in total?

The pattern builds up to 16 triangles at its widest point before decreasing back down. You can stop earlier for a smaller shawl or continue past 16 if you want an even bigger wrap.

What yarn weight and hook size work best for this shawl?

The sample uses a medium (worsted) weight yarn with an approximately 4.0 mm hook. Any yarn works as long as you pair it with a suitably sized hook for good stitch definition.

Why does the first triangle start differently from the rest?

The first triangle begins with a ch 6 because there's nothing to attach it to yet, while every triangle after that starts with a ch 11 to both attach to the previous row and create the increase. This is what allows the shawl to grow wider row by row.