Intermediate 1-2 hours Worsted yarn

Worked on the glider, counted out loud —

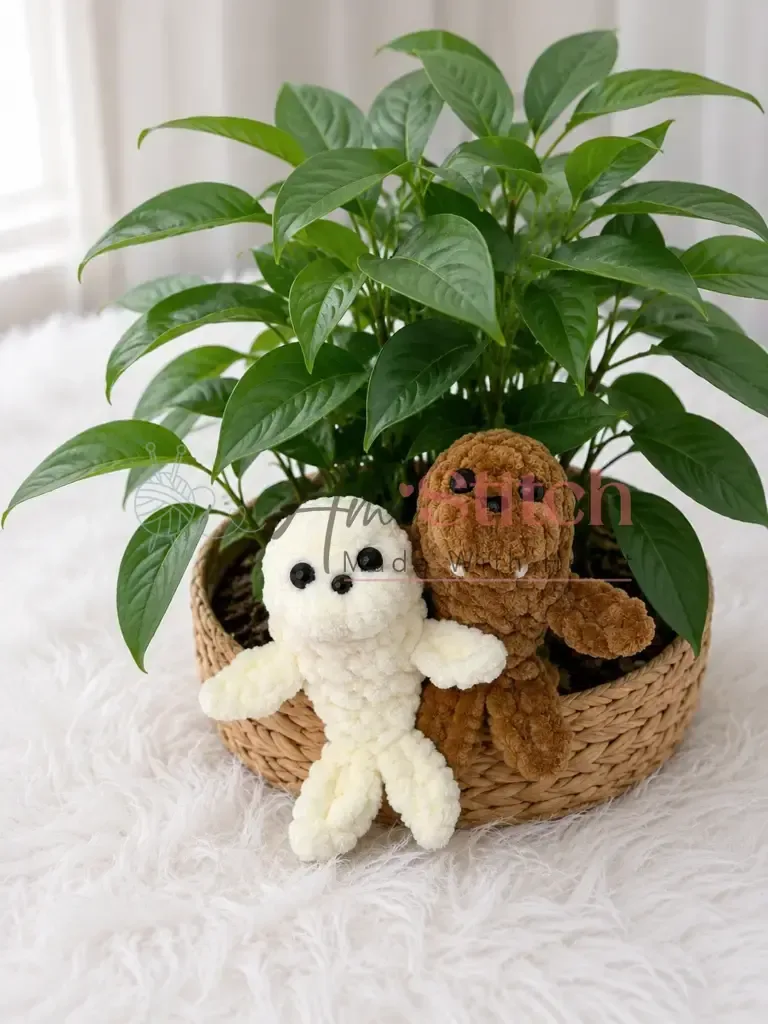
Crochet seal keychain pattern with flippers and puffy cheeks

A quick plush seal keychain for confident beginners — about an hour or two from magic ring to finished flippers.

Jump to the rounds

What this one is

This is the one you make when you want something finished before you've even settled into the couch properly — a tiny seal with round cheeks and a shy little face, small enough to clip onto a bag or tuck into a lunch box. You're making it for the kid who collects zipper charms, for yourself because plush yarn feels wonderful between your fingers, or for someone who needs a small soft thing on a hard week.

Your hands are mostly doing one long continuous spiral, nine rounds total, with a couple of detours to chain out four little flippers right where the pattern tells you to. There's no seaming at the end since the whole body and head come from one piece, and the puff stitches at round 4 give you something fiddly enough to pay attention to but nothing that'll wear out your evening. Plan on it taking well under two hours, start to tail-hidden finish.

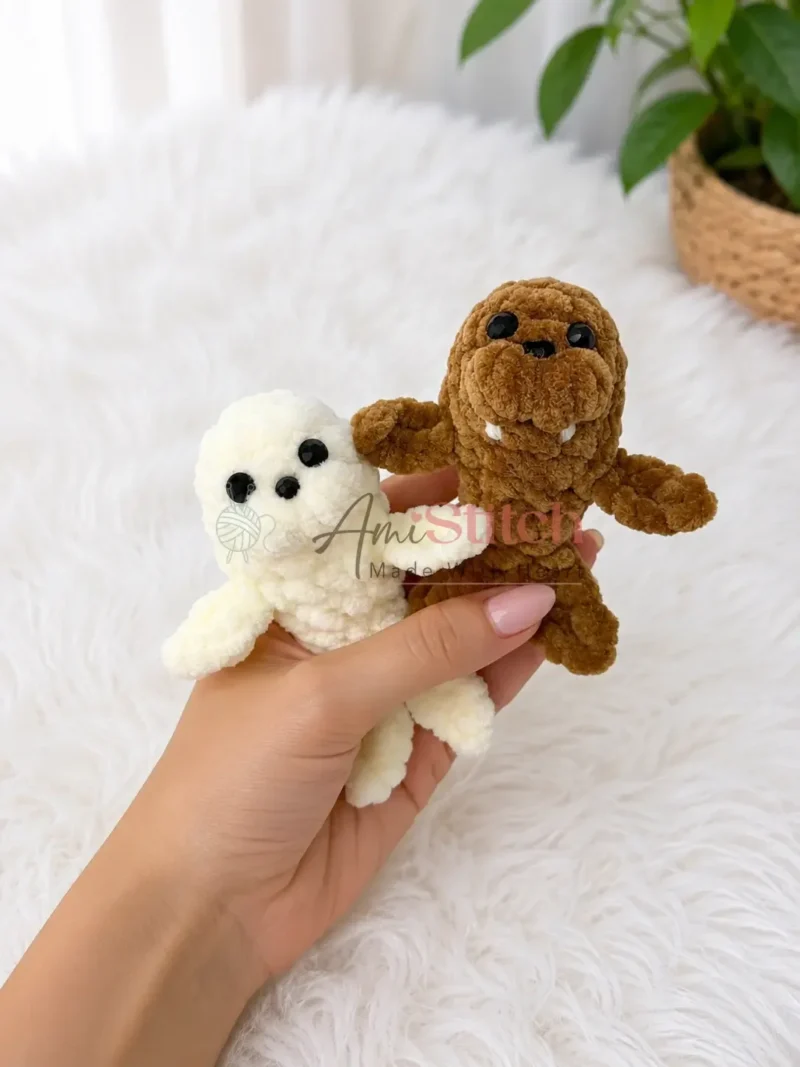
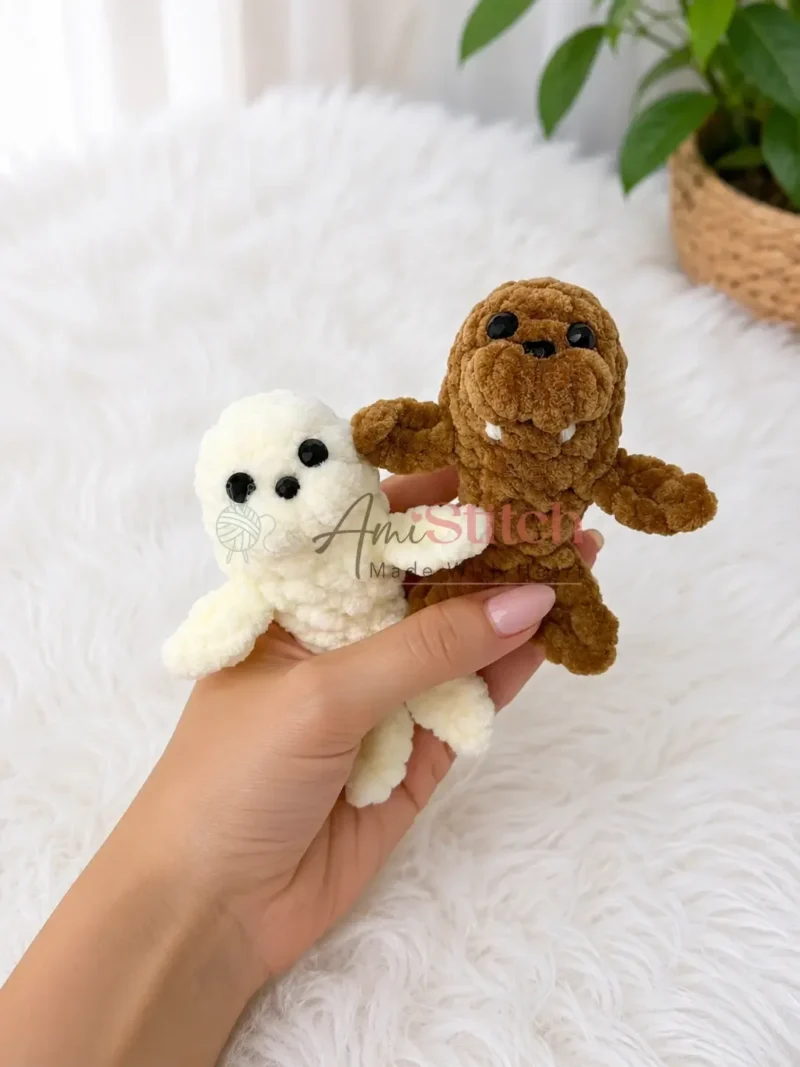
The finished toy measures approximately 5.5 cm from crown to lower back, and about 8 cm including the tail flippers — small enough to clip onto a bag or tuck into a pocket.
Try it another way

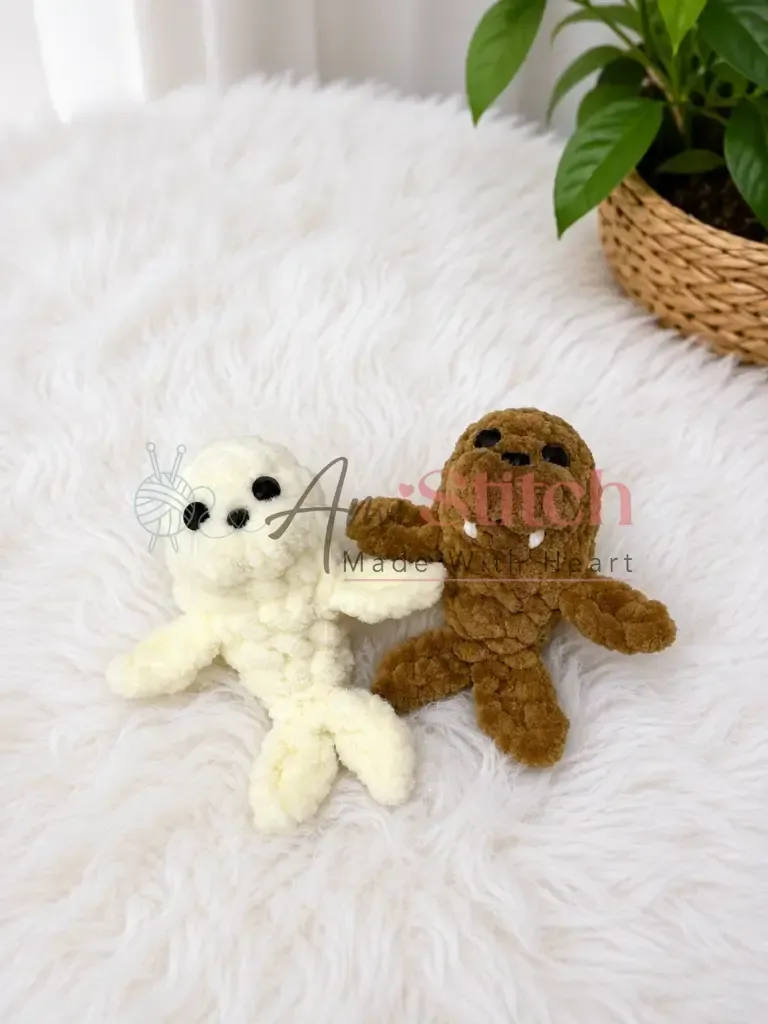
Seals already come in a handful of fair-game colors here — brown, gray, black, white, or spotted — so the easiest variation is simply picking a different one from that list for your next keychain, or making a small litter in all five. The same basic shape also gives you four characters from one 9-round pattern: a seal, a spotted seal pup, a fur seal, or a walrus (add the optional embroidered tusks below the cheek puff stitches for the walrus version). If you want size variety, try the smaller end of the hook range, the US E-4/3.5mm, for a tighter, slightly smaller seal, or the US 7/4.5mm for a looser, slightly plumper one — gauge isn't critical here, so this is a safe way to play. For the face, you can swap the ss20 rhinestone for a half-pearl bead glued on, or skip hardware altogether and embroider the eye with cotton-blend yarn instead, which gives a softer, more hand-stitched look. Since the puff stitches at round 4 are already doing the work of cheeks, you could exaggerate them slightly with a contrasting-color scrap for a two-tone face without touching the rest of the pattern. And because this finishes so quickly, it's an easy one to batch — a few in different seal colors make a nice small gift set, clipped onto bags, zippers, or given as party favors rather than kept as a single keychain.

What makes this one satisfying is how much personality comes from so few rounds. You get a magic-ring nose end, a body that grows in a clean continuous spiral with no joins to hide, and then — right in round 4 — two 4-hdc puff stitches that pop out as cheeks almost by magic. The flippers aren't part of your stitch count at all; they're little ch-5 appendages worked mid-round, so you get the satisfaction of adding dimension to the shape without any extra counting. By round 9, when you cut yarn and pierce the last flipper's tail through to hide it, you've built a whole creature's worth of character out of nine rounds and two detours.

The rounds, in full

Written out, round by round

Intermediate1-2 hours3.5 mmWorsted

Bring to the porch

Everything this one takes, in the order you will reach for it.

Yarn

  • Plush/velvet yarn, approx. 100g/120m weight (similar to worsted-weight plush); 7–8 grams in your chosen color. Seals come in brown, gray, black, white, and spotted — all are fair game.

Hook

  • US E-4 / 3.5 mm to US 7 / 4.5 mm (use whichever size gives you a firm, non-loose fabric with your specific plush yarn)

Eyes

  • Black rhinestone hot-fix crystals size ss30, or half-pearl beads 6–7 mm (with craft glue); 2 pieces

Nose

  • Black rhinestone hot-fix crystals size ss20, or a half-pearl bead 4 mm (with craft glue); 1 piece — or embroider with cotton-blend yarn
  • Stitch marker
  • Yarn needle / tapestry needle (a wide-eye “gypsy” needle works best for embroidery on small pieces)
  • Scissors
  • Tweezers or needle-nose pliers (for setting rhinestones)
  • Lighter (for sealing yarn ends on plush yarn, if needed)

Tools

  • Stuffing / fiberfill: Approximately 1 gram — just a small pinch

Body & Head (worked as one piece, bottom to top)

  1. Round 16 sc in MR. (6)
  2. Round 2inc in each st around. (12)
  3. Round 3sc in each st around. (12)
  4. Round 45 sc, work 1 Puff St (4-hdc puff) in next st, work 1 Puff St (4-hdc puff) in next st, 5 sc. (12)These two puff stitches form the cheeks on the face.
  5. Round 54 sc, work Left Flipper (see Flipper instructions below), 5 sc, work Right Flipper (see Flipper instructions below), 3 sc. (12)

The flippers are not counted in the stitch total — they are worked as embellishments off the main round.

  1. Round 62 sc, dec repeat 3 times around. (9)
  2. Round 7sc in each st around. (9)Stuff the body firmly with fiberfill now — this is your last easy opportunity before the opening narrows.
  3. Round 8sc, dec repeat 3 times around. (6)
  4. Round 9dec, sl st 1 (add a second sl st if needed so the working loop sits cleanly at the side of the toy), work Left Tail Flipper (see Flipper instructions below), sl st through both layers at the center of the tail, work Right Tail Flipper (see Flipper instructions below).Cut yarn and secure symmetrically (see Tail Finishing note below).

Flipper (Upper & Lower — worked identically)

Each flipper is worked off a single stitch in the main round. Work the following directly where indicated in Rnds 5 and 9:

Ch 5.

Starting from the 2nd ch from the hook: sl st 1, ch 1, sk 1 ch, hdc 1, ch 1, sl st 1.

This creates one small flipper with a notched shape. Do not cut yarn after each flipper — continue into the next stitch of the main round.

Putting it together

Step 1

Tail Finishing (Rnd 9): After working the second tail flipper, cut the yarn leaving a short tail. Insert your hook at the same exit point, draw it one stitch to the side, catch the yarn, and pull through. Pierce through the tail from front to back as shown in the pattern diagram, draw the yarn to the back side, pull snug, and hide the tail inside the toy body.

Step 2

Face placement: With the starting magic ring (Rnd 1) as the nose end, position the two Puff Stitches from Rnd 4 as the cheeks. The nose sits centered above them; the eyes sit on either side above the cheeks.

Step 3

Eyes: Glue or heat-set the ss30 rhinestones (or 6–7 mm half-pearls) one on each side of the face, above the cheek puff stitches. The eyes should be visibly larger than the nose for that characteristic wide-eyed baby seal expression.

Step 4

Nose: Glue or heat-set the ss20 rhinestone (or 4 mm half-pearl) centered above the two cheeks. Alternatively, embroider the nose using cotton-blend yarn: insert needle under one cheek, work 2–3 horizontal stitches approximately 4–5 mm wide (1 sc width), pass needle back under the stitches, exit near the starting point below the cheeks, knot 2–3 times, and hide the tail inside the head.

Step 5

Walrus tusks (optional): Using white cotton-blend yarn or white plush yarn, embroider one tusk below each cheek. Insert needle from left to right beneath the cheeks, angle down slightly by 1 round, make a stitch, then pass horizontally back to the mirrored position and repeat for the second tusk. Join both yarn tails close to the exit point, pull to the back of the head, tighten until the knot disappears into the fabric, and hide ends inside the head.

Step 6

Weave in all remaining ends securely inside the toy body.

Marlene's notes

Note 01

Your hook size has real range here — anywhere from US E-4/3.5mm to US 7/4.5mm — so swatch a few stitches first and pick whichever gives you a firm fabric with your specific plush yarn, since plush fibers vary a lot in loft. Work snugly enough that you can't feel individual bumps when you squeeze the toy; if your hook is sliding too easily, drop one hook size.

Note 02

Because the body works in a continuous spiral with no joining and no turning chains, your stitch marker is doing the job a join would normally do — move it up every round or you'll lose track of where round 9 actually starts.

Note 03

Stuff as you go rather than all at the end; with only about 1 gram of fiberfill needed, it's easy to either underfill or overfill a toy this small, and your fabric needs to stay firm enough that no stuffing shows through. Start assessing firmness at round 6, and add stuffing gradually in small pinches rather than one large handful, which creates lumps.

Note 04

The Rnd 1 magic ring becomes the nose of the toy. Place a removable stitch marker or a small length of contrast yarn through that first round so you can orient the face correctly when attaching eyes and nose — plush fabric can look the same from every angle.

Note 05

The tail join is the trickiest part of this pattern. When you work the sl st through both layers at the center of the tail in Rnd 9, use your fingers to pinch the two sides of the flattened tail together firmly before inserting the hook. This keeps the join centered and gives the tail flippers their distinctive spread shape.

Note 06

If you're making these as keychains for children, skip the rhinestones entirely and embroider all facial features with black cotton-blend yarn. Embroidered faces are safer, washable, and — on a toy this small — surprisingly expressive.

Note 07

This pattern is written in US crochet terminology.

Note 08

The finished toy measures approximately 5.5 cm from crown to lower back, and 8 cm including the tail flippers.

Porch photos

Before you sit down

  • Weigh out your plush yarn before you start — you'll want 7 to 8 grams in whichever seal color you've chosen, so check you have that much set aside.
  • Pinch off your fiberfill ahead of time too; it's a genuinely small amount, about 1 gram, so don't over-stuff by instinct.
  • Place your stitch marker at round 1 before your first stitch in round 2, since this whole body is worked in a continuous spiral with no joins to mark your round for you otherwise.
  • Read through round 5 and round 9 before you begin, since that's where the flipper instructions get folded into the main round — knowing where they land will save you from having to backtrack.

How the hours go

Body & Head, rounds 1-4
about 15-20 minutes because you're shaping fast through a magic ring start and placing two puff stitches by round 4
Tail finishing and face assembly
about 15-20 minutes because piercing the tail through to hide it and placing your rhinestone or embroidered eye both want careful, unhurried hands

Looking after it

  • Spot-clean your seal with a damp cloth and a little mild soap rather than running it through a wash, since plush/velvet yarn can lose its nap and soft fiberfill can shift or clump if it gets fully soaked.
  • Let it air-dry fully before clipping it back onto a bag, and store it somewhere it won't get crushed flat — a light fluff with your fingers along the puff-stitch cheeks will bring the texture back if it's been packed away.
FAQs

Asked on the glider

the ones that come up on the glider

Can I skip the rhinestone and still get a good face?

Yes — the pattern notes you can embroider the eye with cotton-blend yarn instead of using the ss20 rhinestone or half-pearl bead. It's a softer look and avoids any gluing or hot-fix step entirely.

Why does my seal come out looser or tighter than expected?

This comes down to hook size, since the pattern gives you a wide range from US E-4/3.5mm to US 7/4.5mm depending on your specific plush yarn. Swatch first and pick whichever size keeps your fabric firm enough that the 1 gram of stuffing doesn't show through.

Do the flippers count toward my stitch total each round?

No — the flippers worked in rounds 5 and 9 are embellishments off the main round and aren't included in the stitch count. You just keep working the main round's stitches as usual once each flipper is done.

How do I know which end is the nose?

The starting magic ring from round 1 is your nose end, with the two round 4 puff stitches sitting as the cheeks on either side of the face. Keep that orientation in mind as you place your eye detail.

What's the easiest way to hide the yarn tail at the end?

After your second tail flipper in round 9, cut the yarn leaving a short tail, then insert your hook at the same exit point and draw it one stitch to the side. Pierce through the tail front to back as shown in the pattern diagram, pull snug, and tuck it inside the body.

Is a lighter really necessary for plush yarn ends?

It's listed as a tool for sealing yarn ends on plush yarn if needed, not a strict requirement. If your tails are already well hidden inside the stuffed body, you can usually skip it.

Can I use regular acrylic yarn instead of plush yarn?

Yes, you can substitute standard worsted-weight acrylic yarn. Keep in mind that the finished toy will look quite different — the plush yarn creates a soft, velvety surface that gives the seal its rounded, fluffy appearance. With regular acrylic, the stitches will be visible, so neat tension becomes more important. The finished size may also be slightly smaller.

How do I attach a keychain ring to the finished toy?

The easiest method is to thread a jump ring or lobster clasp through the magic ring at the top of the head (Rnd 1) before pulling it fully closed, or to attach it after finishing by weaving a short length of yarn through the top stitches and looping it through the hardware. You can also crochet a short chain of 5-6 stitches at the top of the head and attach the keychain ring to that loop for a cleaner finish.