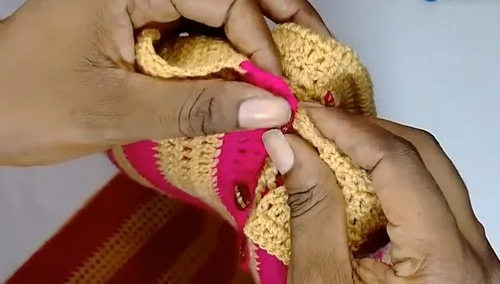
Intermediate 4-6 hours Lightweight yarn

Worked on the glider, counted out loud —

Crochet polo shirt with mesh stitch and collar

A three-panel crochet polo with mesh body and DC collar, sized S. About 4-6 hours for a confident intermediate.

Jump to the rounds

What this one is

This one's for a cooler evening when you want something with a collar for once, not another cardigan. It's a polo, worked flat in three pieces, with a proper V-neck opening and a DC collar that actually sits like a collar. Make it for the person in your life who likes their crochet to look store-bought, or for yourself, if you're that person.

Your hands spend most of the time in the mesh body panels, one back at 46 cm wide and two fronts at 23 cm each, before moving to the tidy work of the SC and DC edging and the seven-row collar. Between the panels, the seaming, and the collar, plan on an evening or two at the hook.

Try it another way

The panel widths given here — 46 cm for the back, 23 cm for each front — are for a size S, so scale those numbers up or down for other sizes and just make sure all three panels finish at the same exact length before you seam. The 15 cm shoulder width and 16 cm V-neck opening are the other two numbers to adjust together, since a wider neck opening means less shoulder to seam closed. For color, this pattern lends itself well to a solid body with a contrast collar, since the collar is worked separately onto the neckline after the panels are joined. You could also swap in a different lightweight yarn altogether for a heavier drape, just re-swatch with your 3 mm hook first since mesh stitch shows tension changes readily. If you want a longer collar, the pattern already builds in room for this: keep working Row 2 and Row 3-style increase rows, or drop the increases once you like the size, since the seven-row example is just that — an example. The 18 cm sleeve opening marker is another easy one to shift for a deeper or shallower armhole, and since it's marked with stitch markers before seaming, you can test the fit on a body before committing to a needle and thread.

There's real satisfaction in a garment that reads as tailored but is built from three flat rectangles and a lot of honest mesh. You get to practice a few different skills in one project: the multiple-of-three foundation chain and its slightly fussy tail-trimming step, clean SC edging worked two stitches into each space, and a collar that grows through increase rows until it sits right. The V-neck opening, left unseamed between the shoulders, is a small design choice that does a lot of visual work. And because the collar is worked directly onto the neckline rather than pieced in separately, you get that satisfying moment where a flat pile of mesh panels suddenly becomes a shirt with a collar you could wear out.
The rounds, in full

Written out, round by round

Intermediate4-6 hours3.5 mmLightweight

Bring to the porch

Everything this one takes, in the order you will reach for it.

Yarn

  • Lightweight yarn

Hooks

  • 3.5 mm (starting hook), 3 mm (main hook)

Notions

  • Tapestry needle, stitch markers, scissors
  • Size (Example): Size S (Measurements should be adjusted for other sizes)

Main Body Panels

The body of the shirt is made of three flat panels: one back piece and two identical front pieces.

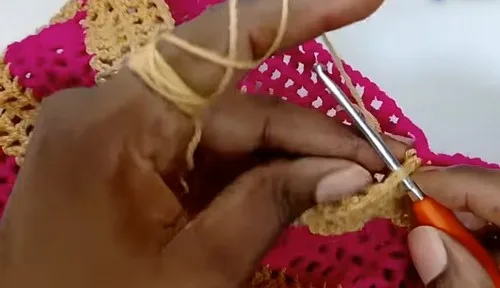
Foundation Chain Create a slip knot and begin your foundation chain. The stitch requires a multiple of three, but it's recommended to make the chain longer than your required length (e.g., an extra 17 cm) because the pattern strings up as you work.

Adjusting Excess Chain Once Row 1 is complete, count 3 stitches back from the last stitch, cut the excess chain, and pull the tail to secure the foundation edge.

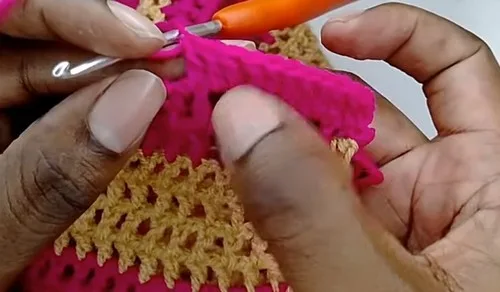
Mesh Stitch Pattern The pattern is worked in turning rows.

Panel Dimensions Ensure all three panels have the same exact length. Back Panel: Width = 46 cm. Front Panels (2): Width = 23 cm each.

Front Edging and Buttons

Front Opening Edging To tidy the raw edge of the front opening, attach your yarn and work a row of Single Crochet (SC) down the side.

  1. Row 1Make 2 SC into each chain-one space/row end along the edge.Work a row of Double Crochet (DC) along the SC edging on both sides.
  2. Buttonhole SideRight Side (Women) Work a total of 19 DC (or 11 DC as originally suggested). Create a Buttonhole: Chain 1, skip the next space, then DC in the next stitch. Repeat this sequence (19 DC, Buttonhole) down the front opening.(19)
  3. Opposite SideLeft Side Attach yarn at the top (neck opening). Chain 3 (counts as 1st DC). Work 1 DC in every stitch and space down the side, ensuring the two sides align and face the front.

Sleeves

  1. Row 1Start of Row 1: Attach yarn at the bottom of the sleeve opening. Chain 4 (counts as 1 DC + Chain 1). Work the mesh stitch pattern (DC on the stitch, Chain 1) around the armhole opening. Close the row with a Slip Stitch into the 3rd chain of the starting Chain 4.Turn your work after each row to maintain the mesh pattern alignment. Repeat the mesh pattern until the desired sleeve length is reached (e.g., 15 cm or 18 rows from the armpit).

Collar

The collar is worked in rows around the neck opening, starting at the bottom edge of the button band.

  1. Row 1Attach yarn. Chain 3 (counts as 1st DC). Make 2 DC into each chain-one space/row end around the entire neck opening.
  2. Row 2Increase Row Chain 3 , turn. Make an increase (2 DC) in the same stitch. Work 1 DC in each stitch across the row until the last stitch, where you make another increase (2 DC).(2)
  3. Row 3Increase Row Repeat Row 2. Subsequent Rows: Continue with or without increases until the collar is the desired size.The example uses a total of 7 rows .Finishing: Sew on buttons to align with the buttonholes on the opposite placket.

Putting it together

Step 1

Sleeve Marking: Lay the panels flat with the right side facing up.

Step 2

Use stitch markers to mark the length of the sleeve opening from the top edge.

Step 3

The example uses 18 cm .

Step 4

Side Seam: Starting from the bottom, use a tapestry needle to sew the side seams up to the sleeve marker.

Step 5

Sew through the inside loops only for a clean seam.

Step 6

Shoulder Seam: Mark the desired shoulder width (e.g., 15 cm for a size S) from the sleeve opening.

Step 7

The unseamed space between the shoulders will be the polo V-neck opening (e.g., 16 cm).

Step 8

Turn the work to the wrong side and sew the shoulder seams closed up to the V-neck allowance.

Marlene's notes

Note 01

The pattern uses two hook sizes: 3.5 mm to start and 3 mm for the main body, so keep both on hand and don't lose track of which round calls for which.

Note 02

Chain longer than you think you need for the foundation — the extra 17 cm allows for the string-up that happens as mesh stitch works up, and you'll trim the excess back to 3 stitches after Row 1.

Note 03

Check gauge against the given widths (46 cm back, 23 cm fronts) before you commit to a full panel, since mesh stitch can vary in drape depending on tension.

Porch photos

Before you sit down

  • Check you have enough lightweight yarn for three panels plus edging and a seven-row collar before you commit to a chain.
  • Have stitch markers ready for the sleeve openings and the shoulder width markings — you'll place these before any seaming begins.
  • Swatch in the mesh stitch with your 3 mm hook to confirm your row gauge matches the panel widths (46 cm back, 23 cm each front) before chaining.
  • Read through the Collar's increase rows (Row 2 and Row 3) before you start Row 1, so you know where the increases land.

How the hours go

Three body panels
about 2-3 hours because the back panel alone is 46 cm wide and both front panels need to match it exactly
Seaming and edging
about 1 hour because shoulder seams, side seams through inside loops, and the SC-then-DC front edging all take patience over speed
Collar
about 1 hour because the shaping runs across seven rows with increases at both ends of Row 2 and Row 3

Looking after it

  • Hand wash the finished polo in cool water with a mild detergent and avoid wringing, then press out excess water in a towel to protect the drape of the mesh stitch.
  • Dry flat, reshaping the panels to their original 46 cm and 23 cm widths while damp, and store folded rather than hung so the shoulder seams and collar keep their shape.
FAQs

Asked on the glider

the ones that come up on the glider

Why does the pattern ask me to chain longer than the finished width?

Mesh stitch pulls in and strings up a bit as you work the first row, so the extra 17 cm gives you room to work without running short. You trim back to 3 stitches from the last stitch once Row 1 is done.

Do I need both hook sizes, or can I just use one?

The pattern calls for a 3.5 mm starting hook and a 3 mm main hook, so it's worth keeping both nearby. Using only one size will change your gauge against the given panel widths.

How do I know where to place the shoulder markers?

Mark the shoulder width, 15 cm for size S, out from the sleeve opening on each panel. What's left unseamed between the two shoulder markers becomes your 16 cm V-neck opening.

What's the point of the two-part edging on the front opening?

The SC row, worked with 2 SC into each chain-one space or row end, tidies the raw edge first. The DC row on top of that gives the opening a firmer, more finished line before the collar goes on.

Can I make the collar taller than the seven rows shown?

Yes, the pattern is written to continue with or without increases until the collar reaches the size you want. Just keep following the Row 2 and Row 3 increase pattern if you want it to keep widening as it grows.

Which loops should I use for the side seams?

Sew through the inside loops only, starting from the bottom and working up to the sleeve marker. This keeps the seam flat and clean on the right side.