Intermediate 4-6 hours 5 ply yarn

Worked on the glider, counted out loud —

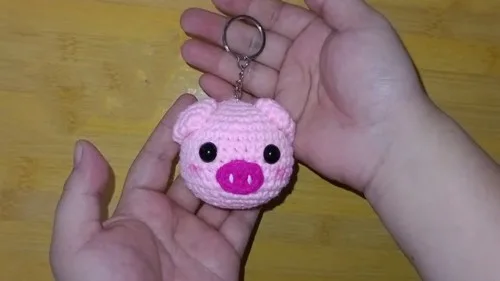
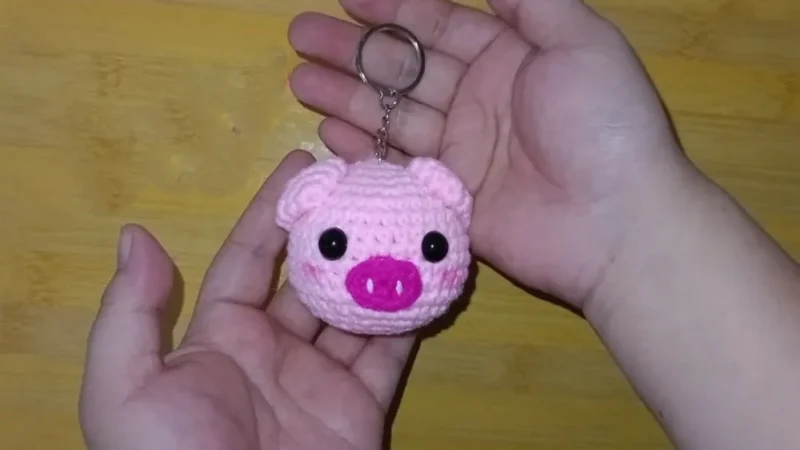
Crochet Pig Amigurumi Keychain Pattern

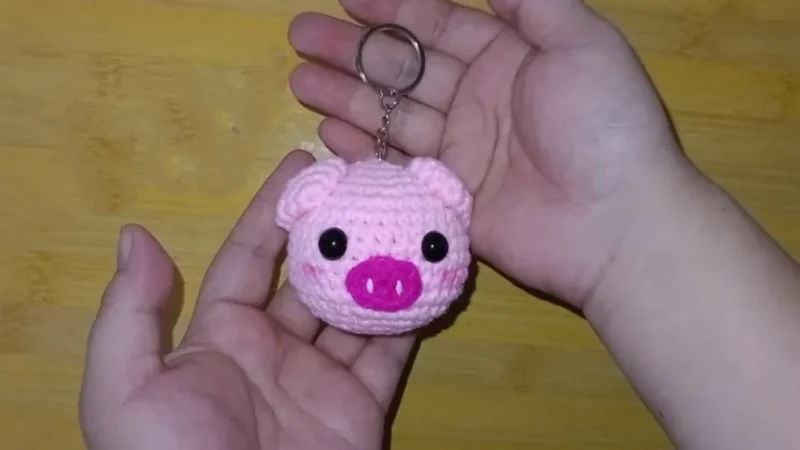
A small crocheted pig keychain in 5 ply yarn, worked in a few hours. Good for confident beginners wanting a quick amigurumi win.

Jump to the rounds

What this one is

This little pig is the kind of project you pick up when you want something finished by the time you set your hook down for the night. It suits anyone who likes a quick gift on hand — a bag charm for a friend, a zipper pull for a kid's backpack, a small thing to tuck in with a card. You don't need much yarn or much room to work it.

Your hands spend most of the time on the head: eight rounds that build from a magic ring up into a rounded little face, with a stretch of plain rounds in the middle to hold the shape before it curves back in. The ears are quick, four short rounds each, and then it's just assembly — eyes, nose, ears, blush, keychain hardware. Start to finish, you're looking at four to six hours.

Try it another way

You can shift this pig from keychain to keepsake with a few easy swaps. Skip the keychain holder in the finishing step and glue on a magnet or a pin back instead, and it becomes a fridge magnet or a little brooch. If you want a slightly plumper face, work an extra plain round or two into the middle stretch of the head, where rounds 7 through 12 are already just single crochet around — adding to that run doesn't disturb any of the shaping counts. Yarn choice matters more than you'd think on a piece this size: a smooth 5 ply gives you crisp, even stitches so the increase pattern reads clearly, while a fuzzier fiber will soften the whole look and hide small tension wobbles, which is handy if you're still getting comfortable with amigurumi shaping. For color, keep the classic pink for a traditional pig, or try the same construction in gray or spotted yarn for a different farmyard character altogether — the 8mm safety eyes and optional blush will carry the personality either way. And since the ears are worked twice from the same short 4-round pattern, it's an easy spot to experiment with a contrasting yarn if you want the ears to stand out against the head.

There's something satisfying about a pattern that tells you exactly where you are at every turn — the head's stitch counts climb in clean steps from 6 up to 36, so you always know if you're on track before you commit to the next round. The plain rounds in the middle give your hands a rhythm to settle into after all that counting, which is a nice contrast to the shaping. And because the piece is small, you get to see a full amigurumi head form in one sitting, from magic ring to closed dome, without losing the thread of what your fingers are doing. The ears, worked twice, let you repeat what you just learned on the head at a smaller scale, so the second one goes noticeably faster than the first.
The rounds, in full

Written out, round by round

Intermediate4-6 hours3 mm5 ply

Bring to the porch

Everything this one takes, in the order you will reach for it.

  • 5 ply yarn
  • 3 mm crochet hook
  • Needle
  • Marker
  • 8 mm safety eyes
  • Fiberfill for stuffing
  • Blush (optional for added color)

Head

  1. Round 16 sc in a magic ring. [6](6)
  2. Round 2Inc in each stitch around. (6 inc) [12] For Round 3: (Sc in next stitch, inc) repeat 6 times. [18](18)
  3. Round 4(Sc in next 2 stitches, inc) repeat 6 times. [24] In Round 5: (Sc in next 3 stitches, inc) repeat 6 times. [30](30)
  4. Round 6(Sc in next 4 stitches, inc) repeat 6 times. [36](36)
  5. Rounds 7–12Sc in each stitch around. [36] For Round 13: (Sc in next 4 stitches, dec) repeat 6 times. [30](30)
  6. Round 14(Sc in next 3 stitches, dec) repeat 6 times. [24](24)
  7. Round 15(Sc in next 2 stitches, dec) repeat 6 times. [18] For Round 16: (Sc in next stitch, dec) repeat 6 times. [12]Stuff with fiberfill at this stage.(12)
  8. Round 17Dec 6 times. [6](6)

Ears (make 2)

1st: 6 sc in a magic ring. [6]

2nd: (Sc in next stitch, inc) repeat 3 times. [9]

3rd: (Sc in next 2 stitches, inc) repeat 3 times. [12]

4th: Sc in each stitch around. Slip stitch to join. [12]

Putting it together

Step 1

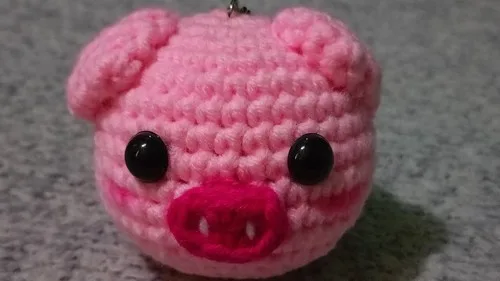
Nose:: Glue the nose in place.

Step 2

Eyes:: Glue the 8mm safety eyes in place.

Step 3

Ears:: Position the ears on the head. Glue and sew them in place (optional: sewing provides extra strength).

Step 4

Blush:: Apply some blush to add color to the cheeks (optional).

Step 5

Finish:: Attach the keychain holder at the top of the head.

Marlene's notes

Note 01

Use a 3 mm hook and keep your tension a little tight through the increase rounds on the head, since a loose gauge here will let stuffing show through at the widest point.

Note 02

Move your marker up every round on the head — with 8 rounds and no slip stitch joins until the ears, it's easy to drift off round without one.

Note 03

Stuff the head firmly before you close it up, especially through the plain rounds 7 through 12, so the shape holds once the decreases pull it in.

Porch photos

Before you sit down

  • Check you have enough 5 ply yarn on hand for one head and two ears, plus a little extra if you want to add blush accents.
  • Have a stitch marker ready before round 1 — with 8 rounds on the head and no natural seam, you'll lose your place fast without one.
  • Read through the head's round 6 to round 7 transition once before you start, so you're not caught off guard when the increases stop and the plain rounds begin.
  • Test your magic ring closure on scrap yarn first if it's new to you, since both the head and the ears open with one.

How the hours go

Head
about 2-3 hours because it runs 8 rounds with increase shaping through round 6 and decreases starting at round 13
Ears (make 2)
about 30-45 minutes because each ear is only 4 short rounds, but you're making two
Assembly and finishing
about 1-1.5 hours because there are 5 steps: nose, eyes, ears, blush, and attaching the keychain holder

Looking after it

  • Hand wash the finished pig gently in cool water if it needs freshening up, then press out excess water in a towel rather than wringing it, since 5 ply yarn can lose its shape under twisting.
  • Let it air dry fully before handling, and reshape the ears and head by hand while damp so they dry sitting the way you want; store it somewhere dry and away from direct sun so the color stays true.
FAQs

Asked on the glider

the ones that come up on the glider

What size hook do I need for this pig?

A 3 mm crochet hook is what the pattern calls for. Stick with it throughout, since the head's increase counts are worked out for that gauge.

Do I need to use a stitch marker?

Yes, definitely. With 8 rounds on the head and no slip stitch joins to mark your place, a marker is the only reliable way to know where each round starts.

Can I skip the safety eyes and embroider the face instead?

You can, though the pattern is written around 8mm safety eyes for a clean, secure finish. If you embroider instead, do it before you finish stuffing the head so you have room to work the needle through.

Is the blush really optional?

It is. The pattern lists it as an optional touch for color on the cheeks, so the pig looks complete with or without it.

How much yarn does one pig use?

The pattern doesn't specify an exact yardage, just 5 ply yarn as the material. Since the head is only 8 rounds and the ears are small, one small ball comfortably covers a single pig.

What keychain hardware should I use?

The pattern doesn't specify a particular type, just that you attach a keychain holder at the top of the head in the last assembly step. Any small keyring or clasp with a jump ring will work, glued or sewn in securely.