Intermediate 2-4 hours Worsted yarn

Worked on the glider, counted out loud —

Crochet a no-sew schnauzer amigurumi keychain

A no-sew schnauzer keychain worked in rounds, right for confident beginners with about 2-4 hours to spare.

Jump to the rounds

What this one is

This little schnauzer keychain is the kind of project you reach for on a quiet evening when you want to finish something whole before you turn off the lamp. It suits a confident beginner ready to try a bit of ear shaping, or a seasoned maker who wants a fast, satisfying gift. No sewing is needed anywhere, so if seaming a muzzle onto a head has ever put you off amigurumi, this pattern is a gentle, forgiving place to practice.

Your hands will spend most of the time working single crochet in continuous rounds, counting through increases that take you from ten stitches up to fourteen, then up to eighteen, as the body takes shape. There's a short, satisfying stretch of ear shaping worked in front-loop double crochet, finished with a three-chain tip closed by a single crochet. All told, expect two or three focused sessions before you're gluing ears into place and trimming the final fur.

Try it another way

The materials list already gives you the two main routes: a 5mm hook with a thicker yarn for a huggable toy, or a 3.5mm hook with a finer, keychain-weight yarn for something pocket-sized. If you go the toy route, scale the safety eyes and nose up toward the listed 7mm eyes and 10mm nose for a face that reads clearly at that bigger size; for the keychain, size both down so the features don't crowd the small head. Color placement is another easy way to make each one different - work the body in a steel-grey or salt-and-pepper shade and save a lighter or white yarn for the muzzle and eyebrow fur you add with the tapestry needle, which is a classic schnauzer marking. You could also swap the keychain ring for a bag charm clip, a zipper pull, or simply leave it as a tiny shelf toy with no hardware at all. Since the ear shaping and facial fur steps are identical whichever size you choose, you can mix and match freely between a quick keychain batch and one larger toy version without relearning anything.

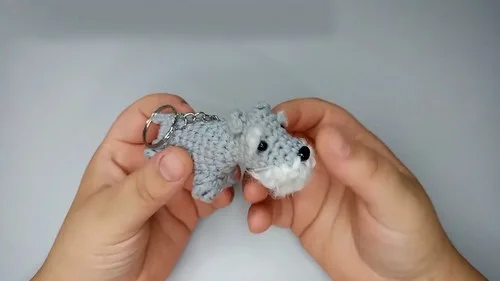
What I like best about this little dog is how much shaping happens without a single seam. You start in a magic ring, then move through tidy increase rounds - six plain stitches followed by four increases to reach fourteen, then two plain stitches and four increases to reach eighteen - so the body simply rounds itself into shape as you go. The ear is its own small reward: a double crochet worked into just the front loop gives it a ridged, almost furry edge, finished with a three-chain tip closed by a single crochet. Then comes the fun part, using a tapestry needle to add brushed facial fur, which is really what turns a plain round pup into a schnauzer.

The rounds, in full

Written out, round by round

Intermediate2-4 hours5 mmWorsted

Bring to the porch

Everything this one takes, in the order you will reach for it.

  • Crochet hook (5mm for a toy, 3.5mm for a keychain)
  • Thicker yarn for the toy or suitable yarn for the keychain
  • Safety eyes (7mm eyes and 10mm nose for the big toy; adjust size accordingly for the keychain)
  • Tapestry needle
  • Stuffing material

Main Pattern

  1. Round 2to 4: Work 10 sc (repeat same as the first round).
  2. Round 56 sc, then make an increase in the next 4 stitches (increase done by working 2 sc into the same stitch).

You should have 14 stitches by the end of this round.

For Round 6: Work 14 sc around (no increases or decreases).

  1. Round 72 sc, then an increase repeat 4 times to a total of 18 stitches.
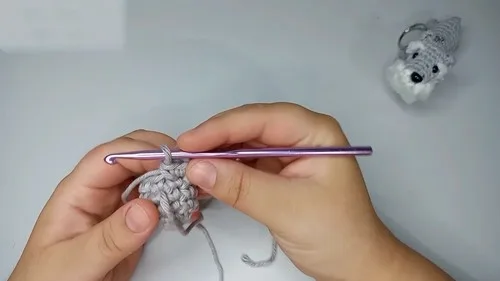
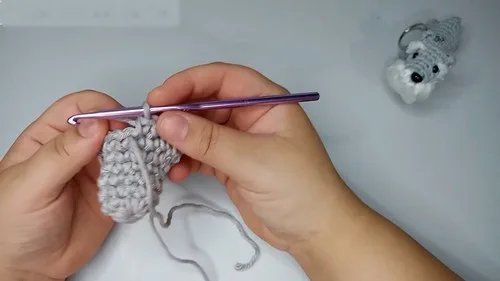
  2. Round 810 sc. Begin to construct the ear: Work a double crochet taking only the front loop.Chain 3, then 1 sc in the first chain.Chain 2, then 1 sc in the front loop of the same stitch as the double crochet to make the first ear.4 sc then repeat the ear pattern on the other side.Complete with 2 sc.Placement of Eyes and Nose: Nose between rounds 1 and 2.Eyes between rounds 5 and 6 directly below the ears.For Round 9: 2 sc and decrease repeat twice, Work sc using the back loop left from the ear (once for each ear), Decrease twice,2 sc. End this round with 14 stitches.
  3. Round 10Decrease once, 2 sc, increase repeat 3 times, Decrease 4 times, 1 sc to finish. This round ends with 12 stitches.
  4. Round 11to 12: Increase gradually, achieving the pattern required for the body and head assembly.

Subsequent Rounds (13 to 22):

Continue establishing the body, incorporating techniques like popcorn stitches in round 14 for texture, and completing the body and tail towards the final rounds.

Putting it together

Step 1

Attach the nose and safety eyes.

Step 2

Use a glue to fix the ears in a bent position similar to a Schnauzer.

Step 3

Add details like facial fur using the tapestry needle and yarn.

Step 4

Stuff the body as you close the rounds.

Step 5

Final grooming by trimming any excess fur or yarn to tidy up.

Marlene's notes

Note 01

Your hook choice does double duty here: 5mm with thicker yarn gives you a plush toy, while 3.5mm with a finer yarn keeps the keychain small and firm enough to actually hang off a bag.

Note 02

Every round is worked continuously with no slip-stitch join, so drop a stitch marker into the first stitch of each round, especially through rounds 5 and 7 where the increases need to land in the right spots.

Note 03

Stuff as you close each round rather than waiting until the end; it's much easier to work filling evenly into the muzzle and body while there's still an opening to push through.

Porch photos

Before you sit down

  • Decide whether you're making the toy or the keychain first, since that decides your hook: 5mm with thicker yarn for the toy, 3.5mm with a finer yarn for the keychain.
  • Have your safety eyes and nose ready in a size suited to a keychain before you close the head, since the pattern's 7mm eyes and 10mm nose are sized for the bigger toy.
  • Read through round 5 (6 sc then four increases to 14 stitches) and round 7 (2 sc repeated with increases to 18 stitches) before you start, so the stitch jumps don't catch you mid-round.
  • Keep stuffing within reach from the start, since you'll be adding it gradually as rounds close rather than stuffing everything at the very end.

How the hours go

Main Pattern, rounds 1-4
about 20 minutes because these are plain sc rounds with no shaping to track
Shaping rounds 5-7
about 15 minutes because the increases to 14 and then 18 stitches need careful counting
Ears and finishing
about 1-2 hours because the front-loop double crochet ear, gluing, facial fur detail, and final trim all take a patient hand

Looking after it

  • Hand wash gently in cool water if needed, and keep the piece away from the washing machine, since tumbling can distort the stuffed shape and loosen the safety eyes.
  • Reshape the head and ears while damp, let the piece air dry fully away from direct heat, and store it somewhere it won't get squashed flat so the front-loop double crochet ears keep their texture.
FAQs

Asked on the glider

the ones that come up on the glider

Can I use the same pattern for both the toy and the keychain?

Yes, the rounds and stitch counts are identical either way. The only changes are your hook size, 5mm versus 3.5mm, and the yarn thickness you pair with it.

What does no-sew actually mean for this pattern?

It means the ears and other details are built directly into the crochet rounds and attached with glue rather than stitched on afterward. You never pick up a needle to seam a separate piece onto the body.

Why does round 5 suddenly jump from 10 to 14 stitches?

That jump comes from working 6 plain sc followed by increases in the next 4 stitches, each increase adding one extra stitch. It's a normal amigurumi shaping move, not a mistake in the count.

What size safety eyes should I use for the keychain version?

The pattern lists 7mm eyes and a 10mm nose for the larger toy, so for a keychain you'll want to scale those down to suit the smaller head. Hold a pair up against your work in progress before you commit to the final placement.

How do I get the ear to keep its bent, floppy shape?

Work the ear's double crochet into the front loop only, as the pattern directs, which naturally gives it a slight curl. Then use a touch of glue to fix it bent forward in a schnauzer-like position once it's dry.

When should I add the facial fur detail?

Add it after the eyes, nose, and ears are already in place, using your tapestry needle and yarn as the assembly steps describe. Finish by trimming any stray fur or yarn ends so the face looks neat rather than shaggy.