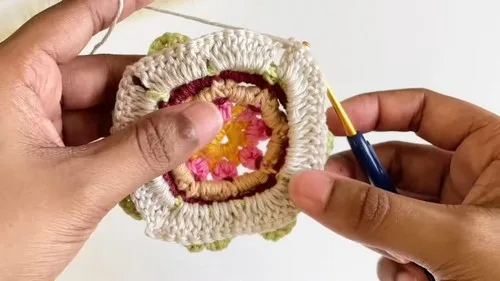
Intermediate 4-6 hours Worsted yarn

Worked on the glider, counted out loud —

Crochet 3D Lily Lotus Square Pattern For Beginners

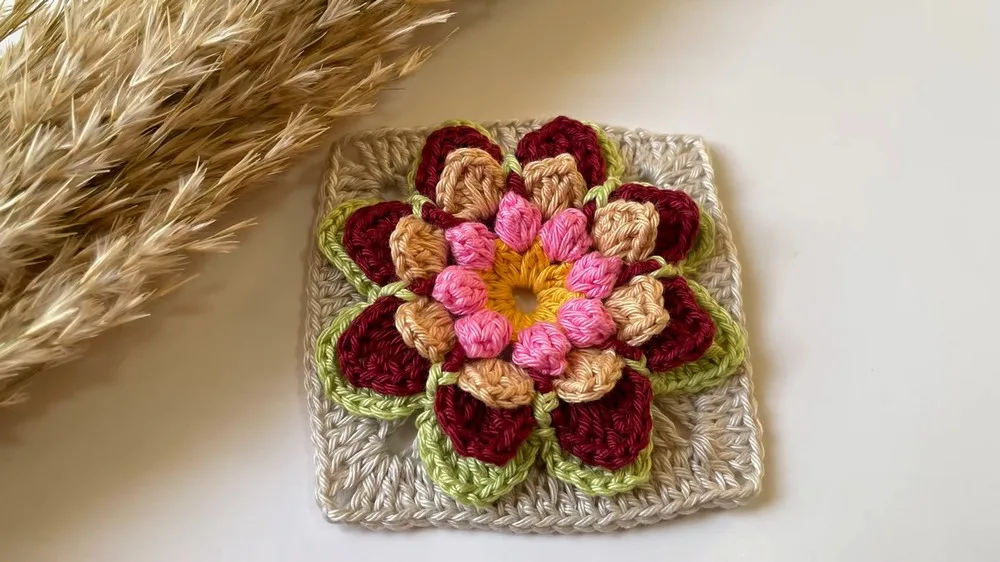
A layered cotton lotus square in six colors, worked flat with a 2.75mm hook. Good first cluster-and-puff project, about 4-6 hours.

Jump to the rounds

What this one is

You know that stretch of evening when the dishes are done and your hands still want something to do, but your brain is finished for the day. This square is built for exactly that. It's for you if you like watching a flat ring turn into something with real dimension, and if you've got a little basket of leftover cotton in six colors just waiting for a reason.

Your hands work in short, satisfying rounds here: a ring of eight clusters first, then petals built up and out from it in layers, each new round anchored into the spaces the last one left behind. Four rounds total, and most crocheters find the whole square comes together in an evening or two, depending on how many petal layers you decide to add.

Try it another way

The easiest change is how many petal layers you add. The pattern gives you the first two, worked in pink then beige, but nothing stops you from adding a third or fourth layer in a new color each time you reach a fresh round of chain-2 spaces, which builds a bigger, busier flower. You could also flip the color logic and use your brightest of the six colors for the center ring instead of yellow, so the eye lands there first before moving out through quieter petal shades. Making several of these squares in the same six colors but rotating which color takes which layer gives you a set that reads as a family rather than identical copies. Since this is worked flat and finishes with just weaving in ends, it's a natural fit for a coaster, a small appliqué stitched onto a bag or cushion, or joined edge to edge with more squares into a bigger piece once you've made a stack of them. If you want a smaller, quicker version, stop after round 3, whose puff-stitch petals already read as a complete little flower on their own without the fuller round 4 layer.
The rounds, in full

Written out, round by round

Intermediate4-6 hours2.75 mmWorsted

Bring to the porch

Everything this one takes, in the order you will reach for it.

  • Cotton yarn (6 colors)
  • 2.75mm crochet hook

Main Pattern

  1. Round 1Center, yellow yarn Start with a slip knot and chain 8; join with a slip stitch to form a ring
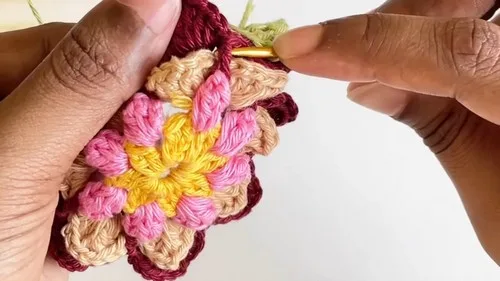
  2. Round 2Center, yellow yarn Chain 3 (counts as first double crochet), make a double crochet into the ring; chain 1; work a two double crochet cluster into the ring (to do a cluster yarn over, pull through two and start another double crochet, yarn over pull through two; you'll have three loops on the hook, then yarn over and pull through all loops); chain 1, and work another cluster into the same ring; continue the pattern, adding five more clusters so that you have a total of eight clusters in the ring; after the eighth cluster, chain 1 and join with a slip stitch into the third chain from the first chain three
  3. Round 3First Layer of Petals, pink yarn Start with a new slip knot; attach yarn with a slip stitch between two clusters; chain 3 (counts as double crochet) and make three more double crochets into the same space; drop the loop from the hook, insert the hook from the top of the beginning chain 3, pull loop through to create a puff stitch; chain 3, create another puff stitch in the next chain-1 space; continue around, creating a puff stitch in each chain-1 space between clusters; join with a slip stitch to the top of the first puff stitch and cut off the yarn
  4. Round 4Second Layer of Petals, beige yarn Start with a slip knot; join yarn with a slip stitch into any space between puff stitches; single crochet, then half-double crochet in the same space; work two double crochets, chain 2, and two more double crochets into the same space; half-double crochet, and single crochet in the same space; repeat around each space and join with a slip stitchContinue to add more layers of petals as before, each time in chain spaces created in the previous round; use different colored yarns for each layer to add contrast; follow similar steps: attaching the yarn, making varying stitches and clusters, and securing the end.

Putting it together

Step 1

After completing the required petal layers and achieving the desired look of the water lily, cut and secure all yarn ends thoroughly.

Step 2

Weave in the ends for a neat finish.

Marlene's notes

Note 01

A 2.75mm hook with cotton yarn gives the small, firm stitches this piece needs to hold its shape, so keep your tension even rather than loose, especially through the cluster round.

Note 02

Each petal layer starts with a fresh slip knot and a new color, so leave a few inches of tail on every cut end to weave in cleanly at the finish rather than trying to catch them all at once.

Note 03

Mark the first stitch or space of each round before you begin it, since the puff and petal rounds don't have an obvious visual starting point the way a plain single crochet round does.

Porch photos

Before you sit down

  • Sort your six colors of cotton yarn ahead of time and decide which one goes on the center, which on the first petal layer, and so on, so you're not hunting mid-round.
  • Read through round 2 once before you start, since the eight-cluster repeat is the part most beginners want to picture first rather than count on the fly.
  • Work a quick swatch with your 2.75mm hook and cotton to check your chain-8 ring closes snugly without a gap.
  • Have small stitch markers or scrap yarn on hand to mark the first cluster and first puff stitch in each round, since it's easy to lose track of where a round started once petals stack up.

How the hours go

Center ring and cluster round (Rounds 1-2)
about 20-30 minutes, because it's a short chain-8 ring plus eight clusters to place evenly
First layer of petals (Round 3)
about 30-40 minutes, because the puff stitches take a bit of care with the drop-and-reinsert technique
Second layer of petals and beyond (Round 4 onward)
about 1-1.5 hours per layer, because each layer has more stitches and spaces to work into, and you can repeat it for as many colors as you like

Looking after it

  • Because this is worked in cotton, you can hand wash it in cool water with a mild soap, then press out excess water in a towel rather than wringing, which keeps the puff stitches from getting misshapen.
  • Lay it flat to dry on a towel and gently reshape the petals with your fingers while damp, then store it flat or loosely folded rather than balled up, so the layers keep their lift.
FAQs

Asked on the glider

the ones that come up on the glider

Do I need to use six different colors, or can I use fewer?

The six-color plan gives you a distinct shade for the center and each petal layer, which is what makes the layering read clearly. You can use fewer colors and repeat one for two layers, though the contrast between rounds will be a little softer.

What size hook does this pattern use?

You'll work the whole square with a 2.75mm hook, held with cotton yarn throughout. That combination is what keeps the stitches small and firm enough for the petals to hold their shape.

How do I keep track of where each round starts?

Place a stitch marker in the first cluster or first puff stitch as soon as you make it, since the joining slip stitch at the end of each round is easy to misplace once petals begin overlapping. This matters most from round 3 onward.

Can I add more than the two petal layers shown in the pattern?

Yes, the pattern notes that you can keep adding layers using the same approach: attach a new color into the chain spaces left by the previous round, then work varying stitches and clusters as before. Just keep cutting and securing yarn between layers as you go.

Is this really beginner-friendly with the puff and cluster stitches?

The individual stitches are approachable, though the cluster and puff techniques do take a bit more attention than plain single or double crochet. If you've never made a puff stitch before, it helps to work the first one or two slowly and check that you're getting the right number of loops on the hook before pulling through.

What can I use the finished square for?

Because it's a flat motif with woven-in ends and no stuffing, it works well as a coaster, an appliqué sewn onto another project, or one unit in a larger joined piece if you make several. It doesn't require any special finishing beyond securing and weaving in your yarn ends.