Intermediate 6-9 Hours DK yarn

Worked on the glider, counted out loud —

Crochet Lace Shrug Top: Easy Mesh Pattern for All Sizes

Make a breezy crochet lace shrug top in DK yarn with a simple mesh stitch. Fully customizable sizing, easy panels, and a flattering open-front silhouette.

Jump to the rounds

Before you sit down

Chain a multiple of 13 for the back panel, adding four inches to your shoulder-to-shoulder measurement.

Work a half double crochet foundation row across the chain to set up the fabric base.

Begin the mesh pattern row, alternating chain spaces and double crochets to create the lacy texture.

Repeat the pattern rows until the back panel reaches your desired length.

Work the front panel using the same chain count and pattern repeat for a matching piece.

Chain and join in the round for each sleeve, then work a half double crochet setup round.

Seam the shoulders leaving a neckline gap, attach the sleeves at the armholes, and weave in ends.

What this one is

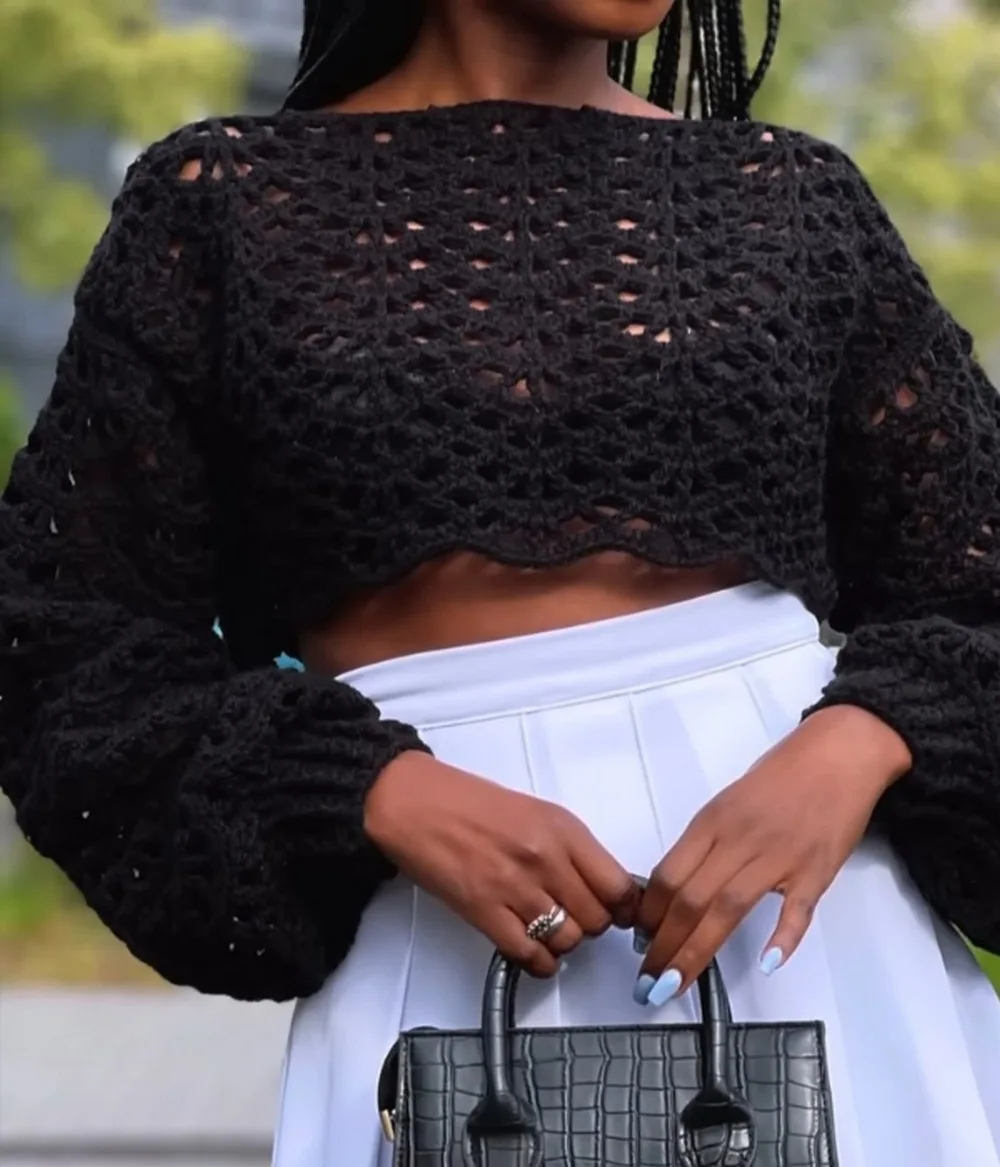
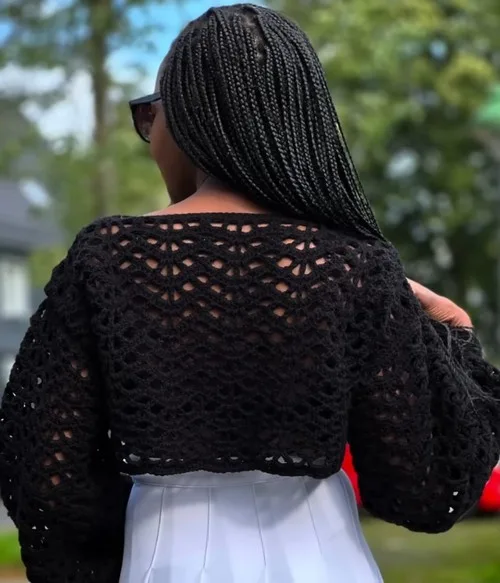
This crochet lace shrug top is built from three simple pieces — a back panel, a front panel, and two sleeves — that come together into a breezy, open-front layer with a delicate mesh texture. It's the kind of make that feels special without demanding a huge time investment, perfect for crocheters who want a wearable win they'll actually reach for. If you love pieces that look far more intricate than they really are, this one is for you.

The whole top is built on a repeating chain-space mesh created with half double crochet and double crochet stitches, so once you learn the rhythm of the pattern row, everything else falls into place. It's a great project for confident beginners ready to try garment shaping, or intermediate crocheters who want something relaxing but still engaging. Expect to spend a handful of cozy evenings — roughly six to nine hours total — bringing all three pieces to life.

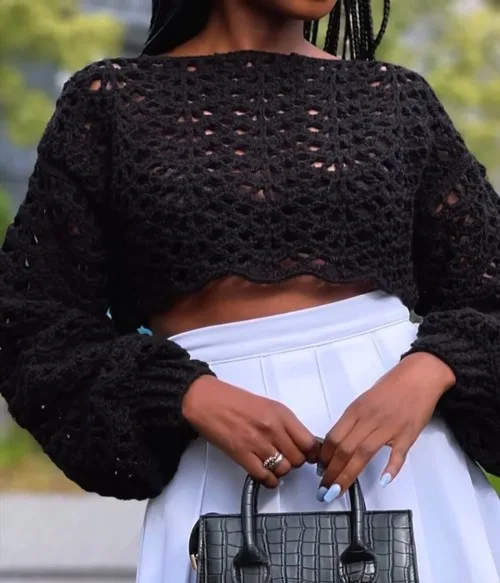
The finished shrug drapes open at the front with soft, lacy movement, thanks to the alternating chain spaces and stitches that give it that airy, see-through quality without feeling flimsy. Because the chain multiple and length are fully adjustable, it fits everyone from extra small to plus sizes with the same easy formula. It makes a lovely handmade gift for a friend who loves layering pieces, or a treat for yourself before the weather turns.
Variations

This pattern is a fantastic canvas for personalization, starting with color. Try a soft sage green or dusty rose DK yarn for a romantic, feminine feel, or go bold with a deep terracotta or mustard for an autumn-ready layer. A color-blocked version — one shade for the back and front panels, a contrasting shade for the sleeves — adds a modern, unexpected twist without any extra technique. If you want a subtle ombre effect, pick up a self-striping DK yarn and let the color shifts happen naturally as you work each row. For yarn substitutions, any DK weight works beautifully here, but consider a cotton-acrylic blend for a breathable summer version, or a mohair-blend DK for a hazier, romantic lace look in cooler months — just be sure to swatch first since drape changes significantly between fibers. Sizing is endlessly flexible: since the foundation chain works in multiples of 13, you can lengthen or shorten the chain to fit petite frames or plus sizes, and adjust the shoulder-to-shoulder length by changing your added four inches to more or less depending on how much ease you want. For length, extend the pattern repeat rows on the back and front panels for a longer, tunic-style silhouette, or stop early for a cropped bolero look. On the sleeves, you could skip the ribbed cuff entirely and finish with a simple single crochet edge for a more relaxed, flowy sleeve, or double up the front post/back post ribbing for a snugger, more fitted wrist. Adding a decorative edging in a contrasting color around the neckline or sleeve cuffs is another easy way to make this pattern feel uniquely yours.

I adore how this shrug tricks people into thinking it's way more complicated than it is! The mesh pattern — that lovely rhythm of chain three, skip one, double crochet — creates this delicate lattice look, but it's honestly just one repeating row once you get the hang of it. I love that the back panel, front panel, and sleeves all use the same foundational approach, so you're not learning three different techniques, just applying one skill three times. There's something so satisfying about watching a flat rectangle of stitches transform into a garment piece with real drape and movement. The half double crochet setup rows give it just enough structure that it doesn't feel flimsy, while the open chain spaces keep it light and breathable — ideal for those in-between weather days. And because the sizing is based on a simple multiple-of-13 chain, you can genuinely customize it for anyone's measurements without recalculating a whole pattern. It's relaxing, repetitive in the best way, and the payoff — an actual wearable, flattering top — makes every stitch worth it.

Common mistakes

  • Not swatching before committing to a chain lengthSince gauge isn't specified, work a small swatch first and measure it against your desired finished width so your multiple-of-13 chain actually produces the size you want.
  • Miscounting the foundation chain multipleCount your chains in groups of 13 as you go and mark every 13th stitch with a scrap of yarn or a stitch marker to avoid having to rip back later.
  • Losing the mesh pattern rhythm mid-rowPay close attention to the chain three, skip one, double crochet sequence — it's easy to drift off pattern, so count your chain spaces at the end of each row to confirm they match.
  • Working the turning chain inconsistentlyAlways chain three before turning in the pattern rows and treat it as your first double crochet — skipping this consistently keeps your edges straight and even.
  • Skimping on ease when measuring for the chainRemember to add four inches to your shoulder-to-shoulder measurement for the panels, and the same for the sleeve circumference, so the finished piece has room to move and drape properly.

The rounds, in full

Written out, round by round

Intermediate6-9 HoursDK

Materials

Everything this one takes, in the order you will reach for it.

  • Tape measure
  • Scissors

Hook

  • 3.5 millimeter (mm)

Yarn

  • DK yarn size, 50 grams, 133 meters each skein, acrylic (recommendation is 3.5 to 4.5 hook size, but using 3.5 for this project)

keep this to hand

Abbreviations

US crochet terms, as used in this pattern.

  1. chchain
  2. ststitch
  3. scsingle crochet
  4. hdchalf double crochet
  5. dcdouble crochet

Back Panel

  1. Round 1Foundation Row: Chain a multiple of 13 (e.g., 78 chains for extra small size). Add four inches to your shoulder-to-shoulder measurement to determine the length of your chain.
  2. Round 2Row 1: Chain two more, yarn over, skip first two chains, and half double crochet in the third chain. Continue half double crochet to the end of the row.
  3. Round 3Pattern Setup Row: Chain three, turn your work, skip next two stitches, and work a double crochet into the third. Continue the pattern as follows - Chain three, make a double crochet, skip one (for a mesh-like pattern), and double crochet in the next, repeating across the row. End the row with a double crochet in the last stitch to match the beginning.
  4. Round 4Repeat Pattern: Follow the established pattern, alternating rows of chain spaces and half double crochets to achieve the desired length.

Sleeves

Make 2
  1. Round 1Foundation: Chain 65 or to fit your arm circumference plus four inches, join to work in the round.
  2. Round 2Setup Round: Half double crochets around.
  3. Round 3Pattern Round: Alternate between chain spaces and double crochets to match the body pattern, decreasing stitches for the cuff.
  4. Round 4Cuff: Switch to front post and back post double crochet stitches to create ribbing at the wrist.

Front Panel

  1. Round 1Repeat steps from the back panel to create an identical piece.

Assembly

Step 1

Place panels with the wrong sides facing each other.

Step 2

Stitch the shoulders together, leaving an 11-inch gap for the neckline.

Step 3

Attach sleeves to the body at the armholes.

Step 4

You may choose to add single crochet edging around the neckline for a finished look.

Step 5

Weave in all ends.

Important notes

Note 01

Always work a gauge swatch before starting, since gauge isn't specified in the pattern — this is the only way to guarantee your finished measurements match your body.

Note 02

The foundation chain must be a multiple of 13 plus your added four inches of ease, so double-check your math before starting the very first chain.

Note 03

Keep your back panel and front panel identical in stitch count and row count so the shoulders align neatly when it's time to seam them together.

Note 04

When sewing the shoulder seams, leave an 11-inch gap centered for the neckline — measure this gap before stitching so it doesn't end up off-center.

Note 05

Place panels with wrong sides facing each other before seaming, which keeps the seam allowance tidy and hidden on the inside of the finished top.

Note 06

If you want a more finished neckline, add a round of single crochet edging after assembly — this step is optional but gives a polished, boutique-quality look.

Note 07

Gauge: Not specified in the text, always important to create a swatch to match the pattern gauge for sizing correctness.

Note 08

Pattern Overview: The top is created starting from the back panel, working in multiple of 13 chains. It involves creating a mesh pattern with double and half-double crochets and repeating the pattern for uniformity across the garment. This same approach is repeated for the front panel and sleeves, maintaining consistency in the pattern throughout.

More photos

FAQs

Asked on the glider

the ones that come up on the glider

What size can I make with this pattern?

Because the pattern is based on a multiple-of-13 foundation chain, you can size it up or down for anyone from extra small to plus sizes by adjusting your starting chain length and adding your own ease. Always swatch first to confirm your gauge matches your target measurements.

Can I use a different yarn weight than DK?

DK weight with a 3.5mm hook gives the drape this pattern is designed for, but you could substitute a similar light worsted if you adjust your hook size accordingly. Just know that changing yarn weight will affect your finished measurements, so swatch and recalculate your chain length.

How much yarn do I need to make the whole top?

That depends on your finished size, but each skein is 50 grams and 133 meters, so plan for several skeins across the back panel, front panel, and both sleeves. It's a good idea to buy one extra skein of your main color in case you need it for edging.

Do I need to know how to read a mesh crochet pattern?

Not necessarily — the mesh is built from a repeating sequence of chain three, skip one stitch, and double crochet, which becomes intuitive after just a couple of rows. If you're comfortable with basic double and half double crochet, you'll pick up the rhythm quickly.

How do I attach the sleeves to the body?

Once your back panel, front panel, and sleeves are complete, you'll stitch the shoulder seams first, leaving the 11-inch neckline gap, then attach the sleeves at the armholes. Weaving in all your ends afterward gives the whole piece a clean, finished look.