Intermediate 4-6 hours Bulky yarn

Worked on the glider, counted out loud —

Crochet gosling comforter amigurumi pattern

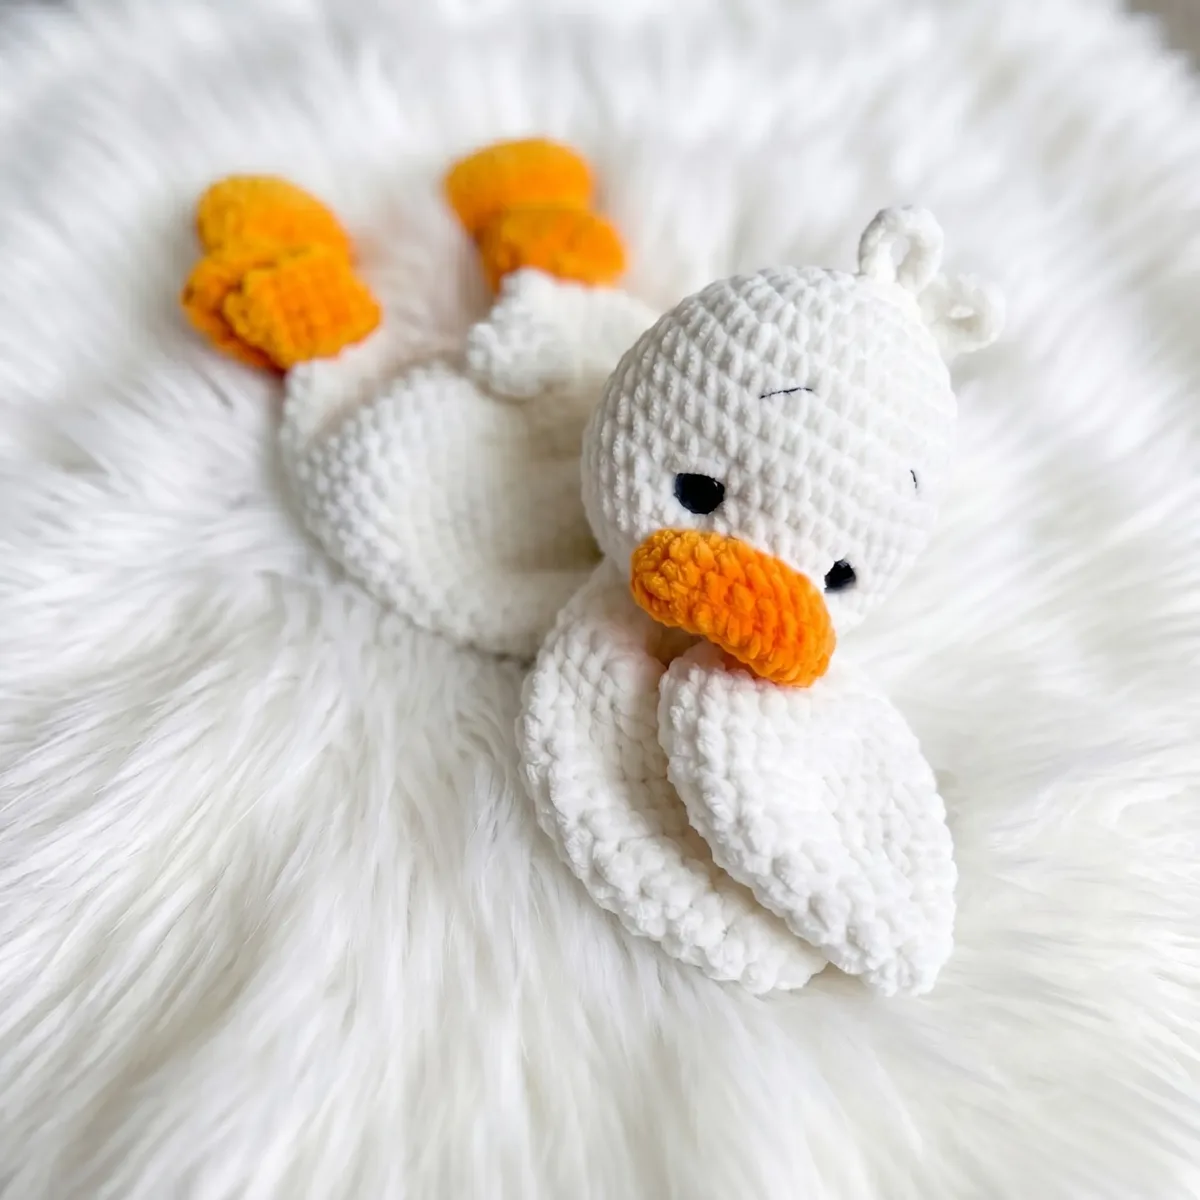
A plush crochet gosling with topknot and wings, worked in one evening's sitting for confident beginners.

Jump to the rounds

What this one is

You know the kind of evening this is for -- the one where you want your hands busy but your mind loose, working toward something soft enough to hand to a baby without a second thought. This gosling comforter is built for exactly that: a plush, huggable little bird with a topknot, tucked wings, and a shape that sits well in small arms. It suits anyone stitching a nursery gift or filling out a shelf of woodland friends.

Your hands spend most of the time in a continuous spiral, shaping the head over fifteen rounds before the beak, topknot, and wings come together as separate little pieces you sew on at the end. The legs get worked first and joined into the body, so there's a satisfying moment where two separate pieces become one. Set aside four to six hours total, likely across two or three sittings, since the plush yarn and stuffing steps ask you to slow down here and there.

The rounds, in full

Written out, round by round

Intermediate4-6 hours4.5 mmBulky

Bring to the porch

Everything this one takes, in the order you will reach for it.

Yarn

  • Himalaya Dolphin Baby — main color (80308) and contrast color (80316); bulky/plush weight

Hook

  • 4.5mm crochet hook

Safety eyes

  • 14mm, 1 pair

Stuffing

  • Polyester fiberfill
  • Tapestry needle
  • Scissors

Optional

  • Thin yarn in a matching tone for sewing the head to the body (e.g., a smooth DK weight in a coordinating color)

Optional

  • Blush powder or felt for cheeks; embroidery thread for lashes

Head

  1. Round 16 sc in mr (6)
  2. Round 2Inc in each st around (12)
  3. Round 3(1 sc, inc) × 6 (18)
  4. Round 4(2 sc, inc) × 6 (24)
  5. Round 5(3 sc, inc) × 6 (30)
  6. Round 6(4 sc, inc) × 6 (36)
  7. Round 7(5 sc, inc) × 6 (42)
  8. Rounds 8–1042 sc each round (3 rounds) (42)
  9. Round 11(6 sc, inc) × 6 (48)
  10. Rounds 12–1548 sc each round (4 rounds) (48)Insert safety eyes between Rnds 12–13, approximately 8 stitches apart.
  11. Round 16(6 sc, dec) × 6 (42)
  12. Round 17(5 sc, dec) × 6 (36)Stuff the head firmly at this point.
  13. Round 18(2 sc, dec) × 9 (27)
  14. Round 19(1 sc, dec) × 9 (18)
  15. Round 20Dec × 9 (9)Close the opening and fasten off. Weave in the end securely.

Beak

  1. Round 1Chain 9. Starting in the 2nd ch from hook: 7 sc across, then 4 sc in the last ch; continue along the opposite side: 6 sc, then 4 sc in the last ch (21)
  2. Round 2Inc, 7 sc, inc, 1 sc, inc, 8 sc, inc, 1 sc (25)
  3. Round 325 sc (25)Fasten off and leave a long tail for sewing. Sew the beak on after completing the face shaping/sculpting.

Topknot

Insert your hook into the stitch adjacent to the magic ring at the top of the head.

Chain 8. Sl st into the magic ring at the crown of the head. Chain 10. Sl st into the next stitch. Chain 8.

Fasten off and hide all ends inside the head.

Embroider lashes and add blush to cheeks as desired.

Wings (make 2)

  1. Round 16 sc in mr (6)
  2. Round 2Inc × 6 (12)
  3. Round 312 hdc (12)
  4. Round 4(1 hdc, inc) × 6 (18)
  5. Round 5(2 hdc, inc) × 6 (24)
  6. Round 6(3 hdc, inc) × 6 (30)
  7. Rounds 7–930 hdc each round (3 rounds) (30)
  8. Round 10(3 hdc, dec) × 6 (24)
  9. Round 11(2 hdc, dec) × 6 (18)
  10. Round 12(1 hdc, dec) × 6 (12)
  11. Round 1312 hdc (12)

Fold the wing in half and work 3 dec through both layers to close. Fasten off and leave a long tail for sewing, or hide the end inside the wing if you plan to crochet the wings directly into the body.

Tail

  1. Round 16 sc in mr (6)
  2. Round 2Inc × 6 (12)
  3. Rounds 3–412 sc each round (2 rounds) (12)
  4. Round 5(1 sc, inc) × 6 (18)Lightly stuff the tail with fiberfill.Fold the tail flat and work 9 sc through both layers to close. Fasten off and leave a long tail for sewing.

Legs & Body (make 2 legs, then join)

  1. Round 1Chain 9. Starting in the 2nd ch from hook: 7 hdc across, 4 hdc in last ch; continue along opposite side: 6 hdc, 4 hdc in last ch (21)
  2. Round 2Inc, 7 hdc, inc, 1 hdc, inc, 8 hdc, inc, 1 hdc (25)
  3. Round 325 hdc (25)
  4. Round 4Dec, 8 hdc, dec × 2, 9 hdc, dec (21)
  5. Round 5(1 hdc, dec) × 7 (14)
  6. Round 6Dec, 4 hdc, dec × 2, 2 hdc, dec (10)

Lightly stuff the foot/leg base if desired.

  1. Rounds 7–2710 hdc each round (21 rounds) (10)
  2. Round 28Inc × 10 (20)
  3. Round 29(8 hdc, inc × 2) × 2 (24)
  4. Round 3024 hdc (24)On the first leg: fasten off with a sl st. On the second leg: do not fasten off — continue to join.

Body (continued from legs)

  1. Round 3124 hdc across first leg, 1 hdc in the sl st join, 24 hdc across second leg, 1 hdc in the sl st join (50)In the next round, increases should fall at both sides and at the front and back center.
  2. Round 32Inc, 11 hdc, inc, 12 hdc, inc, 11 hdc, inc, 12 hdc (54)
  3. Round 33(8 hdc, inc) × 6 (60)
  4. Rounds 34–3560 hdc each round (2 rounds) (60)
  5. Round 36(8 hdc, dec) × 6 (54)
  6. Round 37(7 hdc, dec) × 6 (48)
  7. Round 38(6 hdc, dec) × 6 (42)
  8. Rounds 39–4042 hdc each round (2 rounds) (42)
  9. Round 41(5 hdc, dec) × 6 (36)
  10. Round 42(4 hdc, dec) × 6 (30)
  11. Round 4330 hdc (30)
  12. Round 44(3 hdc, dec) × 6 (24)
  13. Round 45(2 hdc, dec) × 6 (18)

Rnd 46 is where wings are crocheted in — position them so they fall evenly on each side. If sewing the wings on afterward, work Rnds 46–47 without modification.

  1. Rounds 46–4718 hdc each round (2 rounds) (18)Work a few slip stitches to shift your position to the exact center of the back before fastening off.Fasten off and leave a long tail for sewing the head to the body.

Putting it together

Step 1

Attach the head: Position the head centered on top of the body opening. Using a thin yarn in a matching tone (a smooth DK weight works well with plush yarn), sew through both layers all the way around, securing firmly.

Step 2

Sculpt the face: Once the head is attached, use your preferred method to create face sculpting/tension definition.

Step 3

Sew the beak: Pin the beak onto the face below the eyes and sew it in place using the long yarn tail.

Step 4

Attach the wings: If not crocheted in, sew one wing to each side of the body at Rnd 45–46, oriented so the folded edge faces downward.

Step 5

Attach the tail: Sew the tail to the back lower portion of the body, centered between the legs.

Step 6

Finishing: Embroider eyelashes using dark embroidery thread. Add blush to the cheeks if desired. Hide all remaining yarn ends securely inside the toy.

Marlene's notes

Note 01

Work in a continuous spiral throughout and keep a stitch marker on the first stitch of every round, since there's no slip stitch join to mark your place for you.

Note 02

Stuff firmly and evenly, especially the head, which needs to be well filled before you close it up and move on to sculpting the face.

Note 03

Use a smooth, thin DK-weight yarn in a coordinating tone to sew the head to the body -- the bulky plush yarn itself is too thick for a clean, secure seam.

Note 04

This pattern uses US crochet terminology.

Note 05

Gauge: approximately 14 hdc × 16 rounds = 10cm × 10cm with Himalaya Dolphin Baby on a 4.5mm hook.

Note 06

Wings may be crocheted in and attached as you work Rnd 46–47, or sewn on afterward — both methods are described.

Note 07

Managing plush yarn: Himalaya Dolphin Baby is wonderfully soft but can be tricky to see your stitches. Work under good lighting and count every stitch at the end of each round. Using a contrasting color stitch marker is especially helpful with fluffy yarn.

Note 08

Stuffing as you go: Don't wait until the very end to stuff. The head should be filled firmly before Rnd 18, and the feet and tail benefit from light stuffing before they're closed. This ensures a well-shaped finished toy.

Note 09

Joining the legs cleanly: When joining the two legs in Rnd 31, take a moment to align them correctly before working across. Both feet should point in the same direction and the legs should be parallel. A locking stitch marker in the join point helps keep things straight.

Note 10

Sewing the head: Because plush yarn can fray and slip, using a smoother DK-weight yarn in a matching color to sew the head to the body gives a much more secure and tidy join than using the plush yarn itself.

Note 11

Wing placement: Before sewing or crocheting in the wings permanently, pin them to both sides of the body and step back to check that they're balanced. Asymmetric wings are the most common finishing mistake on bird amigurumi — a minute of pinning saves a lot of unpicking.

Before you sit down

  • Check you have both the main color and contrast color of Himalaya Dolphin Baby on hand, since the beak and topknot use the contrast against the body's main shade.
  • Have your 14mm safety eyes ready before you start the head, since they typically get placed partway through the shaping, not at the very end.
  • Work a quick foundation ring with your 4.5mm hook to confirm your 6 sc in mr sits snug and even before committing to all fifteen rounds of the head.
  • Read through the Legs & Body section first so you understand how the two legs get worked separately, then joined, before the body continues upward.

How the hours go

Head
about 60-75 minutes because it runs fifteen rounds and needs careful stuffing before you close it
Legs & Body plus continued body
about 90-120 minutes because you're working two legs, joining them, and continuing another fourteen rounds upward
Beak, topknot, and wings
about 45-60 minutes because each small piece has its own shaping before you sew it

Looking after it

  • Hand wash in cool water with a gentle detergent, since the plush bulky yarn and polyester fiberfill both hold up better without a washing machine's agitation.
  • Reshape the head and body while damp, then lay flat to dry away from direct heat so the stuffing settles evenly and the fibers keep their loft.
FAQs

Asked on the glider

the ones that come up on the glider

What skill level is required for this gosling comforter pattern?

This pattern is suited to intermediate crocheters who are comfortable working in continuous spirals, increasing and decreasing, and joining separate components. Beginners who have completed a few basic amigurumi projects will find it a great next step. The most challenging part is joining the legs to begin the body, but the instructions guide you through it clearly.

When do I attach the safety eyes?

You'll want them in place partway through the head rounds, well before you finish stuffing and closing the top. Check the head's round-by-round instructions for the exact point, since safety eyes need to go in while you can still reach inside to secure the backs.

Why does the pattern tell me to use a different yarn to sew the head on?

The bulky plush main yarn is too thick to pull a neat, secure seam through both layers. A smooth DK weight in a matching tone gives you a cleaner join and less bulk at the neck.

Do I need to join each round or can I keep going in a spiral?

Work in a continuous spiral throughout unless a specific round tells you otherwise. Keep a stitch marker on your first stitch of each round so you don't lose track of where you started.

How firmly should I stuff the pieces?

Stuff firmly throughout, and pay particular attention to the head, which should be well filled before you close the final rounds. A firmly stuffed head holds its shape much better once you start sculpting the face.

Are the wings crocheted directly onto the body or sewn on separately?

The wings can go either way -- you can crochet them in as you go or make them separately and sew them on afterward. The pattern notes mention both options, so pick whichever fits your working style.