Beginner 3-5 hours Worsted yarn

Worked on the glider, counted out loud —

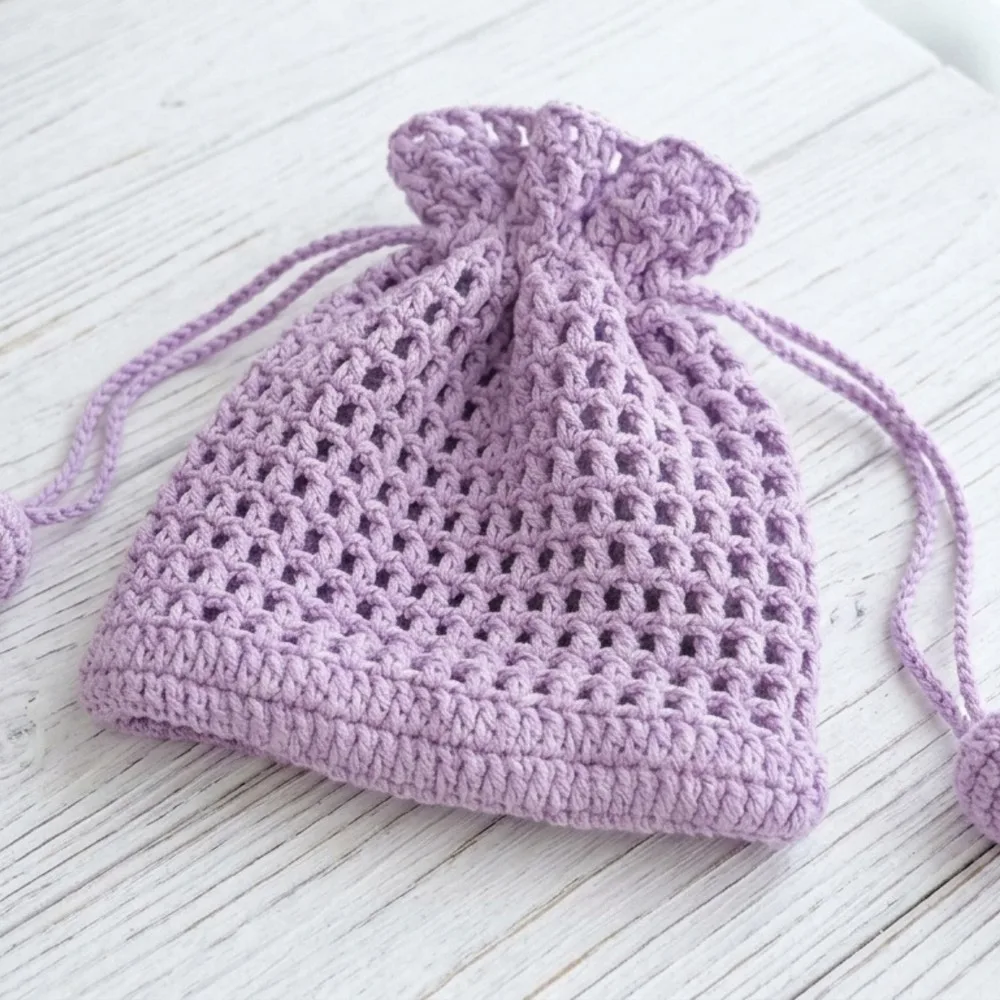
Crochet drawstring pouch with decorative ball ties

A beginner-friendly mesh pouch with drawstring ball ties, ready in about 3-5 hours of easy dc and mesh crochet.

Jump to the rounds

What this one is

This little pouch is the kind of project you reach for on a quiet evening when you want something small and satisfying in your hands. It suits a beginner who has never worked in the round before, as well as anyone who wants a fast, pretty project to keep loose coins, lip balm, or a phone charger tidy. The finished pouch works just as well as a gift as it does a treat you make for yourself.

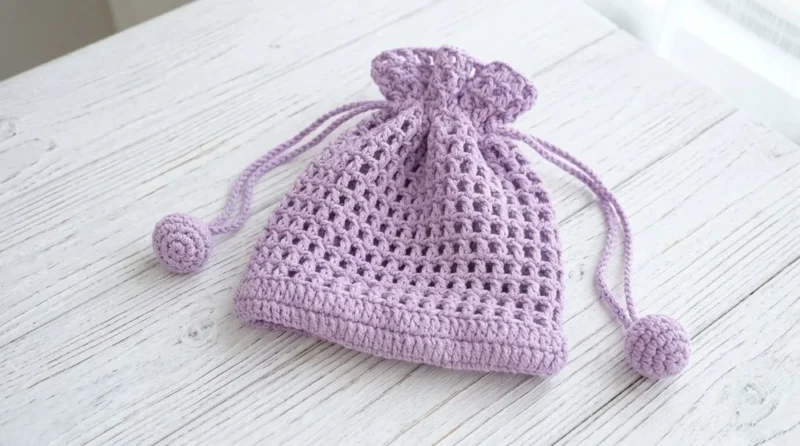
Your hands start with a foundation chain worked on both sides to make eighty stitches in the round, then move into solid dc rounds before opening into a mesh pattern of dc and chain-1 spaces that becomes the eyelets for your drawstring. After the body, you turn to two small magic-ring balls worked in sc increases, stuff them, and sew them to the drawstring ends. All told, expect somewhere around three to five hours from first chain to last woven end, spread across a couple of relaxed sessions.
Try it another way

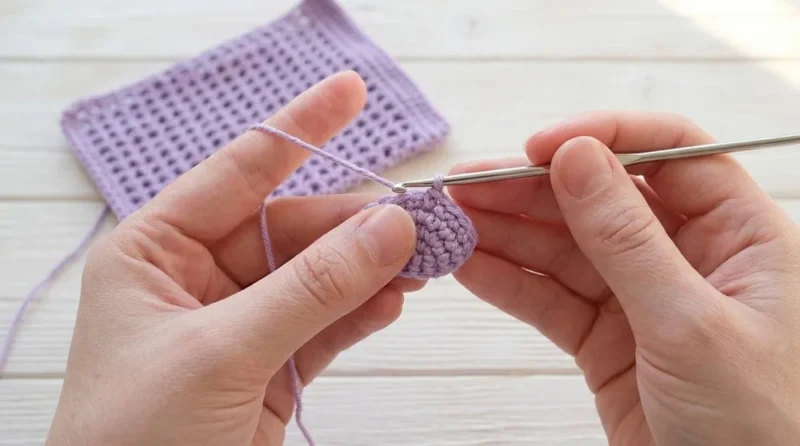
There's a real pleasure in watching the foundation chain turn into a doubled ring of eighty dc just by rotating the work instead of turning it, no seams, no guessing. The mesh round is the heart of the whole project: skipping a stitch, chaining one, and landing a dc in the next builds an open, stretchy lattice that does double duty as decoration and drawstring eyelets. Then the mood shifts entirely for the two decorative balls, worked from a magic ring through increase rounds until you have a firm little sphere to stuff and stitch on. Weaving the drawstrings through the mesh in opposite directions is the final small trick that makes the closure open and shut smoothly, and it is the kind of detail that makes a simple pouch feel considered.

The rounds, in full

Written out, round by round

Beginner3-5 hours2.5 mmWorsted

Bring to the porch

Everything this one takes, in the order you will reach for it.

Yarn

  • Four ply milk cotton yarn (or similar soft worsted weight yarn)

Hook

  • US B/1 (2.5 mm) crochet hook

Notions

  • Scissors
  • Yarn needle (for weaving ends and attaching balls)
  • Stuffing for balls (optional: fiberfill, cotton, scrap yarn)
  • Stitch marker (optional)
  • Measuring tape

Foundation

Ch 42 .

  1. Round 1Starting in the 3rd ch from hook , dc in this ch. Dc in each ch across ( 40 dc ).Do NOT turn; instead, rotate work to the other side of the foundation chain.(40)
  2. Round 1Continued On opposite side, dc into foundation ch (same as first dc), then continue dc in each ch across — 40 dc .

You should now have 80 dc in the round.

Body Rounds

  1. Round 2Ch 2 (counts as first dc). Dc in each stitch around ( 80 dc ). Join with sl st to first dc.
  2. Round 3Ch 4 (counts as dc + ch-1). Skip 1 st, dc in next st, ch 1 , skip 1 st, dc in next st, ch 1, repeat across (creates mesh/eyelet round).Repeat this sequence 20 times; total sets for the round: 20 (dc, ch 1) groups.Join with sl st to 3rd ch of starting ch-4.
  3. Round 4Ch 4 (counts as dc + ch-1). Dc in dc of previous round, ch 1. Continue mesh pattern: in each dc, make dc, ch 1; repeat for 20 sets.Join with sl st to starting chain.
  4. Rounds 5–20Rep Rnd 4 mesh pattern , continuing dc in dc, ch 1 in between, for remaining rounds (total 20 rounds).Join each round with sl st to starting chain.Finish pouch body: Ch 1, fasten off. Weave in yarn tail with yarn needle.

2. Drawstring

Drawstring (make 2): Ch 110 (adjust length for your preference).

Fasten off, weave in the yarn tail.

3. Decorative Balls (make 2)

Ball Instructions:

  1. Round 1Begin with a magic ring. Ch 1, sc 6 in ring. Pull tight, join with sl st.
  2. Round 2Ch 1, 2 sc in each st around ( 12 sc ). Join with sl st.
  3. Round 3Ch 1, (sc in next st, 2 sc in next st) rep 6 times ( 18 sc ). Join with sl st.
  4. Rounds 4–5Ch 1, sc in each st around ( 18 sc ). Join with sl st.
  5. Round 6Ch 1, (sc in next st, sc2tog) rep 6 times ( 12 sc ). (sc2tog = single crochet two stitches together; decrease)Join with sl st.
  6. Round 7Ch 1, (sc2tog) rep 6 times ( 6 sc remains). Join with sl st. Stuff ball with fiberfill (or similar).Fasten off leaving a tail. Use yarn needle to sew closed remaining stitches.

Putting it together

Step 1

Weave both drawstrings through the mesh round (Rnd 4 or your preferred round).

Step 2

Thread decorative ball onto end of each drawstring , sew securely.

Step 3

Pull drawstrings to close pouch.

Step 4

Attach balls either, leaving tails inside for neatness.

Marlene's notes

Note 01

The US B/1 (2.5 mm) hook is small, so keep an eye on tension; stitches that are too tight will make the mesh eyelets hard to weave a drawstring through later.

Note 02

A stitch marker on the first stitch of each round is worth using through the mesh rounds, since the ch-1 spaces make it easy to lose your place.

Note 03

Stuff the decorative balls before you close the final round, and adjust your increase or decrease rounds slightly if you want a fuller or slimmer shape.

Note 04

Approximately 42 stitches wide; the rounds as directed yield a mini pouch suitable for daily essentials.

Note 05

If you are new to magic rings or working in the round, practice both techniques on a swatch before starting the decorative balls.

Porch photos

Before you sit down

  • Check that your four-ply milk cotton (or similar worsted weight) yarn amount is enough to cover the pouch body plus two decorative balls before you start the foundation chain.
  • Place a stitch marker at the start of the round after the foundation, since losing count is easy and the pattern depends on holding steady at 80 sts.
  • Work a small swatch in dc first to see how your US B/1 (2.5 mm) hook and your tension play together, since looser stitches make a softer, more flexible pouch.
  • Read through Rnd 3 before you begin it, since the skip-1, dc, ch-1 mesh sequence is the part beginners find easiest to miscount.

How the hours go

Foundation and Body Rounds
about 1.5 to 2 hours because 80 dc build up quickly once the doubled foundation is joined
Mesh eyelet rounds
about 1 hour because the skip-1, dc, ch-1 sequence across 20 sets per round takes a slower, careful pace
Decorative Balls (make 2)
about 1 to 1.5 hours because each ball works through six rounds of increases before stuffing and closing

Looking after it

  • Since this pouch is worked in milk cotton, hand wash it gently in cool water and avoid wringing, which can distort the mesh eyelets.
  • Lay the pouch flat to dry and reshape the mesh rounds gently with your fingers while damp, then store it unstuffed with the balls tucked inside so the drawstring holes keep their shape.
FAQs

Asked on the glider

the ones that come up on the glider

Can I use a different yarn than the four-ply milk cotton the pattern calls for?

Yes, any similar soft worsted weight yarn will work well with the US B/1 (2.5 mm) hook. Just expect your finished pouch to come out slightly larger or smaller depending on how the yarn's thickness compares to the original four-ply cotton.

Why does the pattern say to rotate the work instead of turning it after Row 1?

Rotating rather than turning lets you work down the opposite side of the same foundation chain, which is how you get from 40 dc to a full 80 dc round without a seam. It keeps the whole foundation joined and continuous from the very first round.

What happens if I lose count and my round is not exactly 80 stitches?

Stop and count carefully rather than pushing on, since the mesh round depends on an even number of skip-and-dc repeats to land evenly. It is much easier to fix a miscount right after the base round than several rounds into the mesh.

Do I really need the mesh eyelet round, or can I skip it?

The mesh round is what creates the eyelets your drawstring passes through, so skipping it means you will have nowhere to weave the drawstring later. If you want a plainer look, work fewer mesh rounds rather than none at all.

How full should I stuff the decorative balls?

Stuff them before you close the final round for the fullest, roundest look, and you can adjust the increase or decrease rounds slightly if you prefer a softer or firmer ball. A firmly but not tightly stuffed ball tends to hold its shape best on the drawstring ends.

Why weave the two drawstrings in opposite directions?

Weaving them in opposite directions through the mesh round means pulling both ends closes the pouch evenly, and pulling them apart opens it just as easily. It is a small trick, but it makes the closure much smoother to use.