Intermediate 4-6 Hours Worsted yarn

Worked on the glider, counted out loud —

Crochet Dragon Tail Scarf Pattern with Glitter Yarn

Learn to crochet a stunning dragon tail scarf with glitter yarn using double crochets and a magic ring start. Free step-by-step pattern for cozy fantasy style.

Jump to the rounds

Before you sit down

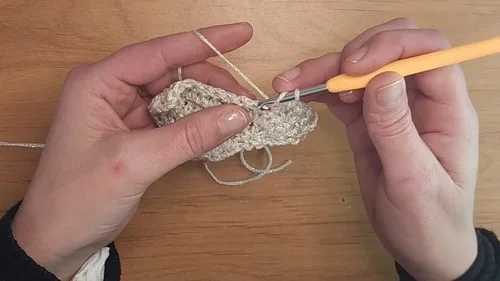
Begin by forming a small magic ring to create the tightly gathered starting point of the dragon's tail tip.

Chain 3 to stand in as your first double crochet, then fill the ring with four total double crochets.

Pull the magic ring closed snugly so the tip forms a neat, gap-free point before moving forward.

Chain 3 and turn your work, then increase with 2 double crochets in that very first stitch.

Work single double crochets across the middle three stitches to keep the row's center even and flat.

Finish the row with 3 double crochets worked into the last stitch to mirror the increase on the other side.

Chain 3, turn again, and skip the first stitch before repeating the increase-middle-increase rhythm on each new row.

Continue through all six rounds of the Main Pattern, letting the piece widen gradually into its signature tapered tail shape.

What this one is

This Crochet Dragon Tail Scarf is one of those patterns that stops people in their tracks. Starting from a tiny magic ring, it grows outward in dramatic double crochet increases that mimic the layered scales of a dragon's tail, especially striking when worked in shimmering glitter yarn. It's perfect for fantasy fans, cosplayers, or anyone who wants a scarf that feels more like wearable art than a basic accessory. If you love pieces with a story built into every stitch, this one is calling your name.

The pattern leans on double crochet increases and decreases worked from a central magic ring foundation, so you'll want to be comfortable with basic double crochet before diving in. Turning at the end of each row and tracking your stitch placement (skipping that first stitch, working multiples into the last) keeps things interesting without being overwhelming. Expect to spend somewhere between four and six hours total, making this a satisfying weekend project you can finish in one or two cozy sittings with your favorite show playing in the background.

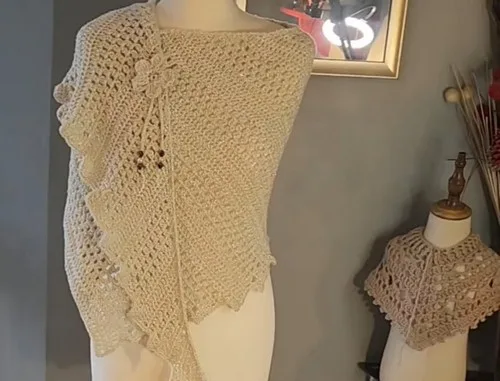
The finished scarf has a distinctive tapered, curling shape reminiscent of an actual dragon's tail, with a scaled texture that catches the light beautifully thanks to the glitter yarn. It drapes with a bit of weight and shine that feels luxurious against a sweater or jacket. Because it's so unique, it makes a fantastic gift for the fantasy reader, gamer, or renaissance-faire enthusiast in your life — something they genuinely won't already own.

Variations

The base pattern is gorgeous as-is, but there's so much room to make it your own. For a color-shift dragon effect, try working the first two rounds in a deep emerald green glitter yarn, transitioning to a shimmering gold or bronze for the final rounds — this mimics a dragon's tail fading from body to tip. If you want a moodier look, swap Zeeman's Partie for a black-and-silver mixed skein, or try Mandala for subtle color gradients without the sparkle overload. For a bigger, cozier wrap-style scarf, simply work an extra one to two skeins and repeat the final two increase rounds twice more before closing off, adding roughly 8-10 extra double crochets per side for a longer, wider tail. Want it smaller and cuter, maybe for a child or as a cowl accent? Use a 4.0mm hook instead of 4.5mm and reduce your yarn to just under two skeins for a more compact, tighter-gauge finish. Seasonal twist: work in deep red and orange glitter yarn for an autumn dragon look, or icy blue and white for a frost-dragon vibe that's stunning against a winter coat. You could also add a fringe or tassel to the wider end using leftover yarn scraps, giving extra movement and drama to the tail tip. For texture lovers, alternate rounds of glitter yarn with a plain worsted weight in a matching shade — this tones down the shine while keeping that signature scaled shape intact, and it's a great way to stretch your glitter skeins further if you're working with a limited stash.

There's something so satisfying about starting this scarf from nothing but a magic ring and watching it unfurl into a full dragon tail shape row by row. I love how the increases at the beginning and end of each row do all the heavy lifting for that curved, tapering silhouette — no fussy shaping techniques required, just careful double crochet placement. Working with glitter yarn like Zeeman's Partie takes this from 'nice scarf' to 'did you actually make that?!' territory; the way the sparkle catches light along each scale-like row is genuinely magical. I also appreciate that the pattern keeps you engaged: chaining 3 to count as your first double crochet, skipping that first stitch on the return, tucking multiple stitches into the last one — it never feels repetitive in a boring way. By the time you close off that final round, you'll have something that looks far more advanced than the actual skill required. It's the kind of project that gets stopped-in-the-street compliments, and honestly, that's my favorite kind of make.
Common mistakes

  • Closing the magic ring too looselyPull the tail yarn firmly and check that all four double crochets have cinched tightly around the center before securing with a knot; weave in the end through the closed ring for extra reinforcement.
  • Forgetting to chain 3 at the startAlways chain 3 before turning and mentally count it as stitch one; place a stitch marker in the top of that chain-3 if you tend to lose track.
  • Skipping the instruction to skipAfter your chain 3 and turn, deliberately move past the very next stitch before working your first double crochet — a stitch marker on that skipped stitch helps confirm you did it correctly.
  • Placing only 1-2 double crochets inCount out loud as you work into the last stitch of the row, and don't move on until you've completed all 3 double crochets in that same spot.
  • Working increases in the wrong stitchUse a stitch marker to flag the very first and very last stitch of each row before you start increasing, removing and replacing it as you progress.
  • Using a yarn weight much lighterStick with a worsted-weight glitter yarn similar to the 100g/250m Partie yarn, or if substituting, choose a yarn with comparable yardage and weight and adjust your hook size slightly if the fabric feels too loose or stiff.

The rounds, in full

Written out, round by round

Intermediate4-6 Hours4.5 mmWorsted

Materials

Everything this one takes, in the order you will reach for it.

  • 4.5 mm crochet hook
  • Yarn needle
  • Stitch marker
  • Scissors
  • 2–3 skeins of glitter yarn (used: "Partie" by Zeeman, 100g ≈ 250m each)

keep this to hand

Abbreviations

US crochet terms, as used in this pattern.

  1. chchain
  2. ststitch
  3. sl stslip stitch
  4. scsingle crochet
  5. dcdouble crochet
  6. mrmagic ring

Main Pattern

  1. Foundation RowCreate a magic ring Chain 3 (counts as first double crochet) Make 4 double crochets into the ring Close the magic ring
  2. Row 1(Increase Side - Double Crochet) Chain 3, turn In the same stitch, make 2 double crochets Make 1 double crochet in each of the next 3 stitches In the last stitch, make 3 double crochets
  3. Row 2(No Increase Side - Double Crochet) Chain 3, turn Skip the first stitch Make 1 double crochet in each stitch until 3 remain In the next stitch, make 2 double crochets Make 1 double crochet in the next stitch In the last stitch, make 2 double crochets
  4. Row 3(Increase Side - Double Crochet) Chain 3, turn In the same stitch, make 2 double crochets Make 1 double crochet in each stitch to the end
  5. Row 4(No Increase Side - Double Crochet) Chain 3, turn Skip the first stitch Make 1 double crochet in each stitch until 3 remain In the next stitch, make 2 double crochets Make 1 double crochet in the next stitch In the last stitch, make 2 double crochets
  6. Row 5(Increase Side - Textured Stitch) Chain 3, turn In the same stitch, make 2 double crochets Chain 1 Skip 1 stitch, in next stitch make 2 unfinished double crochets, yarn over and pull through all loops (group stitch), chain 1 Repeat until 4 stitches remain Make 2 unfinished double crochets, close In the next stitch, make 2 unfinished double crochets, close
  7. Row 6(No Increase Side - Textured Stitch) Chain 3, turn Make 1 double crochet in the next stitch In the next group, make 2 unfinished double crochets, close Chain 2 Skip chain space and group, in next chain space make 2 unfinished double crochets, close, chain 1 Repeat until 3 stitches remain Make 2 unfinished double crochets, close Chain 1 In next stitch, make 2 double crochets In the last stitch, make 2 double crochets
  8. Row 7(Increase Side - Textured Stitch) Chain 3, turn In the same stitch, make 2 double crochets Chain 1 Skip 1 stitch, make 2 unfinished double crochets in next stitch, close, chain 1 Repeat until 3 stitches remain Make 2 unfinished double crochets, close Chain 1 In next group, make 1 unfinished double crochet In following group, make 1 unfinished double crochet, close In next stitch, make 1 unfinished double crochet In last stitch, make 1 unfinished double crochet, close
  9. Row 8(No Increase Side - Textured Stitch) Chain 3, turn Make 1 double crochet in next stitch In next group, make 2 unfinished double crochets, close Chain 2 Skip chain space and group, in next chain space make 2 unfinished double crochets, close, chain 1 Repeat until 3 stitches remain Make 2 unfinished double crochets, close Chain 1 In next stitch, make 2 double crochets In last stitch, make 2 double crochetsRepeating Sequence Repeat Rows 1–8 until your piece reaches the desired length. Finish with a set of 4 double crochet rows.

Assembly

Step 1

If on the right side, do not cut the yarn

Step 2

Chain 1

Step 3

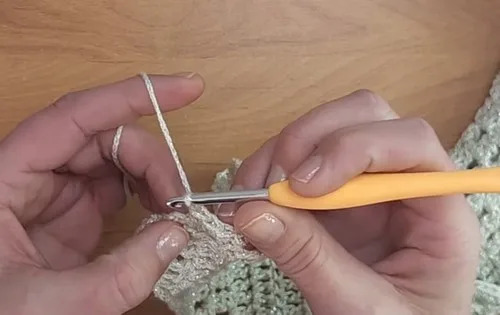
Make 1 single crochet in each double crochet along the top edge

Step 4

Along the side:

Step 5

For each of the first 3 rows in a section, make 3 single crochets

Step 6

On the 4th row, make 2 single crochets, then make an unfinished single crochet and join it with one in the corner

Step 7

Repeat for textured sections

Step 8

Continue this along the entire edge

Step 9

Slip stitch to join, chain 1, cut yarn, and weave in ends

Important notes

Note 01

💡 Keep a stitch marker on hand specifically for flagging your first and last stitch of each row, since the increases in those spots are what create the dragon tail's signature taper.

Note 02

💡 Glitter yarns like Partie can be a bit slippery and prone to splitting, so work at a slightly slower pace and consider a hook with a smoother throat to reduce snagging.

Note 03

💡 Since you'll need 2-3 skeins total, buy from the same dye lot when possible — glitter placement and base color can vary slightly between batches, which shows more in a large, exposed scarf.

Note 04

💡 Weave in your ends as you go rather than saving them all for the finish; glitter yarn tails can be trickier to hide invisibly once the whole piece is complete.

Note 05

💡 Block your finished scarf gently with a cool iron on a low setting or a light steam, which helps the double crochet rows lie flat and enhances the visible scale texture.

Note 06

💡 Optional embellishment: pin a decorative flower or brooch onto the finished scarf for a personalized touch, as suggested in the original pattern.

More photos

FAQs

Asked on the glider

the ones that come up on the glider

How much glitter yarn do I actually need for this scarf?

The original pattern used 2-3 skeins of Zeeman's Partie yarn at 100g/250m each, so plan for roughly 500-750 meters total. Buying an extra skein is a smart move if you want to extend the length or avoid running short mid-round.

Can I make this scarf without glitter yarn?

Absolutely — any worsted weight yarn will work beautifully with this pattern's double crochet structure. You'll lose some of the shimmer effect, but the tapered dragon tail shape will still shine through in the stitch pattern itself.

Why do I skip the first stitch after turning?

Skipping that first stitch compensates for the height of your chain-3, which already acts as your first double crochet of the row. This keeps your edges from flaring out unevenly as the piece grows.

Is this pattern good for a beginner crocheter?

It's better suited to someone with some double crochet experience under their belt, since the increases at both ends of each row require careful stitch counting. If you've completed a few double crochet projects already, you should be able to follow along comfortably.

How long does the finished scarf typically end up?

Length depends on how many rounds and repeats you work beyond the core Main Pattern, since the pattern is designed to be extended with additional glitter yarn skeins. Most makers find that 2-3 skeins produces a nicely wearable, generously long scarf.