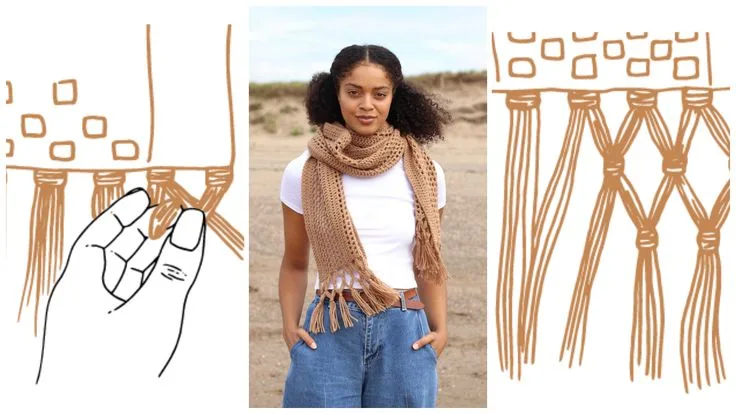
Beginner-Intermediate 2-4 Hours Worsted yarn

Worked on the glider, counted out loud —

Crochet Cross Scarf Pattern: Cozy & Versatile Accessory

Learn to crochet a cross scarf with this cozy, versatile pattern perfect for gifting. Simple stitches create a stylish accessory for any season or wardrobe.

Jump to the rounds

What this one is

This crochet cross scarf pattern creates a beautifully simple yet eye-catching accessory that's as fun to make as it is to wear. With its distinctive crossed design, this scarf stands apart from basic rectangular styles, offering a bit of visual interest without demanding advanced skills. It's perfect for crocheters who want a satisfying project that results in something genuinely unique — whether you're stitching for yourself or crafting a heartfelt handmade gift for someone special in your life.

Built around a compact three-round main pattern, this scarf keeps things refreshingly straightforward. You'll work with basic stitches and a standard crochet hook, making it an ideal project for confident beginners or intermediate crocheters looking for something quick between bigger projects. Expect to spend somewhere around two to four hours from start to finish, depending on your gauge and yarn choice — making it very doable in a single cozy evening or over a lazy weekend.

Once complete, you'll have a soft, textured scarf with a distinctive crossed silhouette that drapes beautifully and layers easily over coats, sweaters, or even a simple tee. It's lightweight enough for transitional weather yet cozy enough to add warmth on chillier days. Because it's so quick to whip up, this pattern is fantastic for last-minute gifts, holiday exchanges, or building up a little handmade stash of scarves in different colorways for every mood and outfit.
Variations

There's something so satisfying about a pattern that delivers big style with minimal fuss, and this crochet cross scarf absolutely delivers. I love how the main pattern's three rounds come together so quickly — you get that instant gratification of watching the crossed shape emerge almost immediately, which keeps the momentum going from start to finish. It's the kind of project where you can sit down after dinner and have a finished (or nearly finished) scarf before bed. What really makes this pattern special is its versatility — the crossed silhouette gives it a fashion-forward edge that elevates it beyond a basic scarf, yet the construction stays simple enough that you're not fighting with complicated stitch patterns or fussy shaping. I also love that it's endlessly customizable; swap yarn weights, change up colors, or adjust the size, and you've got a completely different accessory every time. Whether I'm making one for myself or wrapping one up as a gift, this pattern always feels like a little win — quick, cozy, and impressively cute for how little effort it actually takes.

Common mistakes

  • Using a hook size that doesn't matchAlways check the yarn label for the recommended hook size range and do a quick swatch first. If your fabric feels too dense, size up; if it's too loose or holey, size down until the drape feels right for a scarf.
  • Losing track of which round you'rePlace a stitch marker at the start of each round and move it up as you go. Even with a short pattern, this simple habit prevents miscounts that can throw off the crossed shape.
  • Pulling stitches too tight, especiallyConsciously relax your tension every few stitches and check that the fabric lies flat as you work. If puckering appears, gently block the finished scarf with a light steam or damp cloth to even things out.
  • Not accounting for how the crossedBefore diving into the full project, work a small sample of the main pattern to see how the crossing affects the overall dimensions, then adjust your yarn amount or round repeats accordingly.
  • Choosing a yarn that's too slipperyStick with a smooth, well-plied worsted weight yarn (like a basic acrylic or wool blend) for your first attempt. Save the fancy novelty yarns for once you're comfortable with the pattern's flow.
  • Skipping a gauge check and ending upSince this pattern is compact, small tension differences really show. Measure your work after the first round and compare it to your intended finished size before continuing further.

The rounds, in full

Written out, round by round

Beginner-Intermediate2-4 Hours5 mmWorsted

Materials

Everything this one takes, in the order you will reach for it.

  • Crochet hook (5mm or 6mm recommended, adjust based on your yarn thickness)
  • Yarn — soft wool or bulky yarn, chosen based on the season and desired texture
  • Measuring tape (to check your foundation chain length)
  • Yarn needle (for weaving in ends)
  • Scissors (to cut your yarn)
  • Optional: extra yarn for fringe on the scarf ends

keep this to hand

Abbreviations

US crochet terms, as used in this pattern.

  1. dcdouble crochet

Main Pattern

Foundation Chain Step by step: Make a Foundation Chain — start by making a foundation chain of multiple of 4 stitches plus 2. The total length will depend on how long you want your scarf to be. A typical scarf length is about 60 inches, but you can adjust this as needed. Double Check the Length — use a measuring tape to ensure the chain is the desired length before moving forward with the pattern.

  1. Row 1Turn your work, then double crochet (DC) into the fourth chain from the hook. Continue across the row with DCs into each stitch until the end of the row.
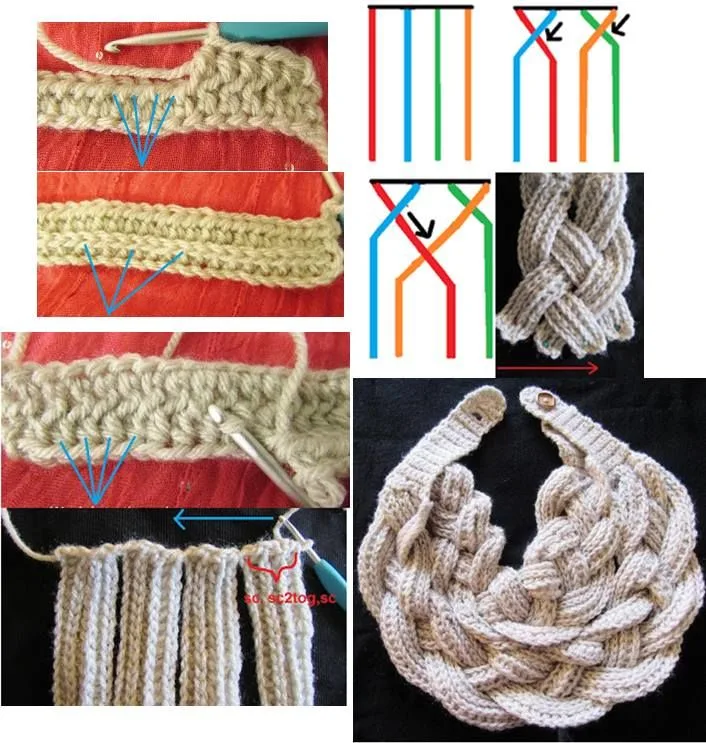
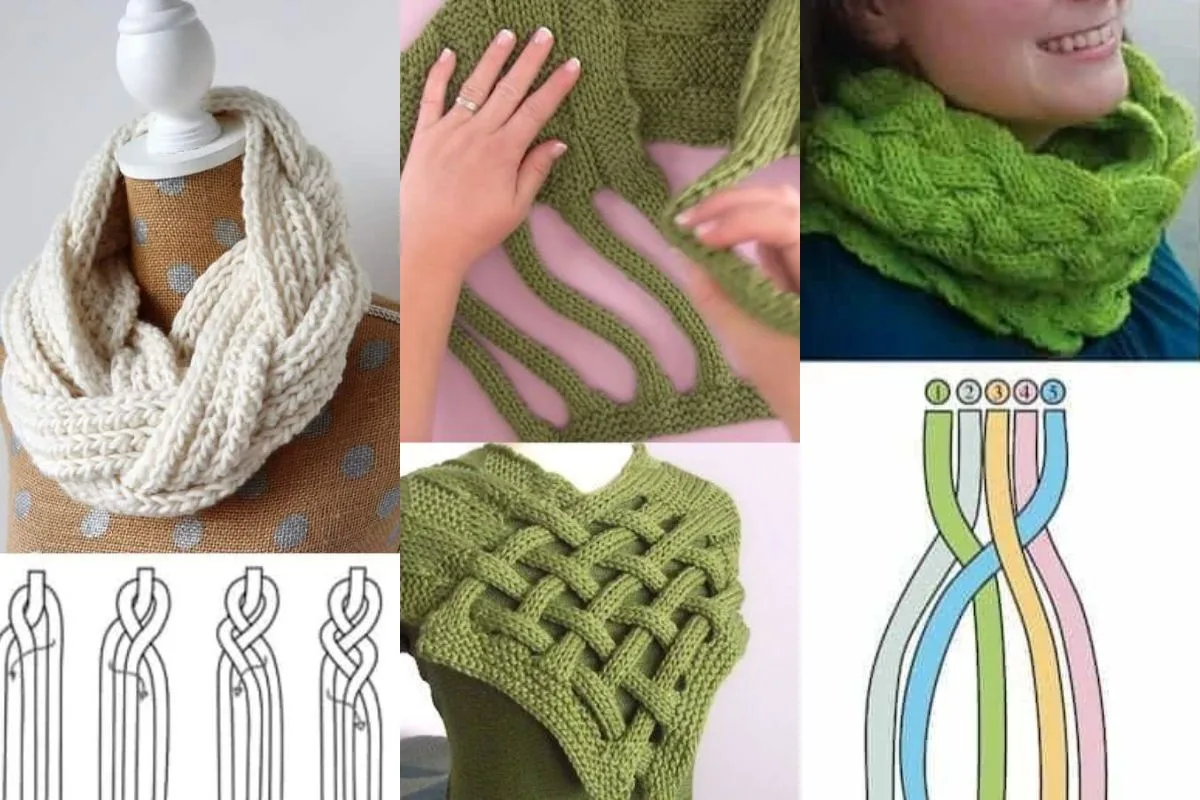
  2. Row 2Turn your work and chain 3 (this counts as your first DC). Skip the first stitch and cross over the next stitch with a double crochet worked into the next stitch, then into the stitch you skipped earlier. This forms the crossed pattern. Repeat the process across the row.
  3. Row 3 and BeyondContinue crocheting in this cross stitch pattern, repeating rows of DC with crossed stitches. Make sure to follow the pattern until your scarf reaches the desired width and texture.

Tip : If you want your scarf to be wider, continue adding more stitches to the foundation chain. For a narrower scarf, reduce the number of foundation stitches.

Finishing Step by step: Finish Your Scarf — once your scarf has reached the desired length, fasten off your yarn and cut the excess. Weave in Ends — use a yarn needle to weave in any loose ends. This ensures your scarf remains neat and tidy. Pro Tip — if you'd like a fringe on the ends of your scarf, simply cut pieces of yarn and tie them along the edges of the scarf for a decorative look.

Important notes

Note 01

💡 Choose a standard 5mm or 6mm crochet hook — this is typically recommended for most scarf projects, but adjust the size depending on your yarn's thickness for defined stitches without a stiff, board-like fabric.

Note 02

💡 Because the pattern only has 3 rounds, take a moment to read through the entire round before starting so you understand how the crossing forms and can spot the shape as it develops.

Note 03

💡 Keep a small stitch marker handy to mark your starting stitch each round — it takes seconds but saves you from unraveling and recounting later.

Note 04

💡 If you're using multiple colors to highlight the cross detail, weave in loose ends as you go rather than leaving them all for the end, which keeps your project neat and manageable.

Note 05

💡 Block your finished scarf gently with steam or a light misting of water and let it dry flat — this helps the crossed sections lie smooth and enhances the overall drape.

Note 06

💡 For gifting, consider adding a small handmade tag or care card noting the yarn fiber content, especially if you used wool or a wool blend that needs gentle washing.

Note 07

💡 Once finished, style your scarf your way: drape it over your shoulders for an elegant fall or winter look, wrap it around your neck for cozy warmth, tie it in a knot for an effortless style, or wear it as a shawl for a more formal touch at parties or events.

More photos

FAQs

Asked on the glider

the ones that come up on the glider

How long does it take to crochet this cross scarf?

Most crocheters finish this pattern in about 2 to 4 hours since the main pattern is only 3 rounds. Your exact time will depend on your yarn weight, hook size, and personal stitching speed.

What size hook should I use for this pattern?

A 5mm or 6mm hook is typically recommended for most scarf projects — adjust the size depending on your yarn's thickness. If you prefer a chunkier scarf, size up with a bulkier yarn.

Can I make this scarf bigger or smaller?

Yes, adjusting your hook size and yarn weight is the easiest way to change the finished dimensions without altering the round count. You can also make your foundation chain longer or shorter (in multiples of 4 stitches plus 2) to adjust the scarf's length — a typical scarf is about 60 inches, but you can adjust this as needed.

Is this pattern good for beginners?

Absolutely — with just 3 rounds in the main pattern, it's approachable for confident beginners who know basic stitches. It's a great confidence-building project before moving on to more complex scarf designs.

What's the best yarn to use for this cross scarf?

A soft wool or bulky yarn works beautifully for extra warmth, offering good stitch definition and a cozy feel — choose based on the season and the texture you want. Avoid overly slippery or novelty yarns for your first attempt so the crossed shape stays easy to track.