Intermediate 4-6 hours Worsted yarn

Worked on the glider, counted out loud —

Little crochet cat keychain amigurumi pattern

A pocket-size crochet cat keychain for confident beginners, worked in worsted yarn over about 4-6 hours.

Jump to the rounds

What this one is

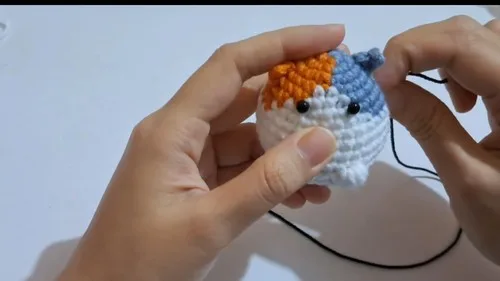
This little cat is made for whoever needs a small bright thing clipped to a bag or a set of keys. Maybe it's a gift for a friend who loves cats more than is strictly reasonable, or a way to use up scraps of yarn in colors that don't belong anywhere else. It doesn't ask for a special occasion. It just asks for a quiet stretch of time and a lap to work in.

Your hands will spend most of their time on single crochet, with increases and decreases doing the shaping work around a body built in nine rounds. There's a bit of color changing to keep you alert, two small ears to attach by feel, and a tail worked separately and sewn on near the end. All told, you're looking at something you can finish in an evening or split comfortably across two.

Try it another way

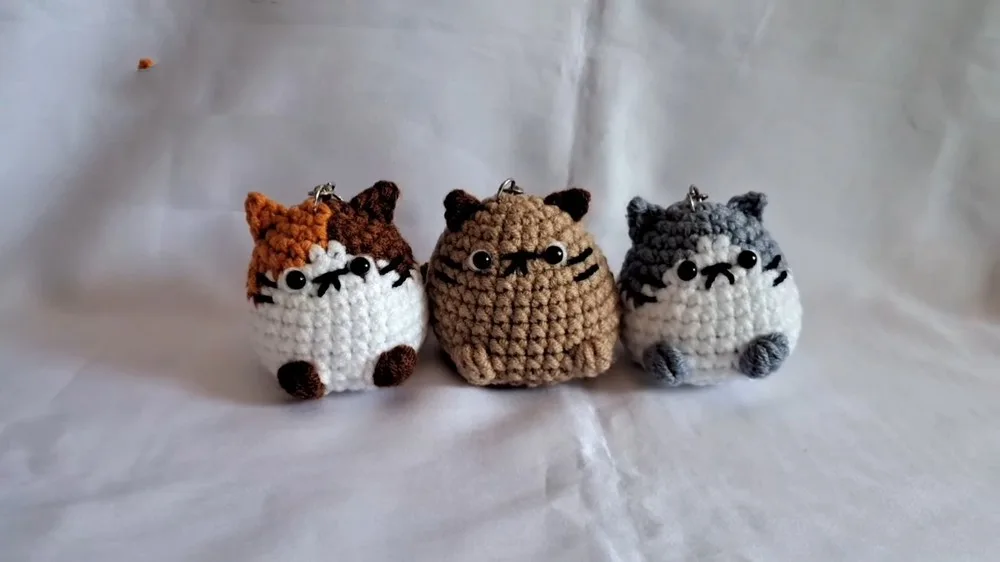
This little cat is easy to make your own once you understand where the shaping happens. If you want a smaller keychain, work the body to fewer rounds before you start closing it off, since the tapering in the later rounds can begin earlier than round nine if you're after something more pocket-size. For color placement, treat the white or contrast patches in the body rounds as a template rather than a rule: swap where the 2 sc in white falls, or trade the orange and gray balance in that round for two colors of your own. If you're making several as gifts, pick a different main color for each body while keeping the ear and tail yarn consistent, so the set reads as a family rather than duplicates. You can also skip the keychain hardware entirely and sew on a loop of yarn or a small ring instead, turning the same pattern into a bag charm or a tiny ornament for a shelf. The ears, picked up right from the body between specific rounds, are also forgiving: shifting their placement slightly changes the whole expression of the face, so don't worry about matching the instructions to the exact stitch if your yarn or hook runs a little different from mine.

What I like about this one is how much shape comes from so little fuss. The body does all its rounding and tapering in just nine rounds, so you feel the increases and decreases working fast, almost like watching a balloon find its form. The color changes in the body rounds give you a reason to pay attention round by round instead of crocheting on autopilot, and placing that patch of white partway through feels like a small puzzle each time. The ears are their own quiet trick, picked up right from the body with a slip knot and a tiny chain, which means no separate pieces to match up later. By the time you're stitching the tail and tucking in the safety eyes, you've used nearly every basic technique this craft has to offer, just in miniature.
The rounds, in full

Written out, round by round

Intermediate4-6 hours5 mmWorsted

Bring to the porch

Everything this one takes, in the order you will reach for it.

  • Yarn in various colors for the body, ears, and additional details.
  • Crochet hook (size not specified, recommend using a hook that matches your yarn weight).
  • Stitch marker.
  • Plastic safety eyes (5 mm recommended).
  • Polyester filling for stuffing.
  • Yarn needle for weaving in ends and assembling parts.

Body

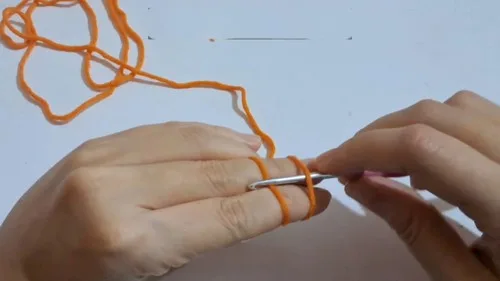
  1. Round 1Magic ring, 3 sc, change color, 3 sc in ring, pull yarn to tighten the ring.
  2. Round 2(Inc in each stitch) around. [change yarn color as described in your instructions]For Round 3: Sc, inc repeat around. Change yarn color accordingly.
  3. Round 4Start with 8 sc in first color, 2 sc in white, and finish with 8 sc in the second color.
  4. Round 52 sc, inc, repeat. Change yarn color as required. For Round 6: 9 sc in orange, 6 sc in white, 9 sc in gray.
  5. Round 73 sc, inc, repeat in orange, white, and gray, respectively, changing colors as indicated.For Round 8 to Round 11: work in sc in each stitch around.
  6. Round 12Start with 14 sc, make a bobble stitch, then 3 sc, another bobble stitch, and finish with 11 sc.
  7. Round 13Sc around. For Round 14: Start decreasing by doing 3 sc, dec, repeat around.
  8. Round 152 sc, dec, repeat around.
  9. Round 16Final Round Sc, dec, repeat around. Then, stuff the cat and close the opening.

Ears (Make 2)

Begin with a slip knot.

Insert the slip knot on a stitch between Round 4 and Round 5.

  1. Round 1Chain 3, skip the first chain, starting from the second chain, make a slip stitch then a single crochet in the last chain.
  2. Round 2For attaching, make another slip stitch on a stitch between R2-R3.Repeat the same for the second ear but change the starting and ending rows as desired for symmetry.

Tail

  1. Round 1Start with a magic ring.
  2. Round 26 sc in ring.(6)
  3. Round 3Sc in each stitch around from the 2nd to the 8th row. You can change colors between rows as desired.Leave a long tail for sewing and attach between Round 13 and Round 14.

Putting it together

Step 1

Weave in all loose ends.

Step 2

Attach keychain hardware as desired.

Marlene's notes

Note 01

Use a hook sized to your yarn weight rather than a specific number, since the pattern leaves hook size open and worsted-weight yarn generally wants a snug, amigurumi-tight gauge.

Note 02

Keep your stitch marker moving up one round at a time, since the body's shaping relies on you knowing exactly which round you're on, especially around the color-change sections.

Note 03

Stuff the body gradually as you close the final rounds rather than all at once, so the shape stays even and the safety eyes sit at the point you intended.

Porch photos

Before you sit down

  • Lay out your yarn colors ahead of time so you know which shade goes where before you reach the color-change rounds in the body.
  • Have your stitch marker ready from round one, since the body is worked in continuous rounds and losing your place is easy without one.
  • Read through Round 4 and Round 6 before you start, since these are the rounds with the white or contrast-color patches and benefit from a plan.
  • Check that your plastic safety eyes (5 mm) and your filling are within reach before you finish the body, so you're not stopping mid-round to dig through a bag.

How the hours go

Body
about 2-3 hours because it's nine rounds with several color changes to track
Ears and tail
about 1 hour because the ears are picked up directly from the body and the tail is a small separate piece
Finishing and assembly
about 30-45 minutes because it's weaving in ends, placing the eyes, stuffing, and attaching the keychain hardware

Looking after it

  • Hand wash the finished cat gently in cool water if it needs cleaning, since stuffed amigurumi with safety eyes and polyester filling don't hold up well in a washing machine.
  • Reshape the body and ears while damp and let the piece air dry fully away from direct heat, then store it somewhere it won't get squashed, so the shaping you built round by round stays put.
FAQs

Asked on the glider

the ones that come up on the glider

Do I need to use the exact colors listed for the body rounds?

No, the colors in the sample rounds are just a guide for how the shaping and contrast patches sit together. Swap in any yarn you have, as long as you keep track of which round calls for a color change.

Why does the pattern not specify a hook size?

The pattern asks you to match your hook to your yarn weight rather than giving one fixed size. For amigurumi, go a size or two smaller than the yarn label suggests, so your stitches stay tight enough to hold the stuffing in.

How do I know where exactly to attach the ears?

The ears are picked up with a slip knot on a stitch between Round 4 and Round 5, then secured again between Round 2 and Round 3. Use your stitch marker to count rounds carefully so both ears land in a matching, symmetrical spot.

Can I skip the safety eyes and embroider the face instead?

Yes, you can embroider eyes with yarn or thread if you'd rather not use plastic safety eyes. Just keep in mind the pattern is written with 5 mm safety eyes in mind, so adjust placement to suit your own stitches.

What is the tail attached to, and when do I add it?

The tail is worked separately from a magic ring and then sewn on using its own long tail of yarn, attached between Round 13 and Round 14 of the body as noted in the pattern. Add it after the body is stuffed and closed, so you can judge the placement against the finished shape.

How much yarn do I actually need for this?

The materials list keeps it general, calling for yarn in various colors for the body, ears, and details without giving exact yardage. Since the body is only nine rounds and the ears and tail are small, a single small skein in each color you plan to use should be more than enough.