Intermediate 4-6 hours DK yarn

Worked on the glider, counted out loud —

Crochet caramel purin box with drips, cherry and cream

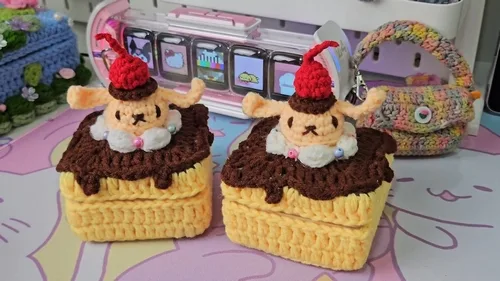
A caramel purin box to crochet over a wooden box, drips, cherry and cream included, about 4-6 hours for confident beginners.

Jump to the rounds

What this one is

This one is for the evening you want something sweet on your desk without turning on the oven. The Caramel Purin Box turns a plain wooden box into a tiny pudding dessert, cherry, cream, and caramel drips included. It suits the maker who likes small keepsakes and gifts, the friend who collects novelty trinket boxes, or you, if you just want proof that yarn and glue can make a dessert that never melts.

Your hands work rounds, not rows, first building the bottom's expanding corners, then wrapping a strip around the sides in back loops only. The front loops you left behind catch brown yarn for drips, slip stitches for short ones, taller stitches for the long drips down the sides. Cream, cherry, and beaded sprinkles finish the lid. Plan for about 4 to 6 hours total, since the glue gun work and small parts go faster once the box pieces actually fit.

Try it another way

If your box is not exactly 8cm x 8cm x 4.5cm, you are already covered, since the Bottom of the Caramel just keeps adding 2 dc, chain 2, 2 dc corner rounds until the square meets your lid. Measure as you go rather than counting rounds blindly. For color, swap the caramel yellow for a deep brown and you have a chocolate purin instead, or keep the base pale and change only the cherry and bead colors for different sprinkles. You could also use the same bottom and sides construction on a round box instead of a square one, adjusting the corner sets to however many the lid needs. If you want a softer finished piece rather than a rigid box topper, skip the wooden box altogether and stuff the bottom and top pieces with the stuffing listed in the materials, sewing them together into a soft caramel-colored pillow instead of gluing them to wood. The drip stitches, slip stitch for short drips, single and half double crochet for long ones, are easy to lengthen or shorten if you want drippier or neater sides.
The rounds, in full

Written out, round by round

Intermediate4-6 hours3.5 mmDK

Bring to the porch

Everything this one takes, in the order you will reach for it.

Yarns

  • Milk cotton yarn recommended. Colors needed: main yellow for caramel, another shade of yellow for accents, brown, red for the cherry, and white for cream.
  • Crochet Hook : 3.5 mm.

Additional Tools

  • Sewing needle, stitch marker, scissors, a box (wooden suggested, dimensions 8cm x 8cm x 4.5cm), screwdriver (for box modification), stuffing, beads, glue gun.

Bottom of the Caramel

Continue working additional rounds, matching the work to the size of the box; adjust the number of rounds as needed for a perfect fit.

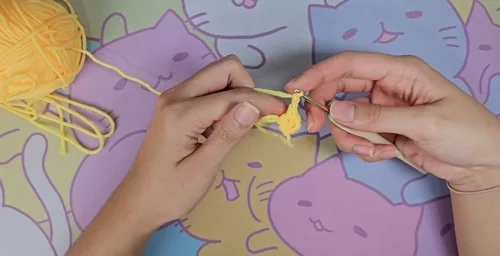
  1. Round 1Start with a magic ring; chain 3 (counts as first dc), 2 dc into the ring, chain 2; repeat (3 dc, chain 2) around the ring to make four corner sets; pull tail to tighten the ring; slip stitch in the top of the chain 3 to close.
  2. Round 2and following: 2 dc, chain 2, 2 dc in every chain-2 space from the previous round, expanding every corner.

Cherry

Use red yarn.

Fill with stuffing and close once the desired size is reached.

  1. Round 1Start with a magic ring, 6 sc into the ring. (6)
  2. Round 2Increase in each round until the desired size is reached.

Caramel Drips (Top Part)

Switch to brown yarn for this part.

  1. Round 1Crochet the top with one less round than the bottom for a tighter fit.
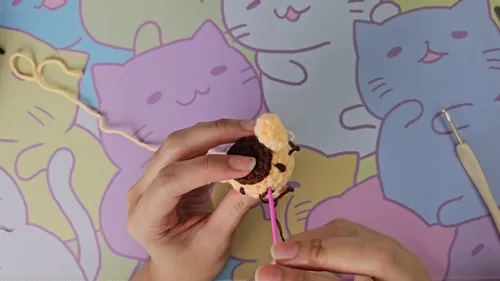
  2. Round 2Using the loops left in front from working in back loops only, crochet drips by varying the stitches (slip stitches for short drips, single crochet and half double crochet for longer drips).

Cream

Switch to white yarn.

  1. Round 1Work a series of single crochets and increases to form a circle that fits on top of the caramel box.
  2. Round 2Add textural details by crocheting in front loops or making popcorn stitches for a whipped cream effect.

Sides of the Box

  1. Round 1Work in back loops only to start shaping the sides, ensuring a snug fit over the box; continue until the crocheted piece covers the sides of the box appropriately.

Putting it together

Step 1

Attach the crocheted top and bottom to the box using a glue gun for a secure fit.

Step 2

Add the cream and cherry on top of the box lid; optionally sew or glue them for permanence.

Step 3

Sew on or glue any additional embellishments like beads for sprinkles to complete the caramel purin look.

Marlene's notes

Note 01

The 3.5mm hook paired with milk cotton gives a firm, dense fabric, which is what you want for a piece that gets stretched over a wooden box and glued.

Note 02

Working back loops only on the Sides round is not just texture, it is the setup for the drip round, so keep that loop structure clean and even as you go.

Note 03

Rounds on the Bottom of the Caramel are sized to your box, not to a fixed count, so check the fit against the actual box after each round rather than trusting a set number.

Porch photos

Before you sit down

  • Have your wooden box on hand (8cm x 8cm x 4.5cm or close to it) and a screwdriver nearby in case it needs any hardware removed before you start wrapping it in crochet.
  • Read through both rounds of the Bottom of the Caramel before you pick up your hook, since round 2 and beyond depend on matching the piece to your actual box rather than a fixed count.
  • Keep a stitch marker on hand for the Sides of the Box round, since it is worked in back loops only and it helps to mark where that round starts and ends.

How the hours go

Bottom of the Caramel
about 1 to 1.5 hours, because the corner increases need checking against the box after each round
Sides and Caramel Drips
about 1.5 to 2 hours, because the back-loop-only round and the varied drip stitches take a slower, careful pace
Cream, Cherry, and Assembly
about 1.5 to 2 hours, because small pieces, a glue gun, and bead sprinkles all need patience even though each piece itself is quick

Looking after it

  • Since the crocheted pieces are glued to a wooden box, skip washing altogether and just spot clean the milk cotton yarn with a barely damp cloth if it picks up dust or fingerprints.
  • Keep the finished box out of direct sun and damp rooms, since both the milk cotton yarn and the wood base hold their shape and color best stored dry and away from heat.
FAQs

Asked on the glider

the ones that come up on the glider

What if my box is not exactly 8cm x 8cm x 4.5cm?

That is fine, the Bottom of the Caramel is worked to size, not to a set round count. Just keep adding 2 dc, chain 2, 2 dc corner rounds and check it against your lid until it fits.

Do I really need the screwdriver?

Only if your box has hinges, a clasp, or other hardware you need to remove before wrapping it in crochet. If your box is a simple open lid and base, you can skip that step.

What yarn works instead of milk cotton?

Any smooth cotton or cotton-blend yarn held at a similar gauge to the 3.5mm hook should behave the same way, since the pattern leans on firm, even stitches rather than a specific brand.

How do I control how long the drips are?

Use slip stitches for short drips and single or half double crochet for longer ones, right there in the front loops from the back-loop-only round. Mixing all three along the same round gives the most realistic dripping look.

Can I skip the wooden box?

You can, stuffing the bottom and top pieces with the stuffing listed in the materials instead of gluing them to wood. You will lose the sturdy box shape but gain a soft caramel-colored pillow instead.