Intermediate 4-6 hours Worsted yarn

Worked on the glider, counted out loud —

Crochet camping lantern ornament pattern with handle

A cozy stuffed crochet lantern ornament for confident beginners, ready in about 4-6 hours from magic circle to handle.

Jump to the rounds

What this one is

This little lantern ornament is for anyone who loves the golden glow of an old camping light and wants to hold onto that feeling long after the trip is over. It's a quick, satisfying make for a crocheter who already knows single crochet and wants a small project that finishes fast. Pick it up on a quiet evening when you want something portable, something that doesn't demand a pattern book open on your lap the whole time.

Your hands will spend most of their time on plain single crochet rounds, shaping a sphere through increases and decreases, then pausing to stuff it firm before working a long chain handle around the top. There's a bit of counting to keep the stitch totals honest, but nothing tricky. Start to finish, including stuffing and weaving in ends, you're looking at somewhere around four to six hours, easily split across a few sittings.

Try it another way

There's real satisfaction in watching six stitches from a magic circle grow into a plump little sphere just by counting increases and decreases. The shaping is honest and logical: six to twelve, twelve to eighteen, three plain rounds to build the body, then a mirrored decrease back down to twelve before stuffing. Working the chain-20 handle around the top is the fun part, skipping five stitches at a time so the loop sits just right for hanging. Finishing with two rounds of single crochet over the chain turns a floppy loop into something sturdy enough to hold the ornament's weight. Pairing a dark base with a lighter body gives you a tidy little exercise in color placement without any complicated colorwork technique.

The rounds, in full

Written out, round by round

Intermediate4-6 hoursWorsted

Bring to the porch

Everything this one takes, in the order you will reach for it.

Crochet Hook

  • Size G or H is recommended, depending on your yarn thickness.

Scissors

  • A good pair of scissors for cutting yarn.

Stitch Marker

  • To keep track of your rounds.

Fiberfill

  • To stuff your lantern and give it a plump look.
  • PATTERN
  • VIDEO TUTORIAL

Part 2

  1. Round 1Magic Circle Begin with a magic circle and work 6 single crochet (SC) stitches into it. Pull the circle tight to close.
  2. Round 2Increasing In this round, increase in each stitch, resulting in 12 SC.
  3. Round 3SC, Increase Repeat Repeat the pattern of one SC followed by an increase in each stitch, ending with 18 SC.
  4. Rounds 4–6SC in Each Stitch For the next three rounds, simply single crochet in each stitch around.
  5. Round 7SC, Decrease Repeat Now, start decreasing by crocheting one SC followed by a decrease. You should have 12 SC at the end of this round.

Stuffing the Lantern

Before we continue, it's time to stuff the lantern with fiberfill. Make sure it's nice and plump for that cozy, lantern-like appearance.

Creating the Handle

  1. Round 8SC, Chain 20, Skip 5 Stitches Repeat Now, we'll create the handle. Single crochet in the next stitch, chain 20, and then skip 5 stitches before single crocheting in the next. Repeat this pattern around the lantern.
  2. Rounds 9–10SC in Each Stitch and Chain For the next two rounds, single crochet in each stitch and chain of the handle.

Finishing Touches

  1. Round 11Slip Stitch Finish off your lantern by slip stitching in the next stitch. Cut the yarn and weave in the loose end.

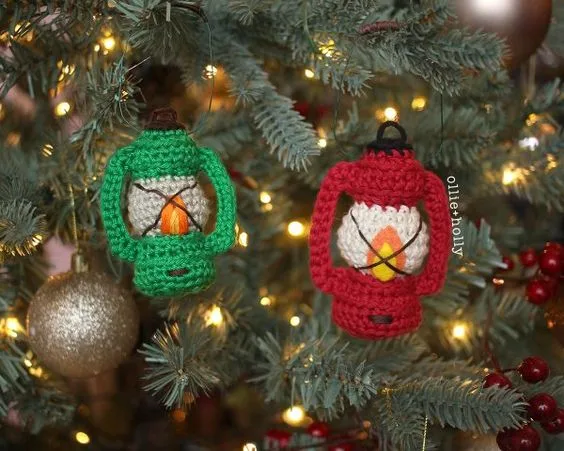
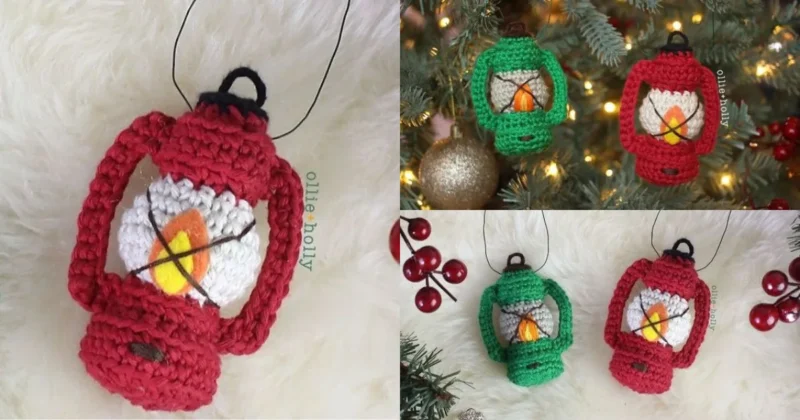
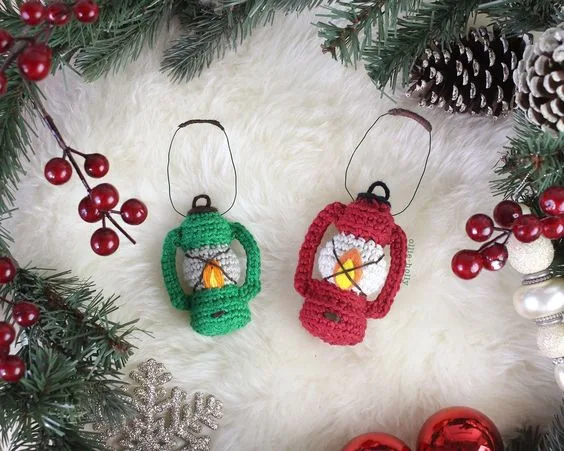
Your Vintage Camping Lantern Crochet Ornament is now complete! Hang it on your Christmas tree or use it as a charming addition to your holiday table settings.

Ideas for Your Crochet Camping Lantern 1. Two-Tone Lantern

Experiment with different color combinations, like a dark base and a lighter body, for a unique look.

2. Embroidered Stars

Use embroidery floss to add small stars or constellations around the lantern’s body, giving it a magical nighttime feel.

3. Sparkle Light Choose a metallic yarn for the light center to create a sparkling effect, enhancing the glow.

Learn how to crochet a vintage camping lantern with this easy guide. Perfect for home decor, this lantern pattern brings rustic charm with a cozy, handmade touch!

How useful was this post?

Click on a star to rate it!

Average rating 4 / 5. Vote count: 13 No votes so far! Be the first to rate this post.

CHECK MORE CROCHET PATTERNS Crochet Angel Tutorial for Beginners: Easy Step-by-Step Pattern Easy Crochet Heart Bracelet Tutorial Step by Step

Short crochet vests - Super trendy must-have pieces

Main Pattern

  1. Round 3SC, Increase Repeat
  2. Rounds 4–6SC in Each Stitch
  3. Round 7SC, Decrease Repeat Stuffing the Lantern Creating the Handle
  4. Round 8SC, Chain 20, Skip 5 Stitches Repeat
  5. Rounds 9–10SC in Each Stitch and Chain

Finishing Touches

  1. Round 11Slip Stitch Ideas for Your Crochet Camping Lantern 1. Two-Tone Lantern 2. Embroidered Stars

3. Sparkle Light Vintage Camping Lantern Crochet Ornament

Let's begin our journey by understanding what makes vintage camping lanterns so special. These lanterns, with their warm, flickering glow, evoke feelings of nostalgia and adventure. Now, you can bring that same sense of wonder into your home with a handcrafted crochet ornament.

Materials Needed Before we dive into the pattern, let's gather our supplies. Here's what you'll need: Yarn: Choose a warm, rustic color like deep red, forest green, or golden brown.

Crochet Hook: Size G or H is recommended, depending on your yarn thickness.

Scissors: A good pair of scissors for cutting yarn.

Stitch Marker: To keep track of your rounds.

Fiberfill: To stuff your lantern and give it a plump look.

PATTERN VIDEO TUTORIAL Crocheting the Body of the Lantern
Putting it together

Step 1

Round 11: Slip Stitch: Finish off your lantern by slip stitching in the next stitch. Cut the yarn and weave in the loose end. Your Vintage Camping Lantern Crochet Ornament is now complete! Hang it on your Christmas tree or use it as a charming addition to your holiday table settings.

Marlene's notes

Note 01

The pattern recommends a G or H hook depending on your yarn thickness; go with the smaller size if your yarn feels loose, since a firmer fabric holds the stuffing better.

Note 02

Rounds are worked continuously without a join, so a stitch marker moved up each round is the only reliable way to track where you are, especially through the increase and decrease rounds.

Note 03

Stuff the lantern firmly before starting Round 8's handle chain, and pack it a little fuller than you think you need, since fiberfill settles once the piece is finished off.

Porch photos

Before you sit down

  • Check how much yarn you have in each of your two colors, since this pattern works best with a dark base and a lighter body.
  • Place a stitch marker at the start of each round, since the rounds are worked continuously without joining and you'll need to know exactly where round one ends and round two begins.
  • Work a quick swatch with your G or H hook to see how firm your single crochet fabric turns out, because loose stitches will let the fiberfill peek through.
  • Read through Round 8, the chain-20 handle round, before you get there, so the skip-5 repeat and the 12 stitches around the top line up in your head first.

How the hours go

Shaping the body (rounds 1-7)
about 1.5 hours because it's seven rounds of single crochet increases and decreases to build the sphere shape
Stuffing and starting the handle (round 8)
about 30 minutes because stuffing firmly and working chain 20 with a skip-5 repeat around the top takes a careful, unhurried pace
Handle rounds and finishing (rounds 9-11)
about 1.5-2 hours because single crocheting over both stitches and chain loops is slower going than the plain body rounds

Looking after it

  • This is a decorative piece rather than something that gets handled often, so spot clean any marks with a damp cloth instead of washing it, which could flatten the fiberfill inside.
  • Store it flat or gently cupped in tissue when it's put away so the handle keeps its shape, and reshape the lantern body by hand if it gets squashed in a box.
FAQs

Asked on the glider

the ones that come up on the glider

What size hook should I use?

The pattern calls for a G or H hook depending on how thick your yarn is. Go smaller for a tighter fabric that hides the fiberfill better once stuffed.

How much yarn do I need for the two colors?

The pattern doesn't give exact yardage, so keep both your base and body colors nearby as you go. Check you have enough left before starting the chain-20 handle in Round 8, since running out mid-chain is frustrating.

When do I stuff the lantern?

Stuff it after the decrease round brings you down to 12 stitches and before you begin the handle work in Round 8. Pack it firmly so it holds its shape once you close things up.

Why does the handle use chain 20 and skip 5?

That combination spaces the loops evenly around the 12 stitches at the top so the handle sits centered and symmetrical once you single crochet over it in the following two rounds.

Can I skip the handle for a simpler ornament?

You could single crochet straight across instead of working Round 8's chain-and-skip repeat, though you'd lose the hanging loop. You'd need another way to attach it wherever you want it displayed.

How do I finish off neatly?

Round 11 finishes with a slip stitch into the next stitch. Cut your yarn leaving a tail long enough to weave in securely through several stitches so it doesn't work loose over time.