Beginner 2-3 hours Worsted yarn

Worked on the glider, counted out loud —

A tiny crochet bee keychain you can finish fast

A quick amigurumi bee keychain for confident beginners, worked up in one sitting.

Jump to the rounds

What this one is

This is the kind of project you reach for on a quiet evening when you want to finish something all the way to the end. It's a tiny bee, small enough to clip to a bag or slip into someone's pocket as a little surprise, and it doesn't ask for a whole weekend of your attention. If you've got a scrap of yellow and a bit of black yarn sitting in your stash, this keychain is ready and waiting for you to pick it up.

Try it another way

Once you've made one of these, it's easy to play with the pattern. Swap a heavier yarn and the H/5mm hook for a chunkier keychain, or drop down to a finer yarn with the G/4mm hook for a smaller charm that fits on a zipper pull. The stripe at round 5 doesn't have to stay black and yellow, either, try white and gray for a different little bug, or keep the yellow but change the antennae and wing yarn to a pale cream for a softer look. If you're making these as gifts, crochet the eyes from black and white yarn instead of using 8mm safety eyes, which keeps things soft enough for a younger child. You can also skip the keychain hardware entirely and sew a small loop at the top of round 8 instead, turning the same 8-round head and body into a little hanging ornament or a bag charm with a ribbon. Since the body only takes 6, 12, 18, then 24 stitches to build up through the first four rounds, it's a forgiving base for trying color or fiber changes without losing track of the shaping.

There's something genuinely satisfying about watching six stitches in a magic ring turn into a full round body in just a few rounds, twelve, then eighteen, then twenty-four, with the color change at round 5 giving you that classic bee stripe without any counting tricks. The wings are their own small reward: a simple chain-3, double crochet, chain-3, slip stitch shell worked twice into a magic ring, done in minutes but instantly recognizable once it's sewn on. Pairing that with curled five-stitch antennae and a set of 8mm safety eyes means you get a project with real personality from just a handful of components, each one quick enough that you never lose momentum before the bee starts looking like a bee.
The rounds, in full

Written out, round by round

Beginner2-3 hours4 mmWorsted

Bring to the porch

Everything this one takes, in the order you will reach for it.

Crochet Hook

  • Size appropriate for the yarn (typically a size G/4mm or H/5mm for standard yarn)

Stuffing Material

  • Polyester fiberfill or similar

Safety Eyes

  • 8mm size, or you can crochet the eyes using white and black yarn

Yarn Needle

  • For sewing parts together
  • Scissors

Head and Body

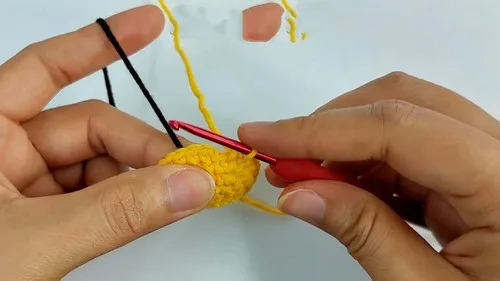
Magic Ring: Start with a magic ring.

In Round 1: 6 single crochet in magic ring [6]

  1. Round 26 increase [12](12)
  2. Round 3(1 single crochet, 1 increase) x6 [18] For Round 4: (2 single crochet, 1 increase) x6 [24](24)
  3. Round 524 single crochet [24] > change to black yarn
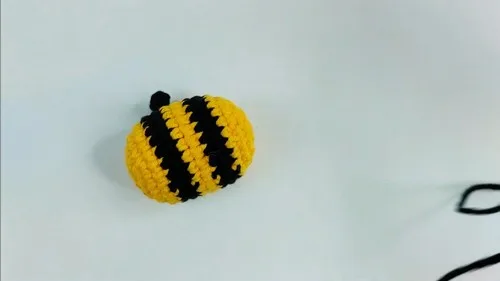
  4. Rounds 6–7Black 24 single crochet [24] (2 rounds) > change to yellow yarn In Rounds 8-9 (Yellow): 24 single crochet [24] (2 rounds) > change to black yarn
  5. Rounds 10–11Black 24 single crochet [24] (2 rounds) > change to yellow yarn
  6. Round 12Yellow 24 single crochet [24] For Round 13 (Yellow): (2 single crochet, 1 decrease) x6 [18]Begin stuffing the body here.(18)
  7. Round 14(1 single crochet, 1 decrease) x6 [12](12)
  8. Round 156 decrease [6] Finish stuffing before closing.

Wings (Make 2)

Magic Ring: In magic ring: (chain 3 + 1 double crochet + chain 3 + slip stitch) x repeat 2 times Bee Antennae (Make 2):

Magic Ring: 5 single crochet in magic ring, slip stitch + 3 chain

Putting it together

Step 1

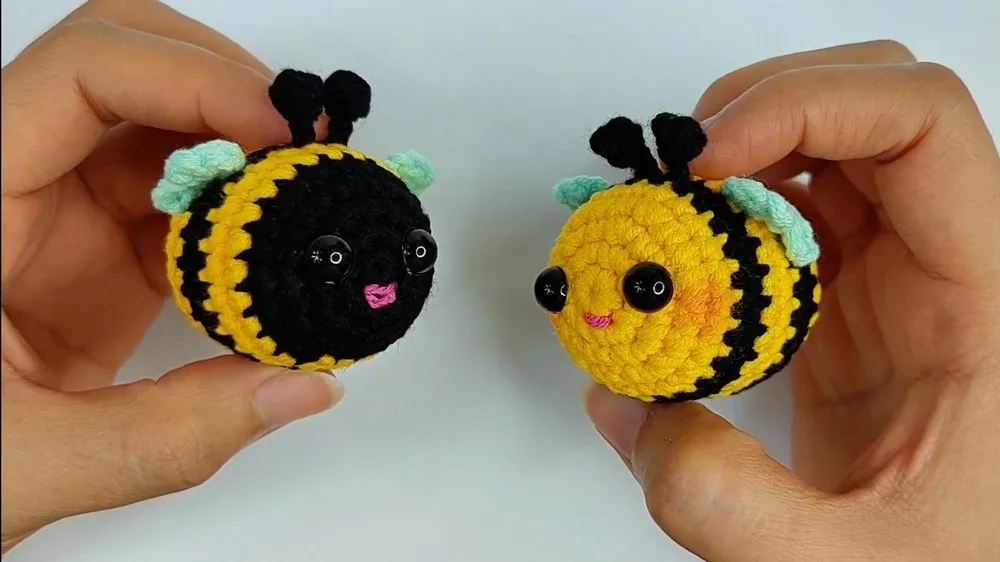
Sew the antennae between rounds 7 and 8 on the head/body.

Step 2

Sew the wings at round 9 on the sides of the body.

Step 3

Insert eyes: Use 8mm safety eyes, placing them appropriately on the face. If you're crocheting the eyes, do this before attaching them to the body.

Marlene's notes

Note 01

Use a hook size that keeps your single crochet fairly snug, since a looser gauge lets the polyester fiberfill show through the small round body.

Note 02

Stuff the head and body firmly as you go rather than waiting until the last round, so the shape stays rounded once you sew the wings and antennae in place.

Porch photos

Before you sit down

  • Check that you have enough yellow yarn for the bulk of the body, plus small amounts of black for the round 5 stripe and white if you're crocheting your own eyes rather than using safety eyes.
  • Set your hook size based on your yarn: a G/4mm or H/5mm both work, so pick the one that gives you a tight enough fabric that the polyester fiberfill won't peek through.
  • Place a stitch marker at the start of round 1 and move it up each round so you always know where you are, especially heading into the round 5 color change.
  • Read through the assembly steps before you begin so you know the antennae land between rounds 7 and 8 and the wings sit at round 9, which helps you picture the finished shape as you're stitching the body.

How the hours go

Head and Body
about 45 to 60 minutes because it runs a full 8 rounds with a color change to track at round 5
Wings (make 2) and Antennae (make 2)
about 15 to 20 minutes because each piece is just a quick magic ring shell or a 5 single crochet loop with a slip stitch and chain
Assembly and eyes
about 20 to 30 minutes because placing the antennae between rounds 7 and 8, the wings at round 9, and the 8mm safety eyes takes a bit of careful positioning

Looking after it

  • Because the piece is stuffed with polyester fiberfill, avoid soaking it, spot clean the surface with a damp cloth and mild soap instead, then let it air dry fully before handling again.
  • Reshape the head and body gently by hand while still slightly damp if it's gotten squashed, and store the finished bee somewhere dry and away from direct heat so the fiberfill keeps its loft.
FAQs

Asked on the glider

the ones that come up on the glider

What size eyes should I use for this bee?

The pattern calls for 8mm safety eyes, which is the easiest option if you have them on hand. If you'd rather not use safety hardware, you can crochet the eyes yourself using black and white yarn and sew them on instead.

Which hook size works best?

A size G/4mm or H/5mm hook both work, so choose based on your yarn weight and how tight you want the fabric. A snugger gauge helps keep the polyester fiberfill from showing through the small stitches.

How much of each yarn color do I actually need?

Yellow is your main color for most of the head and body, while black is only needed for the round 5 stripe and beyond. White is optional and only comes into play if you're crocheting your own eyes.

Where exactly do the antennae get sewn on?

The antennae attach between rounds 7 and 8 on the head and body, right where the top of the head starts to curve in. Sewing them there before you add the eyes makes it easier to judge the face placement.

Where do the wings go?

The wings are sewn on at round 9, on either side of the body. Since the body itself is worked over 8 rounds, this places the wings right at the closing edge, giving the bee a nice balanced silhouette.

Can I really finish this whole bee in one sitting?

Yes, the head and body only runs 8 rounds, and the wings and antennae are both quick magic ring pieces, so most crocheters can finish the hooking, stuffing, and assembly within a couple of hours. It's a nice one to keep for a stretch of free time when you want a complete, finished project by the end.