Intermediate 8-10 Hours Worsted yarn

Worked on the glider, counted out loud —

Cozy Granny Square Hooded Sweater Crochet Pattern

Make a cozy crochet hooded sweater from two granny squares, DC sleeves, and ribbed cuffs. A beginner-friendly winter project with big style payoff.

Jump to the rounds

Before you sit down

Crochet two matching granny squares from a magic ring, building each one out to 18 rounds for the front and back panels.

Work two sleeve tubes in rounds of double crochet, growing each one out to 25 rounds before shaping the cuff.

Close each sleeve's final round with a slip stitch, then add a Front Post/Back Post ribbed cuff for a snug fit.

Finish each sleeve with a row of single crochet around the cuff edge before fastening off.

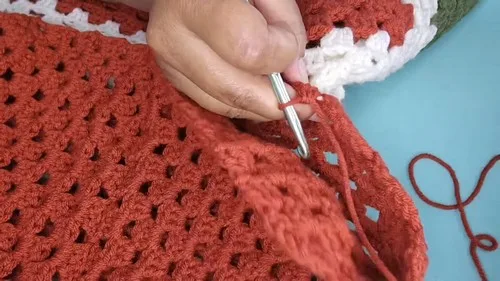
Turn both granny squares inside out with front sides facing, then seam the sides together to form the armholes.

Line up the top edges and seam a short section on each side for the neckline, leaving the center open.

Turn the sweater right side out and set the sleeves into the seamed armholes.

Add the ribbed bottom band around the hem and attach the hood at the open neckline to complete the sweater.

What this one is

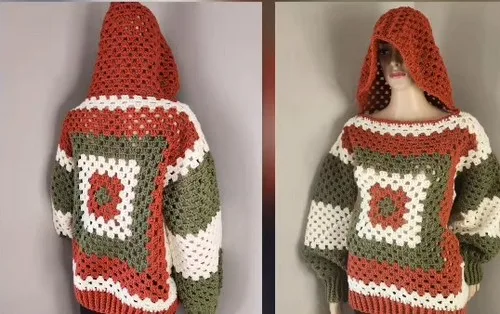
This hooded sweater starts as two oversized granny squares, then transforms into a slouchy, textured pullover with dropped sleeves and a snug hood. It's the kind of piece that looks like it took a professional pattern designer weeks to draft, but it's really just squares, tubes, and a lot of satisfying repetition. Perfect for crocheters who love the classic granny square look but want to wear their work instead of stacking it into a blanket.

You'll lean on just a handful of stitches — double crochet, half double crochet, single crochet, and slip stitch — combined with magic ring starts and Front Post/Back Post DC for the ribbed bands. Nothing here is technically hard, but the sheer number of rounds (18 per square, 25 per sleeve) means this is a project for someone comfortable sitting with a repetitive pattern. Expect to spend a solid weekend or several evenings to get from yarn to finished garment.

The finished sweater lands in a size Large with a relaxed, drapey fit thanks to the granny square construction and dropped-sleeve seaming. It has that chunky, lived-in coffee-shop sweater look with a hood that adds a sporty, cozy edge. Because it's entirely made from basic stitches in your choice of color, it's an incredibly thoughtful handmade gift for anyone on your list who lives in hoodies all winter.

Variations

This pattern is a dream for experimenting with color. Try classic granny-square color blocking — a different shade for each round of the two body squares — for a rainbow ombre effect, or keep both squares one solid color for a clean, modern silhouette. A deep forest green or burgundy body with a cream hood and ribbing creates a gorgeous varsity-style contrast, while an all-neutral oatmeal-and-charcoal combo leans more minimalist and elevated. If you want a speckled, heathered look, swap in a self-striping or marled worsted-weight yarn instead of a solid color for the squares. For sizing, you can scale the finished sweater up or down by adjusting the number of rounds on the granny squares and sleeves proportionally — fewer rounds for a cropped, youth-sized version, more rounds for an extra-oversized fit. Swapping yarn weight is another easy way to change the whole feel: a chunkier bulky yarn with a larger hook will make a thicker, faster-working sweater with a more dramatic stitch definition, while a lighter DK weight (with a smaller hook) creates a drapier, lighter-weight hoodie better suited to layering indoors. You could also play with the hood — work it in a contrasting color block, or add a simple edge in a third accent color for a pop of detail around the face. For texture lovers, alternating rows of DC and HDC on the sleeves creates subtle banding that reads as intentional, elevated design. However you customize it, the granny square construction means the changes are easy to plan out before you start, since each modification just adjusts round count or color, not the overall structure.

I adore this pattern because it takes something so familiar — the humble granny square — and turns it into a genuinely wearable statement piece. Watching two flat squares become the front and back panels of a sweater feels like a magic trick every single time. There's something deeply satisfying about counting up to 18 rounds on each square, watching the color blocking (or solid color, if that's your vibe) build up row by row. The sleeves work up in a similar rhythmic DC pattern, and then the Front Post/Back Post ribbing on the cuffs, bottom band, and hood gives it that structured, ready-to-wear finish that makes people ask where you bought it. I also love that the assembly is just single crochet seaming — no complicated finishing techniques, just lining up edges and working clusters across the armholes and neckline. By the time you turn it right side out for the first time, it genuinely looks like a boutique piece, not a homemade project. It's meditative to make and dramatic to reveal.
Common mistakes

  • Losing track of the corner chain-3Place a stitch marker in each corner chain-1/chain-3 space at the start of every round so you always know exactly where your 3-DC corner clusters belong.
  • Making the two body squares slightly different sizes.Count your rounds carefully and lay the squares flat together every few rounds to confirm they match before you fasten off the first one.
  • Twisting the sleeve tube while working the DC rounds.Keep a stitch marker at the seam or starting point of each round and check that your work lies flat, not spiraled, every 5 rounds or so.
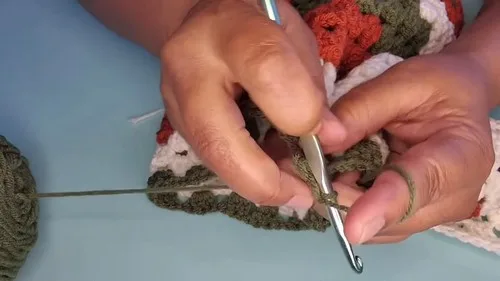
  • Struggling with Front Post/Back Post DCWork these stitches a little looser than usual, since post stitches naturally pull tighter and can make the cuffs, band, and hood edge too snug otherwise.
  • Seaming the armholes and necklineDouble-check the Preparation step — turn both squares inside out so the front sides face each other — before you start single crocheting the seams together.
  • Rushing the neckline seam and closing it too far.Stick to exactly 4 clusters on each side as directed, leaving the center open, so the hood has enough room to attach and sit comfortably.

The rounds, in full

Written out, round by round

Intermediate8-10 Hours6 mmWorsted

Materials

Everything this one takes, in the order you will reach for it.

  • 6 mm hook
  • Yarn (color of choice for body and hood)
  • Scissors
  • Darning needle

keep this to hand

Abbreviations

US crochet terms, as used in this pattern.

  1. MRmagic ring
  2. chchain
  3. DCdouble crochet
  4. HDChalf double crochet
  5. SCsingle crochet
  6. sl stslip stitch

Granny Square (Body Panel)

Make 2

Make 2 identical squares for size Large (18 rows each).

Change colors or continue the same color for subsequent rounds.

Fasten off the first square. For the second square, do not fasten off.

  1. Round 1Create a Magic Ring. Chain 3 (counts as first DC), then place 2 DC in the ring. Chain 3 (corner), then place 3 DC in the ring. Repeat for four sides to complete the square.
  2. Round 2-18Chain 3 (counts as first DC), place 2 DC in the same chain space. Chain 1, then place 3 DC in the next chain-1 space, and work 3 DC in corner spaces. Repeat until you have 18 rows.

Sleeve

Make 2
  1. Round 1Attach yarn at the armhole bottom, chain 3 (counts as first DC), then place 2 DC in the same space.
  2. Round 2-25Continue with chain 1, 3 DC in each chain space around. Repeat for 25 rows.Set-up row (Cuff): Slip stitch to close the 25th row. Chain 1 and place 1 DC in the next two stitches, skip the chain space.Ribbing rows: Work Front Post/Back Post DC pattern for 10 rounds.Final cuff row: Work 1 SC in each stitch around, then fasten off.

Bottom Band (Ribbing)

Set-up Row: Insert yarn at the bottom edge, then place 1 DC in every stitch around. Slip stitch to join.

Ribbing Rows: Work Front Post/Back Post DC for 6 rounds, then fasten off.

Hood

  1. Round 1Neckline Preparation: Attach yarn at the neckline edge and work 1 HDC in each space. Complete the round and fasten off.
  2. Round 2Hood Pattern: Flip the sweater to the wrong side. Work increase rows for 10 rows, then straight rows for 13 rows. Fasten off after completing the rows.

Assembly

Step 1

Preparation: Turn both squares inside out, ensuring the front sides are facing each other.

Step 2

Seam the Sides (Armholes): Join yarn at the bottom corner, then work 2 single crochets in each chain space and 3 SC in each DC stitch. Continue for 10 clusters, then fasten off. Repeat for the opposite side.

Step 3

Seam the Neckline: Line up top edges, join yarn, and repeat the seaming pattern for 4 clusters on each side, leaving the center open for the neckline. Fasten off and turn the sweater right side out.

Step 4

Closing the Hood: Fold the hood and slip stitch to join the top. Work 1 SC down the seam and fasten off.

Step 5

Hood Border: Attach yarn where the neckline meets the hood and work 2 HDC in the space before the hood. Slip stitch to the hood, then work 1 SC in each space along the edge. Fasten off when completed.

Important notes

Note 01

Use a stitch marker on the first stitch of every round for both the granny squares and the sleeves — with this many repeated rounds, it's easy to lose your place.

Note 02

Since the pattern gives you full color freedom, decide on your palette before you begin and plan whether you're color blocking by round or keeping each piece a solid shade.

Note 03

Block your finished granny squares before seaming — a light steam or wet block will square up the corners and make the final seaming lines much crisper.

Note 04

The Front Post/Back Post DC ribbing rows (cuffs, bottom band, hood) create the stretch that helps the sweater fit snugly at the openings, so don't skip counting these rounds even though they can feel repetitive.

Note 05

When seaming the armholes, keep your single crochet clusters consistent — 2 SC in each chain space and 3 SC in each DC stitch — so both sides of the sweater match visually.

Note 06

Weave in ends as you finish each piece rather than saving them all for the end; with four separate parts (two squares, two sleeves) plus the band and hood, loose ends add up fast.

More photos

FAQs

Asked on the glider

the ones that come up on the glider

What size does this hooded sweater pattern make?

As written, this pattern is sized for a Large, with each granny square worked to 18 rounds and sleeves worked to 25 rounds. You can adjust the round counts proportionally if you want a different fit.

Can I use a different yarn weight than worsted?

Yes, though it will change your gauge, drape, and finished size. A bulkier yarn with a larger hook will create a thicker, faster sweater, while a lighter DK-weight yarn with a smaller hook gives a more drapey result.

How much yarn do I need for this project?

The pattern doesn't specify an exact yardage since it's designed for color choice flexibility, but plan for a generous amount given the two 18-round granny squares, two 25-round sleeves, plus the ribbed band and hood — buy a bit extra to avoid running short mid-project.

Do I need to know how to do Front Post and Back Post double crochet?

Yes, this technique is used for the ribbing on the cuffs, bottom band, and hood, and it's what gives those edges their stretchy, structured texture. If you're new to it, it's worth practicing a small swatch first since it's used repeatedly throughout the pattern.

Why do I turn the granny squares inside out before seaming?

Turning both squares inside out so the front sides face each other lets you seam the armholes and neckline from the wrong side, which keeps the finished seam neat and hidden when the sweater is turned right side out at the end.