Intermediate 3-4 hours Worsted yarn

Worked on the glider, counted out loud —

Cozy crochet baby booties with a sweet bear face

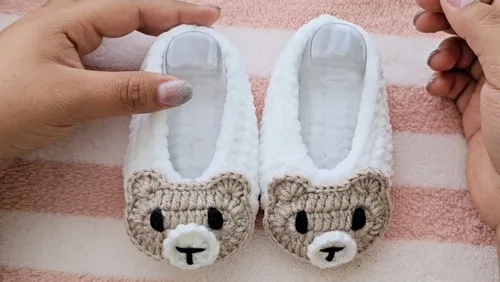
Chenille baby booties with a crochet bear face, for confident beginners with an evening or two to spare.

Jump to the rounds

What this one is

I think of these booties as the project you pull out on a quiet evening when you want something small and sweet in your hands. They're sized for a baby who isn't walking yet, worked up in soft chenille yarn that feels almost like a stuffed toy against tiny feet. Make a pair for a baby shower gift, a hospital bag, or just because you fell in love with the little bear face peeking off the toe.

Your hands move between two hook sizes here: a 4 mm for the chenille bootie body, and a tiny 2 mm for the bear application worked in finer 3 mm yarn. You build each bootie from a flat oval base, shape it into a cupped body with a back-loops-only round, then taper it closed with two decrease rows. Between both booties and the bear pieces, plan on a few sittings rather than one long stretch.

Try it another way

If you want a different look, the easiest swap is the yarn itself: trade the chenille for a smooth worsted weight on the same 4 mm hook for crisper stitch definition, though the finished bootie will feel less plush. For color placement, keep the bear's head and ears in one shade of 3 mm yarn and work the white snout and black facial features exactly as given, since that contrast is what reads as a bear face from across the room rather than a blob. You can skip the Optional Bow entirely and glue the bear head straight onto the toe for a simpler, gender-neutral finish. If you're making these for a gift set, work a few bear heads in one sitting while your 2 mm hook and 3 mm yarn are already out, then set the extras aside to glue onto future bootie pairs later. The two decrease rows at the end of the Body section are also where you'd adjust the fit slightly, pulling decreases a touch closer together for a snugger ankle, though the stitch counts in the pattern itself stay your guide.
The rounds, in full

Written out, round by round

Intermediate3-4 hours4 mmWorsted

Bring to the porch

Everything this one takes, in the order you will reach for it.

  • Chenille yarn
  • 4 mm crochet hook
  • 3 mm yarn (for bear application)
  • 2 mm crochet hook (for bear application)
  • White yarn (for bear snout)
  • Black yarn (for eyes and nose)
  • Tapestry needle
  • Stitch marker
  • Silicone glue

Bootie Base

Make 2
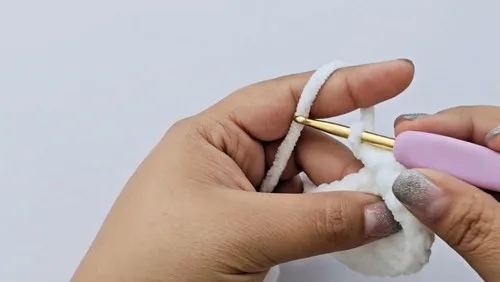
  1. Round 1Chain 13; skip the first chain, make 2 single crochets in the second chain; work 10 single crochets; work 5 single crochets in the last chain; on the other side of the chain, work 10 single crochets; work 2 single crochets in the next-to-last space
  2. Round 2Chain 1, work 2 single crochets in the same stitch and place a stitch marker; work another increase; work 3 single crochets; work 3 half double crochets; work 4 double crochets; work 5 increases of double crochet; work 4 double crochets; work 3 half double crochets; work 3 single crochets; work 2 increases of single crochet; close with a slip stitch in the marked stitch
  3. Round 3Chain 1, work 1 single crochet in the same space and mark it; work an increase, then 1 single crochet, then another increase; work 10 single crochets; repeat "1 single crochet, 1 increase" five times; work 10 single crochets; repeat "1 single crochet, 1 increase" two times; close with a slip stitch in the marked stitch

Body of the Bootie

Make 2
  1. Round 1Chain 1, work single crochets in back loops only for the full round
  2. Rounds 2–4For the next 3 rows, work single crochets in both loops in a spiral
  3. Decrease Row 1Start with a decrease and mark the stitch; work 14 single crochets; repeat "1 single crochet, 1 decrease" five times; work single crochets to last 2 stitches, finish with a decrease
  4. Decrease Row 2Start with a decrease and mark it; work 10 single crochets; work 7 decreases; work single crochets to last 2 stitches, finish with a decrease; slip stitch and leave a long tail for sewing

Bear Application - Head

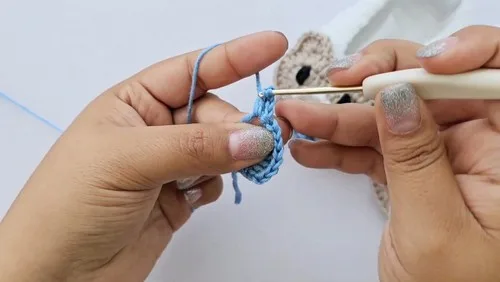
  1. Round 1With 3mm yarn and 2mm hook, chain 11; skip 3 chains, make 2 double crochets in 4th chain; work 6 double crochets; in the last chain, work 6 double crochets; on the other side, work 6 double crochets; in last space, work 3 double crochets; slip stitch to 3rd chain to close
  2. Round 2Chain 3, work double crochet in same space; make 2 more increases; work 6 double crochets; work 6 increases of double crochet; work 6 double crochets; work 3 increases; slip stitch to 3rd chain to close

Bear Application - Ears

  1. Round 1Slip stitch 4 stitches; work 6 double crochets in next stitch; skip 1 stitch, slip stitch 6 stitches; work 6 double crochets in next stitch; skip 1 stitch, slip stitch 2 stitches; cut and pull yarn to back

Bear Application - Snout

  1. Round 1Use white yarn to make a magic circle; chain 2, work 12 double crochets; slip stitch in first double crochet; cut yarn and weave in tail

Optional Bow

  1. Round 1Make a magic circle; chain 2, work 4 double crochets; chain 3, slip stitch into circle; chain 3, work 4 double crochets; chain 3, slip stitch into circle; cut yarn and pull magic circle closed; wrap one yarn tail around center and tie at back

Bear Application - Facial Features

Nose Nose: Stitch a "T" shape in center of snout using black yarn and needle.

Eyes Eyes: Use French knot technique for each eye using black yarn and needle.

Putting it together

Step 1

Glue bear application to front of bootie using silicone.

Step 2

Glue bow onto bear face.

Marlene's notes

Note 01

The chenille yarn is soft but can be slippery on a 4 mm hook, so keep your tension a touch firmer than usual to keep stitches from sliding.

Note 02

Move the stitch marker along with you each round in the Bootie Base and Body sections, since several rounds close with a slip stitch worked back into that exact marked stitch.

Note 03

Let the silicone glue set fully before handling the booties, since both the bear head and the optional bow are glued on rather than sewn.

Porch photos

Before you sit down

  • Check that you have enough chenille yarn on hand for both booties before you start the second one, since chenille balls can run through faster than they look.
  • Keep your stitch marker within reach from the first round on, since nearly every round in the Bootie Base and Body closes with a slip stitch worked back into a marked stitch.
  • Work a few test stitches with the 4 mm hook on your chenille yarn first, since chenille can behave differently than a smooth yarn at the same hook size.
  • Read through Round 1 of the Bootie Base once before you pick up the hook, since the stitch counts shift as you work along the chain and back down the other side.

How the hours go

Bootie Base and Body (both booties)
about 1.5-2 hours because each bootie works through 3 rounds of base shaping plus 4 rounds of body and two decrease rows, times two
Assembly and optional bow
about 15-20 minutes because it's just gluing the bear face to the bootie and the bow to the bear face, plus time for the silicone to set

Looking after it

  • Hand wash the chenille booties in cool water and lay them flat to dry, since chenille can shed or flatten if it's machine washed or wrung.
  • Reshape the booties gently while still damp, keeping the glued bear application facing up so it doesn't get compressed, then store the pair flat rather than stacked under anything heavy.
FAQs

Asked on the glider

the ones that come up on the glider

Can I make the booties without the bear application?

Yes, the Bootie Base and Body stand on their own as a complete plain bootie, so you can stop there and skip straight to the finishing steps if you'd rather not add the bear face.

Why does the pattern use two different hook sizes?

The 4 mm hook suits the thicker chenille yarn used for the bootie itself, while the 2 mm hook is sized for the much finer 3 mm yarn used in the bear application, so the smaller pieces stay in proportion.

Do I sew the bear face on or glue it?

The assembly steps call for silicone glue rather than sewing, for both the bear head onto the bootie and the optional bow onto the bear's face.

What's the stitch marker actually for here?

Several rounds in the Bootie Base and Body close with a slip stitch worked into a specific marked stitch, so the marker is how you find that exact spot again at the end of the round.

Is the Optional Bow necessary?

No, it's listed as optional, and the assembly only calls for gluing it on if you want it, so you can leave the bear face as is.

Can I substitute the chenille yarn?

Yes, though chenille is what gives these booties their soft, plush feel, so a smooth yarn on the same 4 mm hook will look and feel noticeably different.