Intermediate 4-6 hours Worsted yarn

Worked on the glider, counted out loud —

Coral Reef Baby Pinafore with Starfish Appliqués

A textured coral baby pinafore with cream starfish appliqués. Suits confident beginners; about 4-6 hours over a few sittings.

Jump to the rounds

What this one is

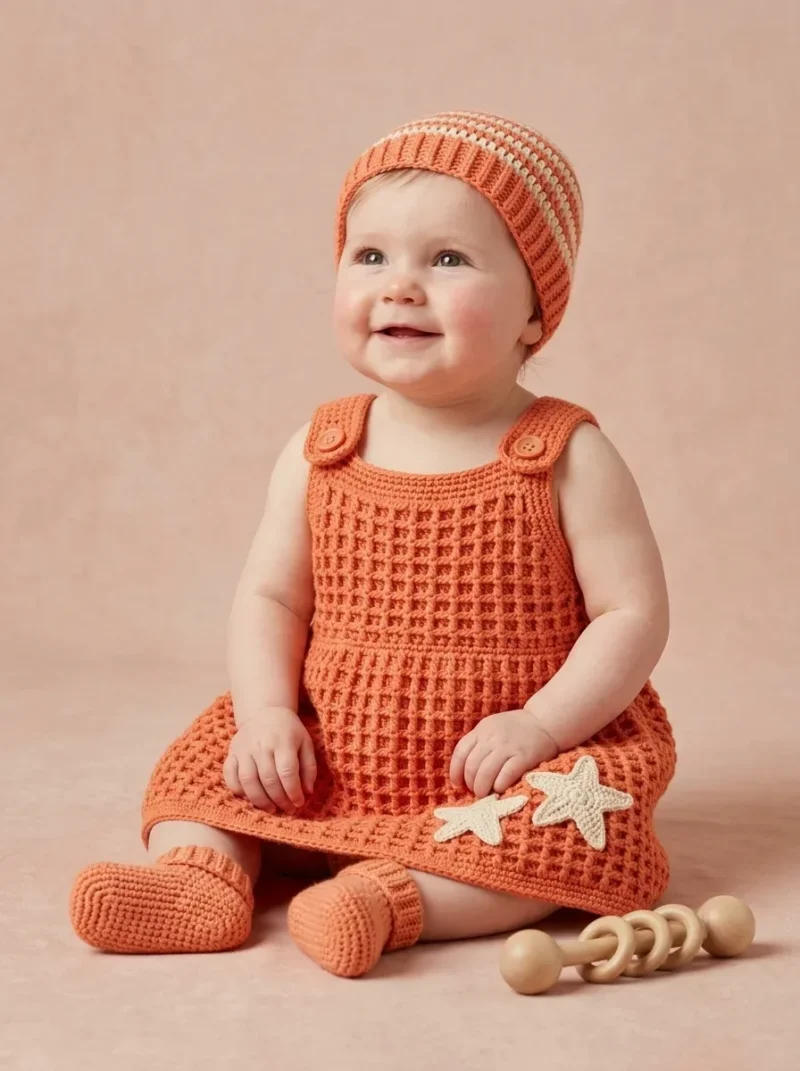
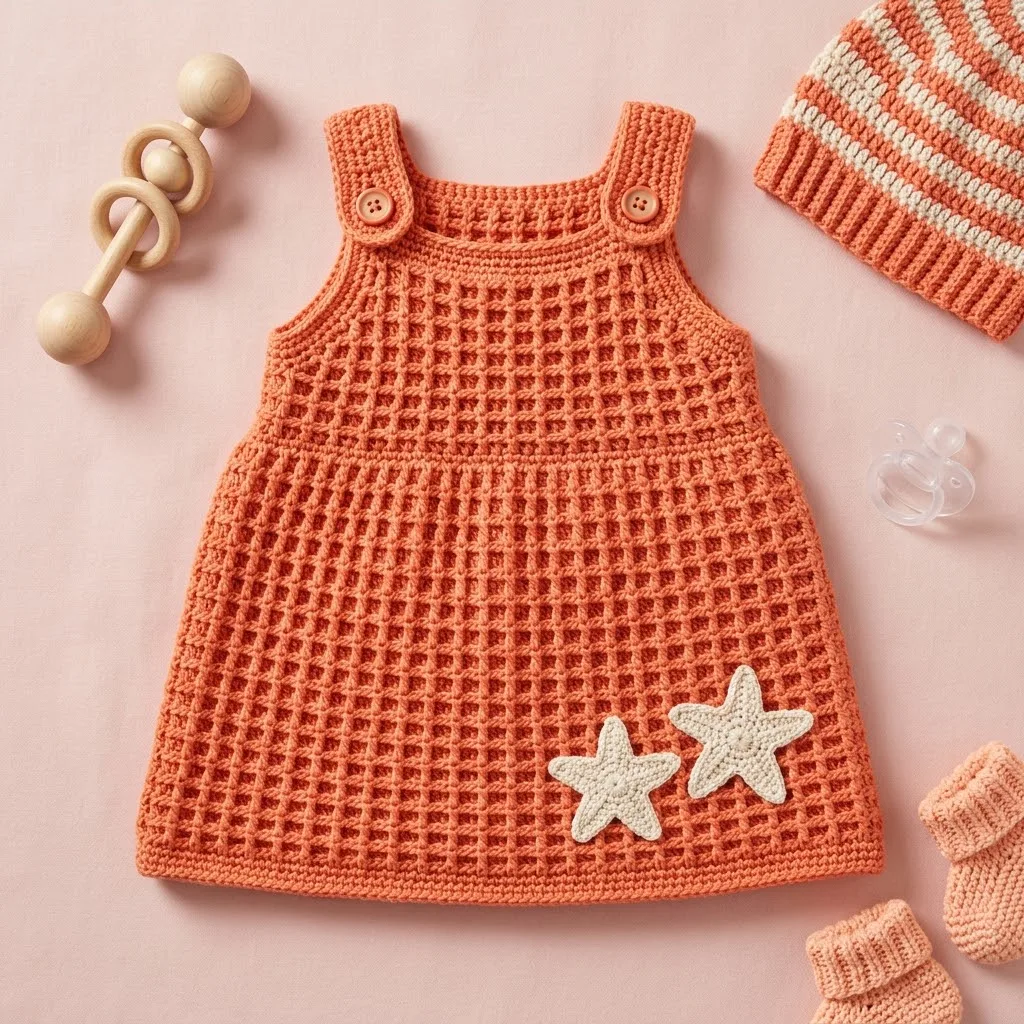
This is the kind of pinafore you make for a baby who already has a drawer full of plain onesies and needs one thing that feels a little special. You picture it over a cream bodysuit, those two little starfish sitting on the bodice like they washed up there on purpose. It is coral, it is textured, and it does not try too hard to be fancy while still looking like you put real thought into it.

Your hands spend most of the time in that front post, back post rhythm across the skirt rows, the kind of repetitive work that lets you half-watch something on the couch without losing count. Between the skirt panel, the two button straps with their worked buttonholes, and the small cream appliqués stitched on at the end, you are looking at a project you can realistically finish in a handful of evening sessions.

Try it another way

If you want a different look, swap the cream contrast for any pale color you have scraps of; 15 yards goes a long way on motifs this small, so you could even make a few extra starfish and scatter them across the bodice instead of keeping them to one spot. The skirt length is easy to adjust too: the pattern notes that 28 rows gets you about 11 inches, so for a smaller or taller baby you'd add or remove rows in pairs, keeping the fpdc/bpdc alternation intact so the grid doesn't skip a beat. For yarn, the worsted weight on an H/8 hook is what gives you that 14-stitch, 10-row gauge over 4 inches, so if you go up or down a hook size, swatch again before committing to the full 77-stitch foundation row. You could also drop the wooden buttons for a different fastening if you prefer, though the buttonhole row at Row 21 is specifically shaped for a button around 15 mm, so keep that in mind if you swap in something larger. And if this one is headed somewhere dressier than everyday wear, consider working both straps in the cream contrast instead of coral, so the whole thing reads as two colors rather than one with small accents.

The satisfaction here is in the texture. Alternating front post and back post double crochet across 77 stitches builds a grid that actually reads as a woven pattern once you've got a few rows under you, and there's real pleasure in watching that grid line up row after row. The straps are a nice change of pace: plain single crochet rows that suddenly need your attention again for the worked buttonhole at row 21, a small technical moment in an otherwise meditative project. And the starfish appliqués, worked separately in cream on the smaller G/6 hook, give you a reason to practice tight, tidy stitches on a tiny scale before you set them onto all that coral texture.
The rounds, in full

Written out, round by round

Intermediate4-6 hours5.0 mmWorsted

Bring to the porch

Everything this one takes, in the order you will reach for it.

  • Yarn
  • Main Color (Coral): Approximately 200 yards of worsted weight yarn (weight category 4)
  • Contrast Color (Cream): Approximately 15 yards for the starfish appliqués
  • Hook
  • Size H/8 (5.0 mm) crochet hook for the main dress
  • Size G/6 (4.0 mm) crochet hook for the starfish appliqués (optional, for tighter stitches on small motifs)
  • Always check your gauge and adjust hook size if needed.
  • Notions
  • 2 wooden buttons, approximately 15 mm (⅝ inch)
  • Yarn needle for weaving ends
  • Stitch markers
  • Scissors
  • Measuring tape
  • Gauge
  • 14 stitches and 10 rows = 4 inches in the textured grid pattern using size H/8 hook.

Skirt Panel

The skirt is the largest section and uses the textured grid pattern throughout. We start at the hem and work upward toward the bodice.

  1. Foundation RowWith coral yarn and H/8 hook, ch 79.
  2. Round 1(RS): Dc in 4th ch from hook and in each ch across. Turn. (77 dc, counting the turning ch as 1 dc)

Special Stitch The beautiful waffle-like texture on this pinafore comes from alternating front post double crochet (fpdc) and back post double crochet (bpdc) stitches in a specific pattern. They are simply double crochets worked around the post of the stitch below instead of into the top loops. Here is the key: where you worked a front post stitch in the previous row, you will work a back post stitch. Where you worked a back post stitch, you will work a front post stitch. This creates the raised grid effect.

  1. Round 2Ch 2 (does not count as a stitch throughout), dc in first st, *fpdc around next st, bpdc around next st* rep from * to last 2 sts, fpdc around next st, dc in last st. Turn. (77 sts)
  2. Round 3Ch 2, dc in first st, *bpdc around next fpdc, fpdc around next bpdc* rep from * to last 2 sts, bpdc around last fpdc, dc in last st. Turn. (77 sts)
  3. Rows 4–28Rep Rows 2 and 3, alternating the post stitches to maintain the grid texture. End with a Row 2 repeat. Turn. (77 sts)

Your skirt should measure approximately 11 inches in length at this point. If you need more or less length, add or remove rows in pairs to maintain the pattern.

Bodice Section

Now we will shape the bodice by working decreases and creating the armhole openings.

  1. Row 29Decrease Row Ch 2, dc in first st, *dc2tog over next 2 sts* rep from * to last 2 sts, dc in last 2 sts. Turn. (40 sts)

Step by step The dc2tog (double crochet two together) is a decrease stitch. Work it like this: yarn over, insert hook in next st, yarn over and pull up a loop, yarn over and pull through 2 loops. Stop here. Yarn over, insert hook in following st, yarn over and pull up a loop, yarn over and pull through 2 loops, yarn over and pull through all 3 loops on hook. You have turned 2 stitches into 1.

  1. Row 30Ch 2, dc in each st across. Turn. (40 sts)
  2. Row 31Ch 2, dc in each st across. Turn. (40 sts)

Divide for Armholes From here the bodice splits into three separate pieces worked one after another: the right front, the back, and the left front, each with their own armhole shaping.

  1. Row 32 Right FrontCh 2, dc in first 8 sts. Turn, leaving remaining sts unworked. (8 sts)
  2. Rows 33-35 RightCh 2, dc in each st across. Turn. (8 sts) Fasten off and weave in the end.(8)
  3. Row 32 BackSkip 2 sts from the right front for the armhole. Join yarn in next st with a sl st. Ch 2, dc in same st and next 19 sts. Turn, leaving remaining sts unworked. (20 sts)
  4. Rows 33-35 BackCh 2, dc in each st across. Turn. (20 sts) Fasten off and weave in the end.(20)
  5. Row 32 Left FrontSkip 2 sts from the back for the armhole. Join yarn in next st with a sl st. Ch 2, dc in same st and remaining 7 sts. Turn. (8 sts)
  6. Rows 33-35 LeftCh 2, dc in each st across. Turn. (8 sts) Fasten off and weave in the end.(8)

Shoulder Straps

The straps connect the front bodice to the back and feature buttonholes for adjustable closure.

  1. FoundationWith coral yarn and H/8 hook, ch 7.
  2. Round 1Sc in 2nd ch from hook and each ch across. Turn. (6 sc)
  3. Round 2through 20: Ch 1, sc in each st across. Turn. (6 sc)
  4. Round 21Buttonhole Row Ch 1, sc in first 2 sts, ch 2, sk 2 sts, sc in last 2 sts. Turn. (4 sc, 2 ch)
  5. Round 22Ch 1, sc in first 2 sts, 2 sc in ch-2 space, sc in last 2 sts. Turn. (6 sc)
  6. Round 23through 25: Ch 1, sc in each st across. Turn. (6 sc) Fasten off, leaving a long tail for sewing.(6)

Finished Measurements

This pattern is written for size 6 to 12 months.

Chest circumference: Approximately 18 inches (fits chest 17 to 19 inches with ease)

Length from shoulder to hem: Approximately 14 inches

Skirt width at hem: Approximately 22 inches

Marlene's notes

Note 01

Swap to the G/6 hook only for the starfish appliqués; keep the H/8 for the whole skirt panel and both straps so your gauge stays consistent across the garment.

Note 02

The post stitches in Rows 2 and 3 only make their grid pattern if you track which stitch was fpdc and which was bpdc in the row below, so a marker on the first post stitch of each row saves you from unpicking.

Note 03

Weave in the cream yarn ends from the appliqués before you sew them on, since once they're stitched to the coral background any loose tail is much harder to tuck away neatly.

Note 04

This pattern is written for a confident beginner to intermediate skill level: if you can work basic stitches in rows and are comfortable counting your stitches, you can make this pinafore.

Note 05

Take the time to check your gauge, since baby garments need to fit properly for comfort and safety. If your gauge is too tight, go up a hook size; if it's too loose, go down a hook size.

Porch photos

Before you sit down

  • Check you have your 200 yards of coral and your 15 yards of cream set aside separately, since the appliqués use so little that it's easy to grab the wrong skein.
  • Make your gauge swatch in the textured grid pattern itself, not plain double crochet, since the fpdc and bpdc columns pull in differently than you'd expect.
  • Place a stitch marker in your first stitch of Row 1 of the skirt so you never lose track of which end is which once the post stitches start alternating.
  • Read Row 3 alongside Row 2 before you start, so you understand how the fpdc and bpdc swap places each row to keep the grid going rather than stacking into ribbing.

How the hours go

Skirt panel (Foundation Row through Row 28)
about 2-3 hours because it's 28 rows of textured post stitch work across 77 stitches, which adds up even once the rhythm sets in
Bodice shaping and armholes (Rows 29-35)
about 30-45 minutes because the decrease row and three separate armhole divisions (right front, back, and left front) need careful, slower stitch counting
Button straps (Foundation through Row 25)
about 45-60 minutes per strap because the rows are short, though the buttonhole row needs slow, careful counting
Starfish appliqués and assembly
about 30-45 minutes because the motifs are small but the smaller hook and sewing-on both ask for patience

Looking after it

  • Hand wash in cool water with a gentle detergent if you used a cotton blend or baby-safe acrylic, and lay the pinafore flat on a towel to dry rather than hanging it, since wet post-stitch texture can stretch out of shape.
  • Once dry, smooth the skirt's textured grid with your fingers to even out the stitches, then store it folded rather than on a hanger so the straps and buttonholes keep their shape between wears.
FAQs

Asked on the glider

the ones that come up on the glider

What size baby does this pinafore fit?

The pattern gives a length from shoulder to hem of about 14 inches, which you can use alongside your own baby's measurements to check fit before you start. If you need a different size, you'd adjust the skirt rows in pairs and the strap rows evenly to keep the buttonhole placement sensible.

Can I skip the starfish appliqués?

Yes, the pinafore stands on its own with just the textured coral skirt and straps. If you leave them off, you'll have the 15 yards of cream spare for some other small project.

Why does my grid texture look ribbed instead of woven?

This usually means the fpdc and bpdc stitches are landing in the same columns row after row instead of alternating. Check that you're working Row 3's bpdc into the fpdc below it and vice versa, exactly as the pattern describes.

Do I need two different hook sizes?

Only if you want the starfish appliqués extra tight and tidy; the G/6 hook is optional for that smaller motif work. The H/8 is what you need for the entire skirt and both straps to hit the stated gauge.

What yarn works best for this project?

A soft cotton blend or acrylic baby yarn that's machine washable and labeled baby safe is ideal, since it holds the fpdc and bpdc texture nicely without shedding loose fibers. Stick to worsted weight (category 4) to match the gauge given.

How do the buttonholes work on the straps?

Each strap has a buttonhole row partway through, where you chain 2 and skip 2 stitches to create the opening, then close it up on the following row with 2 single crochet into that chain space. The 15 mm wooden buttons called for in the materials list are sized to fit that opening.