Intermediate 4-6 hours Worsted yarn

Worked on the glider, counted out loud —

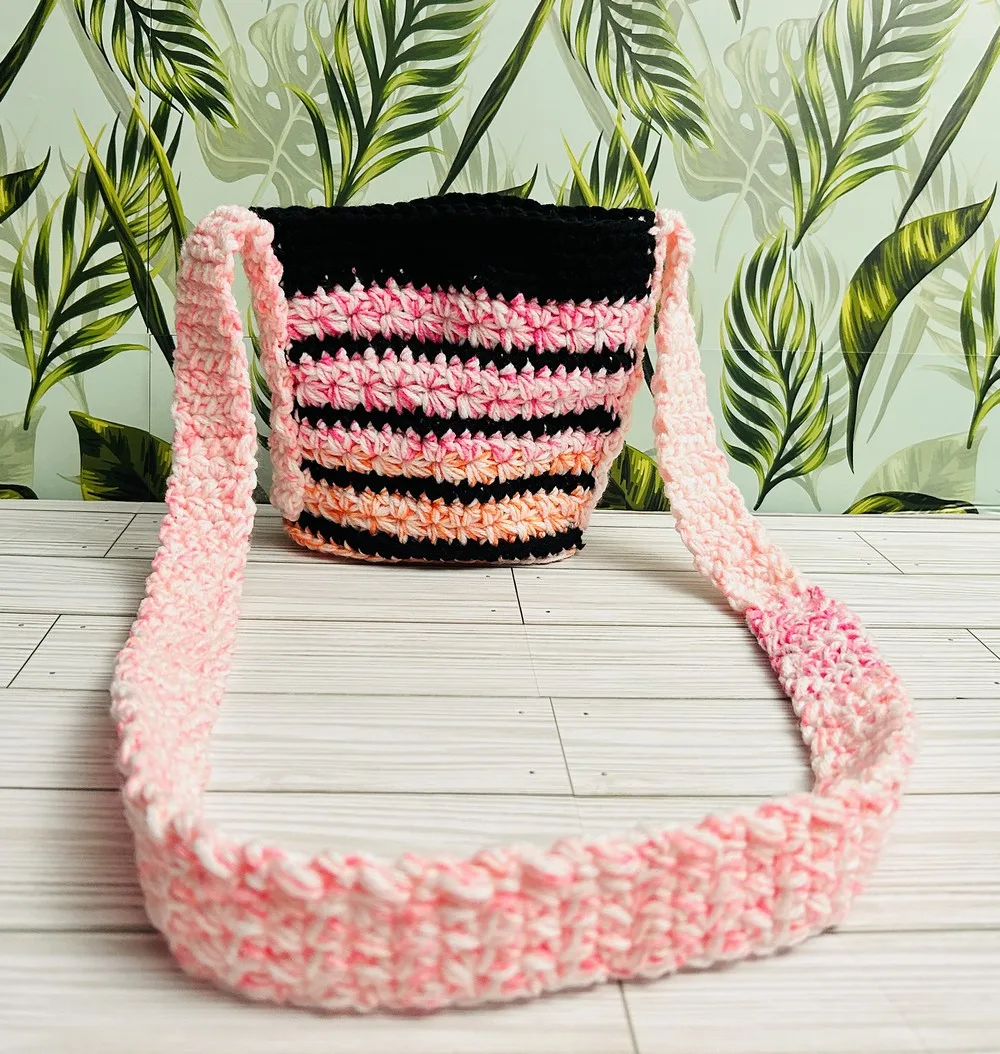
Easy coastal crochet tote bag with star stitch base

A relaxed ombre tote with a textured star-stitch bottom. Suits confident beginners with 4-6 hours to spare.

Jump to the rounds

What this one is

This is the bag you reach for when you want something that looks pulled-together without a scrap of fuss — a trip to the farmers market, a weekend bag, a gift for the person who always compliments but swears they could never. The ombre yarn does half the design work for you, drifting from one shade to the next while you just keep stitching along in single crochet.

Your hands spend most of the time in steady single crochet rounds building up the body, then slow down for the star stitch texture near the base and top, which asks for a bit more attention as you pull up and secure those loops. Between the body, the handles, and the simple strap, you're looking at an evening's project rather than a weekend commitment.

Try it another way

The easiest change is color placement — swap the Big Twist White for another neutral, or skip the black altogether and work your star stitch rounds in a deeper shade from the same ombre family so the whole bag reads as one continuous gradient instead of a clear break. If you want a bigger bag, start your foundation chain longer than 16 and keep repeating Rounds 6 and 7 as many times as you like before finishing, since the pattern already builds in that repeat for exactly this reason. For a smaller version, work fewer repeats of the star stitch section and move straight to the handles once the body feels tall enough for your use. You can also rework the handle loop — the chain-10 gap is what the pattern uses, but a shorter or longer chain there changes how deep the handle sits without touching the rest of the construction. Swapping the magnetic snaps for a button-and-loop closure is another simple substitution if you'd rather not deal with sewing in hardware. And if you're making this as a gift, consider working the straps in the black yarn instead of matching the body, so they read as an intentional design choice rather than an afterthought.
The rounds, in full

Written out, round by round

Intermediate4-6 hours5.0 mmWorsted

Bring to the porch

Everything this one takes, in the order you will reach for it.

Yarn

  • Lion Brand Mandala Ombre Serene, Big Twist White, and Black
  • 5.0 mm crochet hook
  • Yarn needle
  • Scissors
  • Magnetic Snaps

Body

Start: Chain 16 and use a stitch marker.

  1. Rounds 1–5Begin expanding the base with single crochets (sc), increasing in specified stitches to shape the bag.
  2. Round 6Switch to black yarn, working in back loops only for a textured look.
  3. Round 7Implement star stitch in back loops only, creating the characteristic star bottom and top for textural intrigue.Star Stitch Technique: Create stars by pulling up loops across several stitches and securing them together, followed by a half double crochet (hdc) between stars for the top finish.Repeat: Continue the pattern of Rounds 6 and 7 to desired length.

Handles

  1. Round 1Setting Up Handles Start by chaining 1, then single crochet in the next 7 stitches, chain 10 for the handle loop, skip 10, then single crochet in the next stitches.
  2. Round 2Forming the Handle Loop Work sc into the chain space to strengthen the structure, ensuring durability and comfort when carrying.
  3. Round 3Finalizing Handles A round of single crochets evenly around to smooth out any rough edges.

Straps

  1. Round 1Foundation Chain 9, turn and single crochet back along, building the strap to your preferred length.

Putting it together

Step 1

Attaching: Sew straps onto the bag, starting from the bottom side to ensure sturdy support.

Marlene's notes

Note 01

The 5.0 mm hook pairs with worsted-weight yarn here, so keep an eye on your tension through the single crochet body rounds — too loose and the bag won't hold its shape once the magnetic snaps are in.

Note 02

The color change at Round 6 happens in back loops only, so leave your front loops free and untouched; this is what gives the star stitch its visible ridge against the body.

Note 03

Move your stitch marker up each round rather than leaving it in one spot, since both the body and the handle rounds depend on knowing exactly where your round starts and ends.

Before you sit down

  • Check you have enough of the Mandala Ombre Serene to see the color shift through all the body rounds before it runs short — ombre skeins vary in where the color changes land.
  • Have your stitch marker ready right from the starting chain of 16, since the pattern leans on it to track your rounds as the body expands.
  • Work a small swatch in the star stitch if you haven't done it before, just so your first attempt on the actual bag isn't also your first attempt at the stitch.

How the hours go

Body
about 2-3 hours because it runs 4 rounds including the back-loop color change and the star stitch texture, which both ask for more care than plain single crochet
Handles
about 1 hour because the 3 rounds involve setting up the chain-10 loop, reinforcing it, then a tidying round of single crochet
Straps
about 30-45 minutes because it's just one round of chaining 9 and single crocheting back, repeated to your preferred length

Looking after it

  • Hand wash in cool water with a gentle detergent, since the mix of yarns in this bag does best without the agitation of a machine; press out excess water in a towel rather than wringing.
  • Lay flat to dry away from direct heat, gently reshaping the body and smoothing the star stitch texture with your fingers while it's still damp, then store the bag stuffed lightly with tissue so it holds its shape on the shelf.
FAQs

Asked on the glider

the ones that come up on the glider

Can I make this bag without the magnetic snaps?

Yes, the snaps are there for a secure closure but they're not structural to the stitching itself. You can leave them out entirely or swap in a button-and-loop closure once the body is finished.

Why does Round 6 specify back loops only?

Working in back loops only on the color change round is what sets up the ridge that the star stitch in Round 7 sits against. If you work into both loops there, the texture will look flatter and less defined.

How do I know when to stop repeating Rounds 6 and 7?

The pattern leaves this open so you can stitch to your own preferred bag height. A good rule is to hold the body up against what you plan to carry and stop once it feels roomy enough, then move on to the handles.

What if my star stitch rounds don't look even?

This is common on a first attempt, since the technique involves pulling up several loops and securing them together before the hdc between stars. A quick practice swatch before you start the real bag usually sorts out the tension.

Can I lengthen the handles beyond what the pattern gives?

Yes, the chain-10 loop in the handle setup can be made longer if you want the handles to sit higher on your shoulder. Just keep the skip count matching your new chain length so the loop sits evenly.

Is this a good first bag pattern if I've only made amigurumi before?

It's a reasonable step up, since most of the stitching is familiar single crochet and the star stitch is the only genuinely new technique. Reading through Round 7 before you start, as suggested above, makes the jump much smoother.