Intermediate 4-6 hours Super bulky yarn

Worked on the glider, counted out loud —

Chunky Crochet Cat Cave Dome Bed Pattern

A cozy chunky cat cave for calm cats, worked in super bulky yarn over about 4-6 hours.

Jump to the rounds

What this one is

You know the cat who circles the room three times before picking the one spot that's half-hidden and fully theirs. This cave is made for that cat, and for you, the one who wants to give them a proper hideaway instead of another cardboard box. It sits just as well by a reading chair as it does tucked under a window, and it looks like it belongs there.

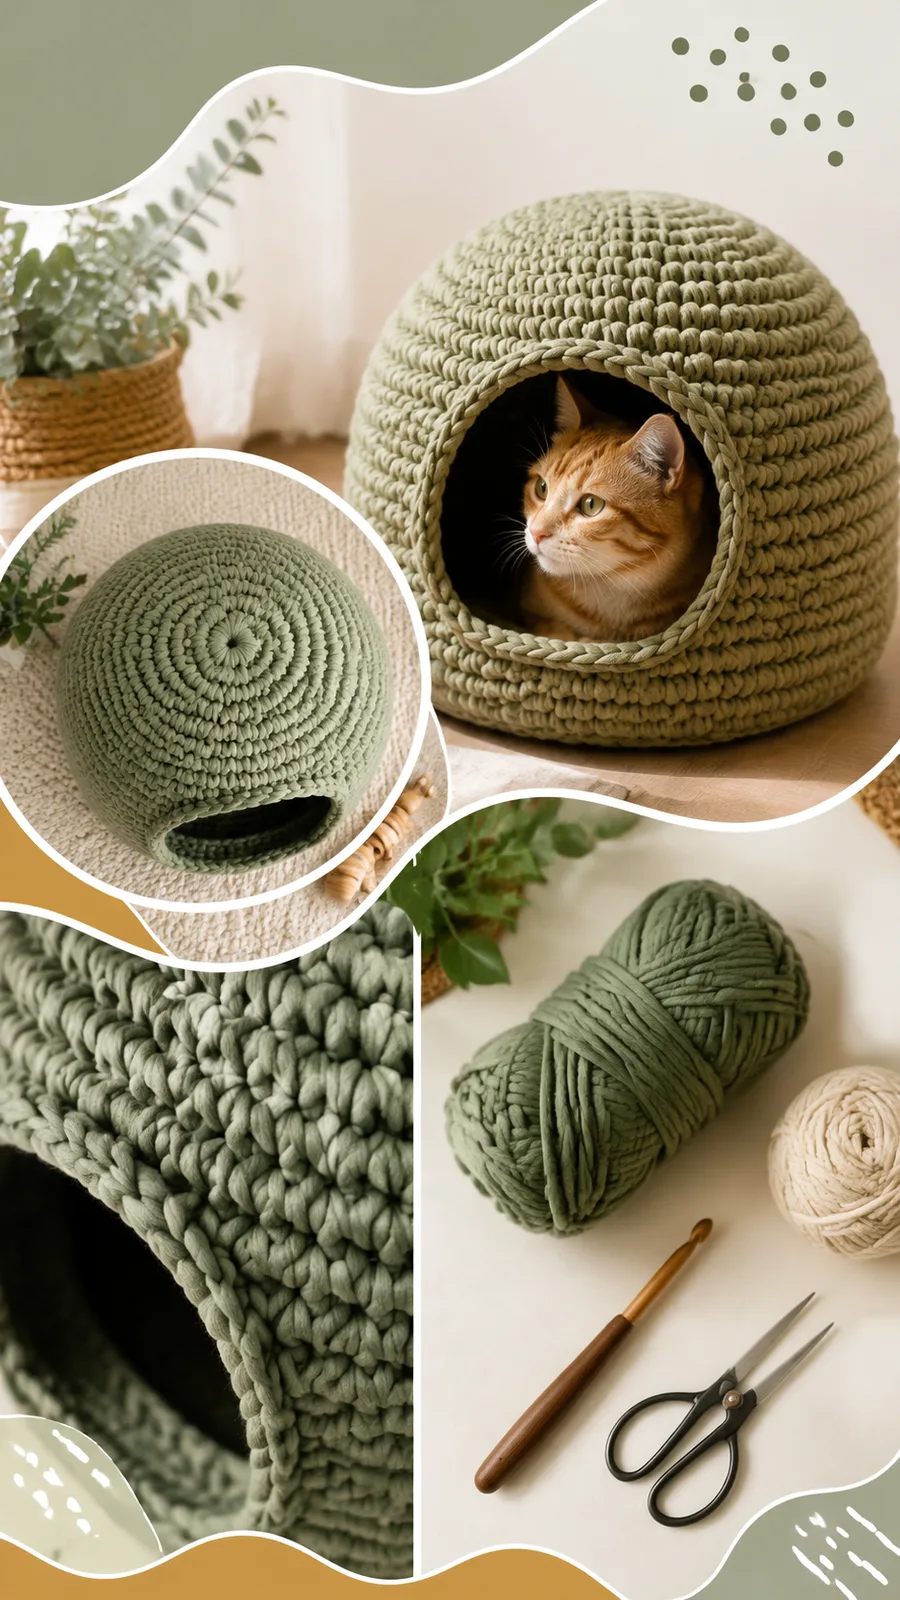
Your hands spend most of this project on one long, steady climb: eight rounds of increases that turn a magic ring into a wide circle, then ten rounds of plain single crochet that build the walls straight up before the dome starts curving inward. Plan on roughly four to six hours total, worked in a sitting or spread across a few relaxed evenings.

Try it another way

There's a real satisfaction in watching Round 1's eight stitches turn into a 56-stitch wall just by trusting the increase pattern through Round 8 and then going quiet for ten rounds of plain single crochet. The decreases that follow, dropping from 56 down to 44 stitches, are where the piece stops being a tube and starts becoming a dome, and you can feel that shift happening under your hook. Working through both loops with thick yarn and an 8 mm hook means every stitch is sturdy and visible, so your tension shows clearly and corrections are easy to spot. By the time you reach the front opening, you're not just following a count, you're sculpting a shape your cat will actually climb into.
The rounds, in full

Written out, round by round

Intermediate4-6 hours8 mmSuper bulky

Bring to the porch

Everything this one takes, in the order you will reach for it.

  • 450 yards (411 meters) super bulky yarn
  • 8 mm crochet hook (US L-11)
  • Stitch marker
  • Yarn needle
  • Scissors

Optional

  • washable pet cushion insert for extra comfort

Main Pattern

The cat cave is worked from the bottom upward in continuous rounds. Do not join rounds unless instructed. Place a stitch marker in the first stitch of each round and move it upward as you crochet.

  1. Round 1Make a magic ring. Work 8 sc into the ring. (8 sts)
  2. Round 2Inc in each stitch around. (16 sts)
  3. Round 3(Sc in next stitch, inc in next stitch) repeat around. (24 sts)
  4. Round 4(Sc in next 2 stitches, inc in next stitch) repeat around. (32 sts)
  5. Round 5(Sc in next 3 stitches, inc in next stitch) repeat around. (40 sts)
  6. Round 6(Sc in next 4 stitches, inc in next stitch) repeat around. (48 sts)
  7. Round 7(Sc in next 5 stitches, inc in next stitch) repeat around. (56 sts)
  8. Round 8Sc around. (56 sts)

Main Pattern

  1. Rounds 9–18Sc around continuously. (56 sts each round)(56)
  2. Round 19Sc in next 14 stitches, dec 6 times, sc in remaining 30 stitches. (50 sts)
  3. Round 20Sc around. (50 sts)
  4. Round 21Sc in next 13 stitches, dec 6 times, sc in remaining 25 stitches. (44 sts)
  5. Round 22Sc around. (44 sts)
  6. Round 23Sc around. (44 sts)
  7. Round 24Work reverse single crochet around the opening edge for a firm finish.Fasten off, leaving a long yarn tail. Weave in all ends securely with a yarn needle.

Special Stitch Explanation

Single Crochet Increase (inc): Work two single crochet stitches into the same stitch.

Single Crochet Decrease (dec): Insert hook into the next stitch, yarn over and pull up a loop. Insert hook into the following stitch, yarn over and pull up a loop. Yarn over and pull through all loops on hook.

Putting it together

Step 1

Gently shape the crochet cat cave by pressing the sides into a rounded dome form. Light blocking with steam from a distance can help relax the fibers, but avoid flattening the structure. Allow the piece to cool completely before use.

Marlene's notes

Note 01

Keep your single crochet stitches worked through both loops and fairly tight throughout, since a looser gauge will leave gaps and a floppier dome than the pattern intends.

Note 02

Move your stitch marker up at the start of every round rather than trying to count back later, since these rounds are continuous and never joined.

Note 03

If you plan to add the washable pet cushion insert, leave the front opening unstretched while you work the final rounds so the cave keeps its shape once the insert is tucked in.

Note 04

This cat cave finishes at approximately 16 inches wide x 14 inches tall (41 x 36 cm), based on a gauge of about 9 single crochet stitches by 10 rounds = 4 inches x 4 inches (10 x 10 cm). Check your gauge swatch against this before starting so your finished dome matches these dimensions. This is a confident-beginner project worked in US crochet terms.

Before you sit down

  • Check that you have close to the full 450 yards of super bulky yarn on hand, since running short mid-dome means an awkward join partway up a wall.
  • Have your stitch marker ready before Round 1 so you can mark the first stitch and keep moving it upward through every round.
  • Work a small swatch in single crochet with the 8 mm hook first to see how firm your tension looks, since this cave depends on a tight, gap-free fabric.
  • Read through Round 19 before you start shaping, since the decrease placement there sets the opening and is easier to follow once you know where it's headed.

How the hours go

Base and rising walls (Rounds 1-8)
about 45-60 minutes because the increases need steady counting to land on 40 stitches by Round 5 and keep climbing accurately
Straight sides (Rounds 9-18)
about 1.5-2 hours because ten rounds of plain single crochet at 56 stitches each take the longest stretch of steady, repetitive work
Dome shaping and opening (Round 19 onward)
about 1-1.5 hours because the decrease placement is fiddly and worth checking stitch by stitch to keep the opening even

Looking after it

  • Hand wash the finished cave in cool water if your super bulky yarn is wool or a wool blend, then press out excess water in a towel rather than wringing it, since twisting can distort the dome shape.
  • Lay it flat to dry fully before returning the cushion insert, and re-shape the walls gently by hand while damp so the cave dries into a rounded dome rather than a flattened tube.
FAQs

Asked on the glider

the ones that come up on the glider

Why does the pattern say not to join rounds?

This cave is worked in continuous spiral rounds rather than joined rounds, which avoids the small seam or step you'd get at the end of every joined round. That's why the stitch marker matters so much, since it's your only way of tracking where each round begins.

How do I know when to start the decrease rounds?

You'll work Rounds 9 through 18 as plain single crochet at 56 stitches each, and Round 19 is where the first decrease round begins, bringing the count down to 50 stitches. Reading through that round once before you reach it helps you place the decreases evenly around the dome.

Do I need the washable pet cushion insert, or can I stuff it another way?

The insert is suggested for comfort and because it's washable, which matters for a pet bed, but it isn't structural to the crochet itself. You could substitute a washable cushion pad of similar size or leave the cave unlined if your cat prefers a firmer shell.

Is this pattern suitable if I've only made amigurumi before?

The techniques, single crochet, increases, and decreases, are the same ones amigurumi uses, just scaled up with super bulky yarn and worked over far more rounds. The main difference is patience, since the straight-sided rounds between the base and the dome are the longest stretch of plain stitching you'll do.

How do I keep the front opening looking neat?

The opening comes from leaving a gap unworked while the decrease rounds shape the rest of the dome, so keeping your tension consistent through Round 19 and beyond is what keeps that opening even. Light steam blocking afterward, held at a distance, can help relax the edge without flattening the curve.