Beginner 4-6 Hours Chunky yarn

Worked on the glider, counted out loud —

Chunky Crochet Balaclava & Turtleneck Hoodie Pattern for Beginners

Learn to crochet a chunky balaclava turtleneck hoodie with FPdc/BPdc ribbing. Beginner-friendly pattern with two-color edging for a cozy handmade look.

Jump to the rounds

Before you sit down

Chain a long foundation row and work hdc and dc across to set up your first panel's base.

Build up nine rounds using a repeating front post and back post double crochet rib pattern.

Finish each row with a single hdc, then chain 2 and turn to keep the ribbed edge tidy.

Repeat the entire panel a second time so you end up with two identical mirrored pieces.

Seam the two body panels together following the assembly steps to shape the hood and neckline.

Attach the contrast edging piece around the opening to frame it with a pop of color.

Weave in all loose ends and give the seams a final check for a clean, finished look.

What this one is

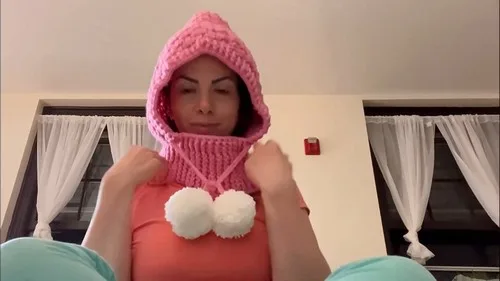
This Chunky Crochet Balaclava and Turtleneck Hoodie is the ultimate cold-weather statement piece — part cozy hood, part snug turtleneck, all texture. Built from two identical panels worked in a rich purple with a contrasting pink edge, it has that punchy, handmade-with-love look that stands out on the coldest days. It's perfect for anyone who wants a functional accessory that also doubles as a fashion piece, whether you're gifting it to a trendy teen, a chunky-knit lover, or keeping it for yourself.

The whole thing comes together with beginner-friendly stitches — hdc, dc, and a satisfying FPdc/BPdc rib pattern that gives the fabric its stretchy, ribbed texture without any complicated shaping. You'll start with a simple 35-chain foundation, work nine rounds to build the body panel, then finish with a short two-round edging piece in your contrast color. Expect to spend an evening or a lazy weekend afternoon on this one — it moves quickly once you get into the FPdc/BPdc rhythm.

The finished balaclava-hoodie hybrid has a substantial, chunky drape thanks to the medium weight yarn, with a snug turtleneck fit that transitions into a full hood. It feels thick, warm, and cocoon-like — exactly what you want when the temperature drops. Made from two mirrored panels seamed together, it's a wonderfully unique handmade gift for anyone on your list who appreciates statement knitwear with a crochet twist.
Variations

I love this pattern because it proves you don't need fancy shaping to make something that looks incredibly striking. The FPdc/BPdc repeat across each row creates this gorgeous raised rib texture that mimics knit fabric, and it's genuinely satisfying to watch that pattern build up row after row. Working two identical panels means you get into a rhythm fast — by the second panel you'll barely need to glance at the notes. The pink edging against the purple body is such a fun, unexpected pop of color that makes this feel like a designer piece rather than a basic hood. It's also endlessly practical: chunky yarn plus a 5mm hook means big stitches, quick progress, and a project that doesn't drag on for weeks. I love that beginners can tackle this too — hdc and dc are the backbone, and the post stitches, while they sound fancy, are really just working around the stitch post instead of into the top. By the time you seam your two panels together, you'll have a genuinely impressive, wearable piece that looks way harder than it actually was.

Common mistakes

  • Losing count of the FPdc/BPdc repeatPlace a stitch marker at the start of each new repeat block (every 2 FPdc + 2 BPdc) so you can quickly count backward if you lose your place.
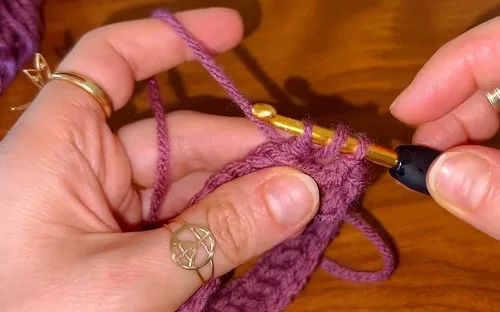
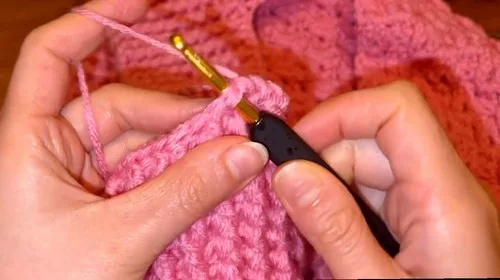
  • Working the front post and back postRemember: FPdc goes around the post from front to back, and BPdc goes around from back to front — always insert your hook around the stitch's vertical post, never into the top loops.
  • Forgetting the single hdc at the endCount your stitches before turning — if you're one stitch short in the total of 35, you likely skipped that final hdc; add it in before continuing.
  • Skipping the wrong number of chainsAlways skip 2 chains at the beginning since this skipped section counts as your first hdc — recount your foundation chain if your stitch count feels off.
  • Making the two panels different sizesKeep your two panels side by side as you work so you can compare row height and width regularly, and try to crochet both in one sitting if possible to keep tension consistent.
  • Confusing the 2 dc worked in the spaceThis is a space stitch, not a stitch-top stitch — insert your hook into the gap between the FPdc and BPdc group rather than into any single stitch.

The rounds, in full

Written out, round by round

Beginner4-6 Hours5 mmChunky

Materials

Everything this one takes, in the order you will reach for it.

  • Medium weight yarn in two colors (Purple for body, Pink for edging)
  • 5mm crochet hook
  • Scissors
  • Tapestry needle
  • Cardboard or pom-pom maker

keep this to hand

Abbreviations

US crochet terms, as used in this pattern.

  1. scsingle crochet
  2. hdchalf double crochet
  3. dcdouble crochet
  4. sc2togsingle crochet 2 stitches together (decrease)
  5. FPdcfront post double crochet
  6. BPdcback post double crochet

Main Body (Make 2 Identical Panels)

Foundation Chain Make a slip knot.

Chain 35.

  1. Round 1Base Row Skip 2 chains (counts as 1st hdc). Double crochet (dc) in each chain across.In the last chain, make 1 hdc.Chain 2 and turn.

Total stitches: 35.

  1. Round 2Start Ribbing Pattern 2 Front Post dc (FPdc). 2 Back Post dc (BPdc). Repeat 2 FPdc, 2 BPdc across.Last stitch: 1 hdc.Chain 2 and turn.
  2. Round 3Increase Row 2 FPdc. 2 dc in the space between FPdc and BPdc. 2 BPdc. Repeat 2 FPdc, 2 dc in space, 2 BPdc across.Last stitch: 1 hdc.Chain 2 and turn.
  3. Round 4Alternate Ribbing 2 BPdc. 2 FPdc. Repeat 2 BPdc, 2 FPdc across. Last stitch: 1 hdc.Chain 2 and turn.
  4. Round 5Increase Row 2 BPdc. 2 dc in the space between BPdc and FPdc. 2 FPdc. Repeat 2 BPdc, 2 dc in space, 2 FPdc across.Last stitch: 1 hdc.Chain 2 and turn.
  5. Round 6Continue Ribbing 2 FPdc. 2 BPdc. Repeat 2 FPdc, 2 BPdc across.Last stitch: 1 hdc.Chain 2 and turn.
  6. Round 7Increase Row 2 FPdc. 2 dc in space between FPdc and BPdc. 2 BPdc. Repeat 2 FPdc, 2 dc in space, 2 BPdc across.Last stitch: 1 hdc.Chain 2 and turn.
  7. Round 8Ribbing Pattern 2 BPdc. 2 FPdc. Repeat 2 BPdc, 2 FPdc across. Last stitch: 1 hdc.Chain 2 and turn.
  8. Round 9Increase Row 2 BPdc. 2 dc in space between BPdc and FPdc. 2 FPdc. Repeat 2 BPdc, 2 dc in space, 2 FPdc across.Last stitch: 1 hdc.Chain 2 and turn.
  9. Round 10-23Repeat Pattern Continue alternating ribbing and increase rows in the same 4-row sequence.

Maintain the established pattern and continue shaping.

  1. Round 24Change to Pink Yarn Work 2 BPdc, 2 FPdc for 7 repeats (28 stitches). 2 BPdc. 2 FPdc.1 single crochet (sc).Chain 1 and turn.
  2. Round 25Decrease and Shaping 2 sc in next 2 stitches (4 sc total). 2 hdc in next 2 stitches (4 hdc total). 2 dc in each of next 14 stitches (28 dc). 1 hdc in last stitch.Chain 2 and turn.
  3. Round 26Final Ribbing Row 2 FPdc, 2 BPdc for 7 repeats (28 stitches). 2 FPdc. sc2tog (single crochet 2 together).Slip stitch.Fasten off.Repeat for Second Panel Follow the same steps to create a second identical panel.

Assembly and Hood Section: Panel Joining (see Assembly Instructions below for how the two panels are joined).

Neck and Hood Rounds

Neck and Hood Rounds

  1. Round 1Establish Round Dc evenly around the entire joined edge opening. Slip stitch to join.Chain 2 and turn.
  2. Round 2-3Ribbing 1 FPdc, 1 BPdc around entire round. Slip stitch to join each round. Chain 2 and turn.
  3. Round 4+Increase Repeat 1 FPdc increase, 1 BPdc, 1 FPdc, 1 BPdc, 1 FPdc, 1 BPdc sequence. Continue until hood reaches desired length.Slip stitch to join each round and chain 2 to continue.Final Details Drawstring Make a long chain with desired tightness.Weave through the top edge of the hood.Tie tightly at center and cut loops.Attach to ends of drawstring.

Pom-Poms Wrap yarn around cardboard multiple times.

Fluff and trim into shape.

Assembly

Step 1

Work 32 sc along top edge of first panel.

Step 2

Work 36 sc along top edge of second panel.

Step 3

With right sides facing, align and join edges using slip stitches.

Important notes

Note 01

💡 Use a 5mm hook exactly as specified — going smaller will make the FPdc/BPdc ribbing too tight to stretch comfortably over the head.

Note 02

💡 Since you're making 2 identical panels, complete one fully before starting the second so you have a reference for stitch count and tension.

Note 03

💡 Place a locking stitch marker in the first stitch of each round so you always know where your round begins, especially important with the repeating FPdc/BPdc pattern.

Note 04

💡 Weave in ends as you finish each panel rather than waiting until the very end — it's much easier to manage on a flat panel than after assembly.

Note 05

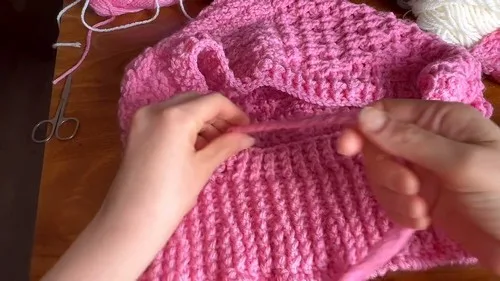
💡 When seaming the two panels together, use a tapestry needle and a whip stitch or mattress stitch in your body color so the seam blends invisibly into the ribbing.

More photos

FAQs

Asked on the glider

the ones that come up on the glider

What yarn weight works best for this balaclava hoodie?

This pattern is designed for medium weight (worsted) yarn paired with a 5mm hook. If you want an even chunkier, faster-working result, you can size up to a bulkier yarn and a larger hook.

Can I make this pattern in one color instead of two?

Absolutely — the purple and pink combo is just for visual contrast on the edging. Using a single color throughout will still give you the same ribbed texture, just a more subtle, monochrome look.

Do I need to know front post and back post stitches before starting?

Not necessarily — FPdc and BPdc are simple once you understand you're just working around the stitch's post instead of into the top loops. A few practice rows will have you comfortable with the rhythm quickly.

How do the two panels turn into a finished balaclava shape?

You crochet two identical panels using the 9-round body pattern, then seam them together following the assembly steps to form the hood and turtleneck shape. The two-round edging piece finishes the raw edge with a clean contrast trim.

Is this pattern really beginner-friendly despite the post stitches?

Yes — the entire pattern relies on just hdc, dc, and a repeating FPdc/BPdc block, with no increases or decreases to worry about. Once you get the rib repeat into muscle memory, it's a very approachable project.