Intermediate 4-6 hours Bulky yarn

Worked on the glider, counted out loud —

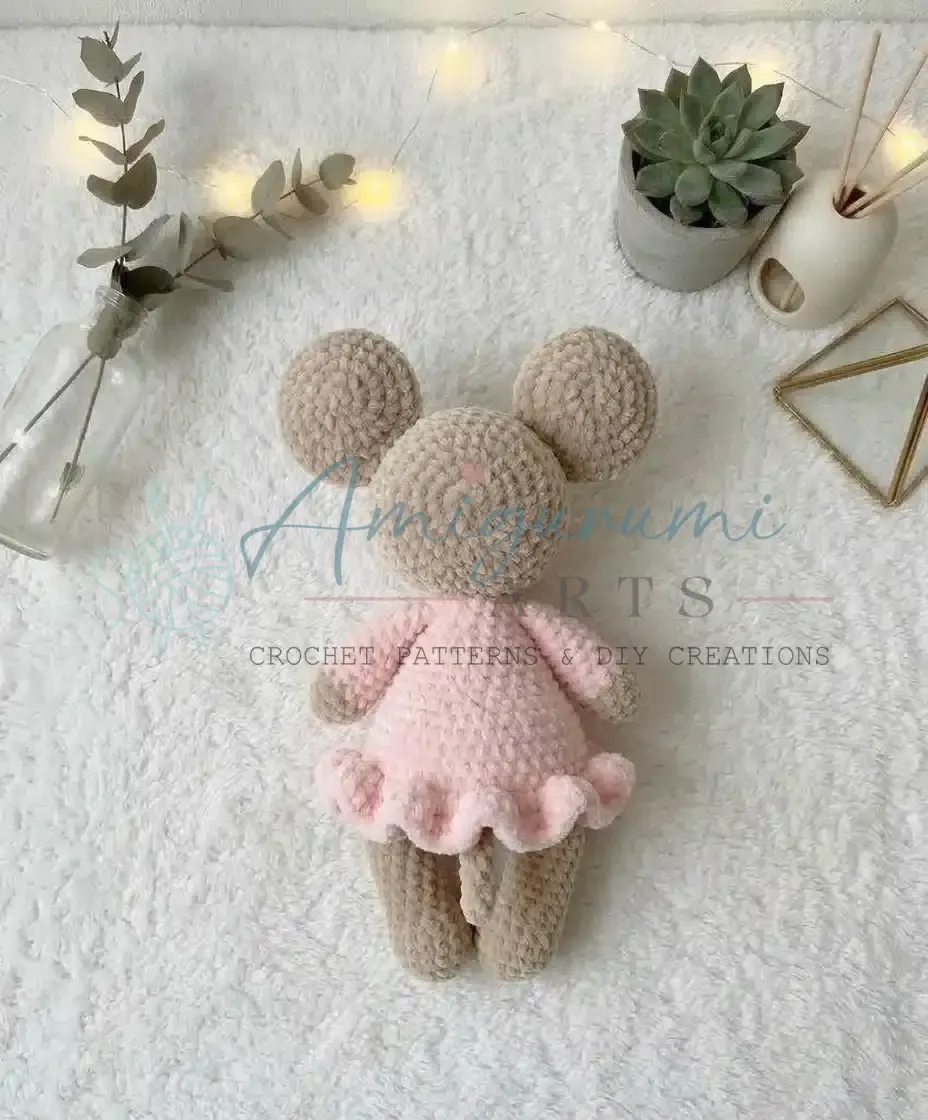
Chubby chenille mouse amigurumi pattern with ruffled dress

A soft chenille mouse for confident beginners or intermediates, about 4-6 hours from magic ring to sewn-on tail.

Jump to the rounds

What this one is

This one's for whoever on your gift list loves something small and soft enough to actually hold onto at night. You know the kind of person — they still have a stuffed animal from childhood tucked somewhere, and they'd welcome one more. The little dress ruffle and pink inner ears give this mouse a sweetness that works for a baby shower just as easily as a birthday for someone who never really grew out of loving these things.

Your hands will spend most of their time on single crochet in continuous spirals, with the chenille yarn doing a lot of the visual work for you. Between the head, body, four paws, two ears, tail and skirt, you're looking at around 4 to 6 hours total, plus a little extra at the end for sewing pieces together and sculpting the face with cotton thread.

Try it another way

If you want a smaller mouse, dropping to a lighter-weight yarn with a smaller hook will shrink the whole thing while keeping every round count the same, which is the easiest way to make a mantel-sized version instead of the roughly 25-28 cm original. For a boy mouse or a gender-neutral gift, skip the dress-colored paws and skirt ruffle entirely and keep the whole body in one main color, or swap the pink inner ears for a blue or yellow accent instead. You can also play with where the dress color shows up — instead of just the paws and skirt, try carrying it into a few rounds of the belly on the body for a vest-like effect. The ears are worked with a bigger 5.5 mm hook on purpose, so if you want floppier, more rabbit-like ears, you could size up further; for ears that stand up instead, stick with the 4.5 mm throughout. If this is headed for a child under three, leave out the safety eyes and nose and embroider the face instead with the same strong cotton thread used for sculpting, so there's nothing small enough to be a hazard.

The rounds, in full

Written out, round by round

Intermediate4-6 hours4.5 mmBulky

Bring to the porch

Everything this one takes, in the order you will reach for it.

Bulky (Category 5) Chenille Yarn

  • Main color (e.g., beige/grey) — approximately 1.5 skeins (100g/120m each)
  • Accent color (e.g., pink) — a small amount for inner ears
  • Dress color — a small amount (for color change on paws and body)

Crochet Hook

  • 4.5 mm (US G/7) and 5.5 mm (US I/9) for the ears

Safety Eyes

  • 12 mm, black

Safety Nose

  • 14-16 mm, black
  • Polyester Fiberfill (stuffing)
  • Tapestry Needle
  • Scissors
  • Stitch Marker (highly recommended!)
  • Strong Cotton Thread (matching main yarn color, for face sculpting)

Head

Place safety eyes between Rnds 7 and 8, with 6 stitches between them; place safety nose between Rnds 8 and 9, centered between the eyes.

Start stuffing the head firmly with fiberfill at Rnd 19, shaping it as you go.

Finish stuffing firmly; fasten off leaving a long tail, weave the tail through the front loop of the remaining 6 stitches and pull tight to close the hole; secure the yarn and weave in the end.

  1. Round 16 sc in MR. (6)
  2. Round 26 inc. (12)
  3. Round 312 sc. (12)
  4. Round 4(1 sc, inc)*6. (18)
  5. Round 5(2 sc, inc)*6. (24)
  6. Round 624 sc. (24)
  7. Round 7(3 sc, inc)*6. (30)
  8. Round 8(4 sc, inc)*6. (36)
  9. Round 9(5 sc, inc)*6. (42)
  10. Rounds 10–1542 sc. (6 rounds)
  11. Round 16(5 sc, dec)*6. (36)
  12. Round 17(4 sc, dec)*6. (30)
  13. Round 18(3 sc, dec)*6. (24)
  14. Round 19(2 sc, dec)*6. (18)
  15. Round 20(1 sc, dec)*6. (12)
  16. Round 216 dec. (6)

Ears (Make 2)

Make 2

Use the larger 5.5 mm hook for the ears to give them a lovely, soft drape.

Inner ear: fasten off leaving a short tail; weave in the starting and ending tails.

Outer ear: do not fasten off before joining.

After Row 7, fasten off leaving a long tail for sewing.

Fold the bottom corners of the ear towards the center, creating a slight envelope shape at the base; use the tapestry needle and long yarn tail to sew the corners together, securing the fold.

Repeat entire process for the second ear.

  1. Round 1Inner Ear - Accent Color 7 sc in MR. (7)
  2. Round 2Inner Ear 7 inc. (14)
  3. Round 3Inner Ear (1 sc, inc)*7. (21)
  4. Round 4Inner Ear (2 sc, inc)*7. (28)
  5. Round 1Outer Ear - Main Color 7 sc in MR. (7)
  6. Round 2Outer Ear 7 inc. (14)
  7. Round 3Outer Ear (1 sc, inc)*7. (21)
  8. Round 4Outer Ear (2 sc, inc)*7. (28)
  9. Round 5Joining Place the pink inner ear on top of the beige/grey outer ear, aligning the stitches; working through both loops of both pieces, sc around the edge for 25 stitches, leaving about 3 stitches unworked at the top to help shape the ear. (25)
  10. Round 6Ch 1, turn; 25 sc. (25)
  11. Round 7Ch 1, turn; 25 sc. (25)

Back Paws (Make 2)

Make 2

Work with the 4.5 mm hook.

Stuff the bottom part of the paw firmly after Rnd 8; keep the upper part lightly stuffed or unstuffed.

Fasten off leaving a long tail for sewing.

  1. Round 16 sc in MR. (6)
  2. Round 26 inc. (12)
  3. Round 3(1 sc, inc)*6. (18)
  4. Rounds 4–518 sc. (2 rounds)
  5. Round 6(1 sc, dec)*5. (15)
  6. Round 73 sc, dec, 10 sc. (14)
  7. Round 814 sc. (14)
  8. Round 9dec, 4 sc, dec, 6 sc. (12)
  9. Rounds 10–1312 sc. (4 rounds)
  10. Round 1411 sc, sl st. (12)

Front Paws (Make 2)

Make 2

Work with the 4.5 mm hook.

Change to dress color before Round 5.

Stuff the bottom part of the paw firmly after Rnd 9; keep the upper part lightly stuffed or unstuffed.

Fasten off leaving a long tail for sewing.

  1. Round 17 sc in MR. (7)
  2. Round 27 inc. (14)
  3. Rounds 3–414 sc. (2 rounds)
  4. Round 55 sc, 2 dec, 5 sc. (12)
  5. Rounds 6–912 sc. (4 rounds)
  6. Round 103 sc, dec, 4 sc, dec, 1 sc. (10)
  7. Rounds 11–1310 sc. (3 rounds)
  8. Round 141 sc, sl st. (10)

Body

Work with the 4.5 mm hook and main color.

Change to dress color before Round 10.

Fasten off leaving a long tail for sewing the head.

  1. Round 16 sc in MR. (6)
  2. Round 26 inc. (12)
  3. Round 3(1 sc, inc)*6. (18)
  4. Round 4(2 sc, inc)*6. (24)
  5. Round 5(3 sc, inc)*6. (30)
  6. Round 6(4 sc, inc)*6. (36)
  7. Round 76 sc, then 6 sc through both loops of the first back paw and the body, 12 sc, then 6 sc through both loops of the second back paw and the body, 6 sc. (36)
  8. Round 813 sc, inc, 2 sc, inc, 2 sc, inc, 2 sc, inc, 13 sc. (40)
  9. Round 940 sc. (40)
  10. Rounds 10–1340 sc. (4 rounds)
  11. Round 14(8 sc, dec)*4. (36)
  12. Round 1536 sc. (36)
  13. Round 16(4 sc, dec)*6. (30)
  14. Rounds 17–1830 sc. (2 rounds)
  15. Round 19(3 sc, dec)*6. (24)
  16. Rounds 20–2124 sc. (2 rounds)
  17. Round 22(2 sc, dec)*6. (18)
  18. Round 234 sc, then 5 sc through both loops of the first front paw and the body, 4 sc, then 5 sc through both loops of the second front paw and the body. (18)
  19. Round 2418 sc. (18)
  20. Round 2518 sc, sl st. (18)

Skirt/Dress Ruffle

Attach dress color yarn at the beginning of Rnd 10 of the body (the first round of the dress color).

Fasten off and weave in ends.

  1. Round 1Ch 1 (does not count as a stitch); (1 sc, inc in next st)*20 around; join with sl st to first sc. (60)
  2. Round 2Ch 2 (counts as first dc); (1 dc in next st, 2 dc in next st)*20 around; join with sl st to top of starting ch 2. (80)

Tail

Work with the 4.5 mm hook and main color.

Fasten off leaving a long tail for sewing.

  1. Round 1Ch 25.
  2. Round 2Starting in the 2nd ch from hook, (inc in next st, sc in next st)*12, 1 sc in last st. (37)
Putting it together

Step 1

Face Sculpting: Thread your tapestry needle with a long piece of strong cotton thread matching your main yarn color.

Step 2

Insert the needle into the bottom center of the head, around Rnd 8 (Point 1).

Step 3

Bring the needle out near the outer corner of one eye (Point 2).

Step 4

Re-insert the needle near the inner corner of the same eye (Point 3), catching a small amount of fabric.

Step 5

Bring the needle out through a stitch next to your starting point (Point 4), on the bottom center of the head; gently pull the thread to create a slight indentation around the first eye.

Step 6

From Point 4, insert the needle near the outer corner of the second eye (Point 5).

Step 7

Re-insert the needle near the inner corner of this second eye (Point 6), catching a small amount of fabric.

Step 8

Bring the needle out again through Point 1 on the bottom center of the head.

Step 9

Gently pull both ends of the thread at the bottom of the head until you achieve the desired indentation around both eyes.

Step 10

Tie a secure knot with the two ends of the thread at the bottom of the head, trim the excess, and push the knot inside the head with your needle to hide it.

Step 11

Attach the Ears: Position the ears on the head, between Rnds 13 and 14, with about 8 single crochet stitches between them at the top; use the long tails and tapestry needle to sew them securely all around the base.

Step 12

Attach the Head to the Body: Take the long yarn tail from the body; before fully closing the seam, make sure the top of the body is firmly stuffed; align the head and body, and sew them together neatly using a whip stitch or mattress stitch, going through the front loop of the body and the remaining stitches of

Marlene's notes

Note 01

Chenille yarn hides stitch definition well, but it also hides tension problems, so keep your single crochets snug and even or the fiberfill will peek through at the seams.

Note 02

Swap to the 5.5 mm hook only for the ears — going back down to 4.5 mm for the rest of the body keeps the proportions from looking off.

Note 03

Stuff the lower part of each back paw firmly before closing it up, but leave the upper portion of the paw soft so it can bend naturally when you sew it to the body.

Note 04

This pattern is written in US crochet terminology.

Note 05

Worked in continuous spirals for most parts, so a stitch marker is recommended to keep track of rounds.

Note 06

The ears and skirt are worked in rows or joined rounds with turning chains.

Note 07

Gauge is not critical for this project, but maintain a consistent, snug tension so the stuffing doesn't show through; finished mouse is about 25-28 cm (10-11 inches) tall.

Note 08

Personal tip: when pulling yarn through for a single crochet, give it a gentle tug to keep stitches firm and even.

Before you sit down

  • Check you have close to 1.5 skeins of your main chenille color on hand — the head and body alone eat through yarn fast.
  • Set your stitch marker where you can grab it easily; everything here works in continuous spirals, so losing your round is easy to do and hard to spot in chenille.
  • Read through the Head instructions for Rounds 7 through 9 before you start, since the eye and nose placement happens early and is awkward to fix after the fact.
  • Have your safety eyes, nose, and fiberfill within reach before Round 7 of the head so you're not stopping mid-round to dig through a bag.

How the hours go

Head
about 60-75 minutes because it's 16 rounds plus careful eye and nose placement between Rounds 7 and 9
Body and all four paws
about 2 to 2.5 hours because the body alone runs 20 rounds and each paw set needs its own stuffing and shaping
Ears, tail, skirt, and face sculpting
about 45-60 minutes because the ears join two colors and the face sculpting with cotton thread takes a patient, steady hand

Looking after it

  • Spot clean with a damp cloth and mild soap where possible; chenille yarn can shed and mat if it's machine washed too roughly, so hand washing in cool water and laying flat to dry will keep the fluffy texture intact.
  • Reshape the ears and paws gently while damp and store the finished mouse somewhere it won't get compressed for long stretches, since chenille can flatten under weight and take a while to spring back.
FAQs

Asked on the glider

the ones that come up on the glider

Can I use worsted weight yarn instead of bulky chenille?

You can, though your mouse will come out noticeably smaller than the 25-28 cm original since the stitch counts stay fixed. You'll also lose some of that soft, fuzzy look that bulky chenille gives this particular pattern.

Why does the pattern call for two different hook sizes?

The 4.5 mm hook keeps the head, body, and paws snug enough that stuffing doesn't peek through. The larger 5.5 mm hook is used just for the ears so they drape softly instead of standing up stiffly.

When exactly do I insert the safety eyes and nose?

The eyes go in between Rounds 7 and 8 of the head, spaced six stitches apart, and the nose goes in between Rounds 8 and 9, centered between the eyes. Getting this placement right before you keep stitching upward matters since it's hard to adjust later.

Do I need the stitch marker for a pattern this size?

Yes, since most of the mouse is worked in continuous spirals rather than joined rounds, it's very easy to lose track of where a round starts. The pattern itself calls the marker highly recommended for exactly that reason.

What's the strong cotton thread for in the materials list?

It's used after the head is complete, for sculpting the face by stitching through specific points around Round 8 to shape the eye area and bring out an expression. Regular chenille yarn is too thick and soft to create that same defined, sculpted look.

Why are the back paws stuffed differently than the front paws?

The back paws get firm stuffing only in the bottom section after Round 8, with the upper part left lightly stuffed or unstuffed so they bend naturally where they attach to the body. This keeps the mouse looking properly seated rather than stiff-legged.