Intermediate 3-4 hours Fingering yarn

Worked on the glider, counted out loud —

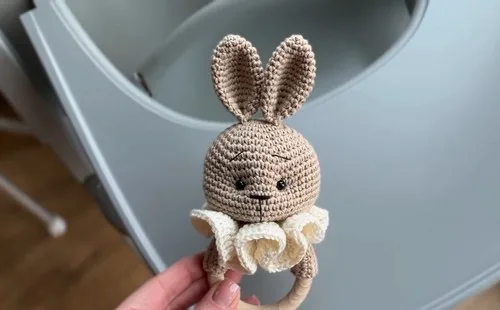
A soft bunny ring rattle to crochet for a new baby

A beginner-friendly cotton bunny rattle with a wooden ring center, worked in a few relaxed sittings for a newborn gift.

Jump to the rounds

What this one is

This little bunny ring rattle is the kind of project you make on a quiet evening when you want something small and sweet to show for your time. It's sized for the tiniest hands, with a wooden ring at its center a newborn can grip before they even understand what gripping means. Make it for a baby shower, a hospital bag, or just because you know someone who's about to become brand new to the world.

Your hands spend most of this project on single crochet in the round, working two small ears up from magic rings, then shaping a head through seven rounds of increases before it rounds back in. After that you'll crochet a flat strip to wrap and stitch around the wooden ring. All told, you're looking at a few sittings rather than one long stretch, with the head taking the longest to shape.

Try it another way

You can make this entirely your own without changing a single round. Swap the color of the Drops Safran cotton between the Ears and the Head for a two-tone bunny, or keep the Wooden Ring Stripe in a contrasting shade so it reads as a deliberate accent rather than a match. If you want a slightly larger or smaller toy, going up or down within the 1.75 mm–2.0 mm hook range will change the finished scale without touching the stitch counts, though your gauge swatch will tell you how much. The Wooden Ring Stripe is worked flat as 27 single crochet over several rows before it's sewn around the 6.5 cm ring, so you could crochet it in stripes of two colors instead of one solid strip for a bit more visual interest. For a different feel entirely, consider leaving off the rattle bell ball and using the shape purely as a soft ring toy for slightly older babies who are past the mouthing stage for small parts. The same bunny Head and Ears, worked at this scale, also make a sweet stand-alone keyholder or bag charm if you skip the ring assembly altogether and finish the head with a loop instead.

There's real satisfaction in watching those magic ring starts tighten into clean little circles, especially on the ears, where fourteen rounds take you from a six-stitch nub to a soft curved shape that sits flat against the head. The head itself is the showpiece: seven rounds of steady increases, from six stitches up through twelve, eighteen, twenty-four, thirty, thirty-six, forty-two, and forty-eight, build a dome that rounds out evenly if you keep your tension consistent. Then there's the wooden ring stripe, worked flat in rows of twenty-seven single crochet instead of in the round, which is a nice change of rhythm before you wrap and sew it snugly around the ring. Setting the 6 mm safety eyes and tucking in the rattle bell ball at the end feels like the moment the whole thing finally becomes a toy.
The rounds, in full

Written out, round by round

Intermediate3-4 hours1.75 mmFingering

Bring to the porch

Everything this one takes, in the order you will reach for it.

  • Drops Safran cotton yarn
  • Crochet hook (1.75 mm–2.0 mm)
  • Scissors
  • Hollow fiber stuffing
  • Wooden ring (6.5 cm)
  • 6 mm safety eyes
  • Plastic rattle bell ball

Making the Ears (Make 2)

  1. Round 1Magic ring, 6 single crochet (6)
  2. Round 2(1 single crochet, increase) ×3 (9)
  3. Round 3(2 single crochet, increase) ×3 (12)
  4. Round 4(3 single crochet, increase) ×3 (15)
  5. Round 5(4 single crochet, increase) ×3 (18)
  6. Round 6Single crochet around (18)
  7. Round 7(5 single crochet, increase) ×3 (21)
  8. Rounds 8–12Single crochet around (21)
  9. Round 13(5 single crochet, decrease) ×3 (18)
  10. Round 14(4 single crochet, decrease) ×3 (12)Fold ear in half, crochet 6-7 single crochet through both layers to close Fold again and crochet 3 single crochet to pleat

Head

  1. Round 1Magic ring, 6 single crochet (6)
  2. Round 26 increases (12)
  3. Round 3(1 single crochet, increase) ×6 (18)
  4. Round 4(2 single crochet, increase) ×6 (24)
  5. Round 5(3 single crochet, increase) ×6 (30)
  6. Round 6(4 single crochet, increase) ×6 (36)
  7. Round 7(5 single crochet, increase) ×6 (42)
  8. Round 8(6 single crochet, increase) ×6 (48)
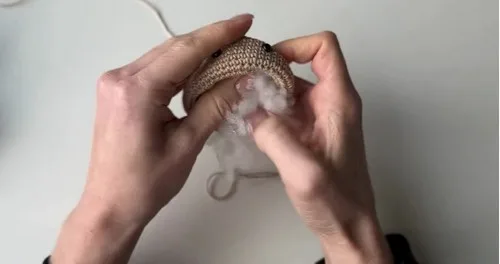
  9. Rounds 9–17Single crochet around (48)Insert safety eyes between rounds 11-12 leaving 8 stitches between Stuff head and insert rattle bell
  10. Round 18(6 single crochet, decrease) ×6 (42)
  11. Round 23(1 single crochet, decrease) ×6 (12)
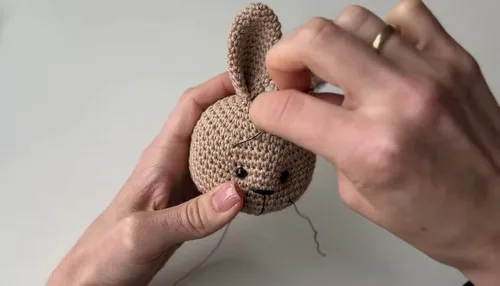
  12. Round 246 decreases (6)Make muzzle, sew on ears, embroider nose and eyebrows with black thread

Wooden Ring Stripe

  1. Round 1Chain 28
  2. Round 2Work 27 single crochet from 2nd chain
  3. Rounds 3–9Chain 1, turn, 27 single crochetSew stripe tightly around wooden ring

Marlene's notes

Note 01

Use the smaller end of the 1.75 mm–2.0 mm hook range if your single crochet tends to run loose, since tight stitches keep the stuffing and the rattle bell ball from peeking through.

Note 02

Move your stitch marker up at the end of every round on the Head especially, where the jump between increase rounds makes it easy to lose your place.

Note 03

Stuff the Head firmly before closing it around the rattle bell ball, packing a little extra fiber around the ball so it rattles without feeling loose inside.

Porch photos

Before you sit down

  • Check your Drops Safran cotton amounts before you start the first magic ring, since the Ears, Head, and Wooden Ring Stripe are all worked from the same ball.
  • Read through the Head's rounds once before you cast on, so you know exactly where the increase rounds fall and don't lose count partway through.
  • Work up a quick magic ring and six single crochet swatch with your 1.75 mm–2.0 mm hook to check your stitches are tight enough to hide the stuffing.
  • Keep a stitch marker on hand to track the start of each round on the Head, where the counts climb quickly through 18, 24, and 30 stitches.

How the hours go

Making the Ears (both)
about 45 minutes because you're working two matching pieces through fourteen short rounds each
Head
about 1.5 hours because seven rounds of increases shape the roundest, largest part of the toy
Wooden Ring Stripe
about 45 minutes because the repeated rows of 27 single crochet and the careful sewing around the 6.5 cm ring both take patience

Looking after it

  • Hand wash the finished rattle in cool water and lay it flat to dry, since the cotton yarn can hold water and the hollow fiber stuffing takes a while to dry through.
  • Keep the rattle bell ball and wooden ring away from the washing machine and dryer, and store the toy somewhere dry between uses so the cotton keeps its shape and the wooden ring doesn't warp.
FAQs

Asked on the glider

the ones that come up on the glider

Can I use a different yarn than Drops Safran cotton?

You can, but the pattern is written tightly for a fine cotton worked on a 1.75 mm–2.0 mm hook, so a thicker yarn will give you a noticeably bigger bunny and may need extra stuffing. Stick close to a fine cotton if you want the finished size shown here.

Why does the Head have so many more rounds than the Ears?

The Head works through seven rounds of increases to build enough width for the 6 mm safety eyes and the rattle bell ball inside, while each Ear needs fourteen rounds to make a small curved shape. It's simply a matter of scale between the two parts.

How do I attach the Wooden Ring Stripe to the ring?

Once you've worked the strip to length in rows of 27 single crochet, you wrap it around the 6.5 cm wooden ring and sew it tightly in place so no wood shows through. A snug fit keeps the stripe from sliding once baby starts tugging on it.

Is this rattle safe for a newborn to handle?

The 6 mm safety eyes and the enclosed rattle bell ball are designed to be secure once properly fitted and the head is stuffed firmly, but you should still supervise a newborn with any handmade toy. Check the eyes and seams regularly for wear.

Can I make the ears sit floppier instead of curved?

Since the Ears are worked in rounds with regular increases rather than shaped rows, they naturally curve rather than lie flat, but leaving them slightly less stuffed will give a softer, floppier result. Lightly steaming the finished ear can also help it settle the way you want.

What's the trickiest part of this pattern?

Most crocheters find the Head's increase rounds the part to watch most closely, since the jump from 18 to 24 to 30 stitches happens quickly and it's easy to misplace an increase. Counting stitches at the end of each round keeps it on track.