Intermediate 4-6 hours Worsted yarn

Worked on the glider, counted out loud —

Amigurumi tiger crochet pattern for a soft striped cub

A crochet amigurumi tiger with a shaped muzzle and beaded eyes, worked in worsted cotton over a few relaxed sittings.

Jump to the rounds

What this one is

You know the kind of evening where your hands want something to do but your mind doesn't want a puzzle. This tiger is for that. It's built for anyone who wants a small, sturdy toy to give away or keep on a shelf, something with a bit of personality in the face without a pattern that fights you the whole way through.

Your hands spend most of their time on the head here, working eleven rounds of increases before you shape a separate three-round muzzle and stitch it into place. The arms and tail move faster, worked flat through their rounds with a color change partway. All told, expect to sit with this one over a few short sessions rather than finish it in one go.

Try it another way

Once you've made the tiger as written, there's plenty of room to play. Swap the Alize Cotton Gold and YarnArt Jeans for any worsted-weight cotton blend you already have, since the stitch counts stay the same regardless of brand. For a different look, try placing the color change on the arms earlier or later than the pattern suggests, or add a second color change to the tail's ten rounds for a more deliberately striped effect rather than one clean block of color. If you want a slightly smaller tiger, working the whole pattern with the same 2.25 mm hook but a finer cotton will shrink it down without changing a single round or stitch count. You could also make just the head and muzzle as a standalone keychain or ornament, since that combination already reads as a complete little tiger face on its own. For gifting, consider working the arms and legs in a solid neutral while keeping the head and tail striped, so the personality stays concentrated where it shows most. None of these changes touch the actual stitch counts in the rounds, just where and how you introduce color.

There's real satisfaction in building a face from two pieces instead of one. The head takes its eleven rounds of steady increasing, and then you get to shape the muzzle on its own, starting from a chain of six rather than a magic ring, and grafting it onto the face afterward. That two-part construction is what gives the tiger its snout instead of a flat, generic circle. The arms carry a color change partway through their seven rounds, which is a small satisfying moment of watching stripes appear. The tail's ten rounds give you something to work on when you want simple, repetitive stitching after all that shaping in the head. Each part has its own small technique to enjoy, not just more of the same.
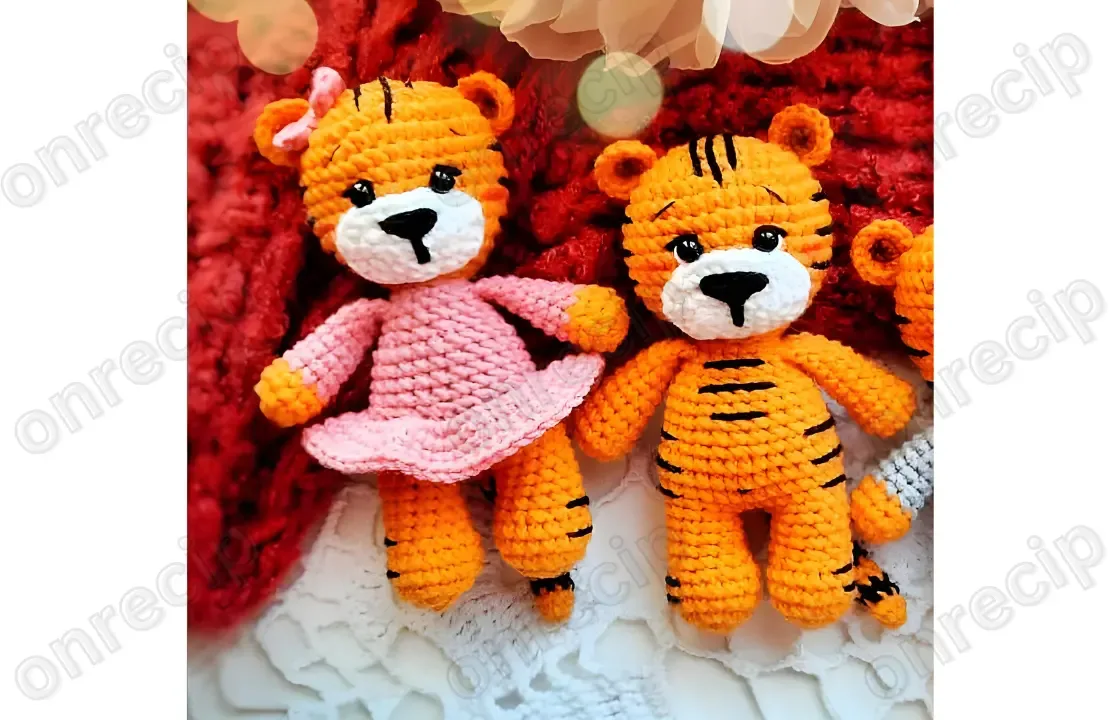
The rounds, in full

Written out, round by round

Intermediate4-6 hours2.25 mmWorsted

Bring to the porch

Everything this one takes, in the order you will reach for it.

  • Alize Cotton Gold and YarnArt Jeans yarn
  • 2.25 mm crochet hook
  • 6 mm black beads for eyes
  • Sewing needle, scissors
  • Fiberfill

Head

  1. Round 16 sc in magic ring [6]Step by step: (inc) repeat 6 times [12] Fasten off and leave a long tail for sewing.(6)
  2. Round 2(inc) repeat 6 times [12](12)
  3. Round 3(1 sc, inc) repeat 6 times [18](18)
  4. Round 41 sc, inc, (2 sc, inc) repeat 5 times, 1 sc [24](24)
  5. Round 5(3 sc, inc) repeat 6 times [30](30)
  6. Round 62 sc, inc, (4 sc, inc) repeat 5 times, 2 sc [36](36)
  7. Rounds 7–1236 sc
  8. Round 132 sc, dec, (4 sc, dec) repeat 5 times, 2 sc [30](30)
  9. Round 14(3 sc, dec) repeat 6 times [24](24)
  10. Round 151 sc, dec, (2 sc, dec) repeat 6 times, 1 sc [18](18)
  11. Round 16(1 sc, dec) repeat 6 times [12] Stuff with fiberfill. Fasten off. Sew beads to the head on R 10.

Muzzle

Make 6 ch.

  1. Round 1from the 2nd ch from hook: 4 sc, 3 sc in last st, turn: 3 sc, inc [12](12)
  2. Round 2inc, 3 sc, 3 inc, 3 sc, 2 inc [18](18)
  3. Round 31 sc, inc, 3 sc, (1 sc, inc) repeat 3 times, 3 sc, (1 sc, inc) repeat 2 times [24]Fasten off and leave a long tail for sewing.(24)

Arms (make 2)

  1. Round 16 sc in magic ring [6](6)
  2. Round 2(inc) repeat 6 times [12](12)
  3. Round 312 sc
  4. Round 4(2 sc, dec) repeat 3 times [9]Change to sweater color:(9)
  5. Rounds 5–89 sc
  6. Round 9dec, 7 sc [8](8)
  7. Rounds 10–118 sc Stuff the bottom part of the arm. Fold the top opening flat and 4 sc through both sides.Fasten off.

Tail

With orange yarn:

  1. Round 17 sc in magic ring [7](7)
  2. Round 27 sc With black yarn:
  3. Round 37 sc With orange yarn:
  4. Rounds 4–57 sc With black yarn:
  5. Round 67 sc With orange yarn:
  6. Rounds 7–87 sc With black yarn:
  7. Round 97 sc With orange yarn:
  8. Rounds 10–117 sc With black yarn:
  9. Round 127 sc With orange yarn:
  10. Rounds 13–147 sc Fold the top opening flat and sc through both sides. Fasten off.

Legs (make 2)

Ready to Learn More? Open the next page for Further Guidance!

Pages: 1 2

Marlene's notes

Note 01

Work with the 2.25 mm hook throughout and check your tension gives you a firm, tight fabric so the fiberfill doesn't peek through the stitches.

Note 02

The arms include a color change partway through their seven rounds, so keep your second yarn nearby and ready before you reach that point rather than stopping to hunt for it.

Note 03

Stuff each piece as you go rather than waiting until the round is closed, especially on the head, so the fiberfill settles evenly through all eleven rounds without lumps.

Before you sit down

  • Check how much of each yarn color you'll need across the head, muzzle, arms, tail, and legs before you commit to a single skein of each shade.
  • Read through the Head instructions once end to end so the eleven rounds of shaping make sense before you pick up your hook.
  • Have your 6 mm beads and sewing needle set aside now, since the eyes go in during head construction rather than at the very end.
  • Place a stitch marker at the start of each round on the head and tail, since both are worked in one continuous spiral and it's easy to lose your place.

How the hours go

Head
about 60-75 minutes because it runs eleven rounds with several increase rows to keep track of
Muzzle and face assembly
about 30-40 minutes because the three rounds are quick but attaching it neatly to the head takes patience
Arms, tail, and legs
about 90 minutes total because there are two arms and a color change to manage alongside the tail's ten rounds

Looking after it

  • Since this is worked in cotton yarn, hand wash the finished tiger in cool water if it needs freshening up, and avoid wringing it since that can distort the muzzle and head shaping.
  • Lay it flat to dry away from direct heat, and once dry, gently reshape the head and muzzle with your fingers before setting it on a shelf so the increases sit smoothly again.
FAQs

Asked on the glider

the ones that come up on the glider

Why does the head take so many rounds compared to the other parts?

The head is the largest single piece at eleven rounds, since it needs to build up enough width to hold the shape and hide the beaded eyes securely. The muzzle and tail are separate, smaller pieces that don't need the same gradual increasing.

Do I attach the muzzle before or after stuffing the head?

Work the muzzle's three rounds separately first, then sew it onto the head once the head itself has a few rounds of stuffing in place so you have a firm surface to stitch against. Leave the long tail from fastening off specifically for this attachment step.

What hook size does this pattern use throughout?

You'll work everything on a 2.25 mm hook, from the magic ring rounds on the head and arms to the chain start on the muzzle. Keeping the same hook size across all parts helps the pieces match in density when you assemble them.

Can I make the arms without the color change?

Yes, you can carry a single color through all seven rounds of the arms if you'd rather skip the color change entirely. The stitch counts and shaping stay exactly the same either way.

How many beads do I need for the eyes?

The materials list calls for 6 mm black beads for the eyes, and since a tiger has two eyes, you'll use two beads total. Keep your sewing needle handy since they attach directly to the head.

Is the tail worked the same way as the head?

Both the head and tail are worked in continuous rounds rather than turned rows, so a stitch marker at the start of each round helps you track where you are in both. The tail runs ten rounds compared to the head's eleven, so it's a slightly quicker piece to finish.