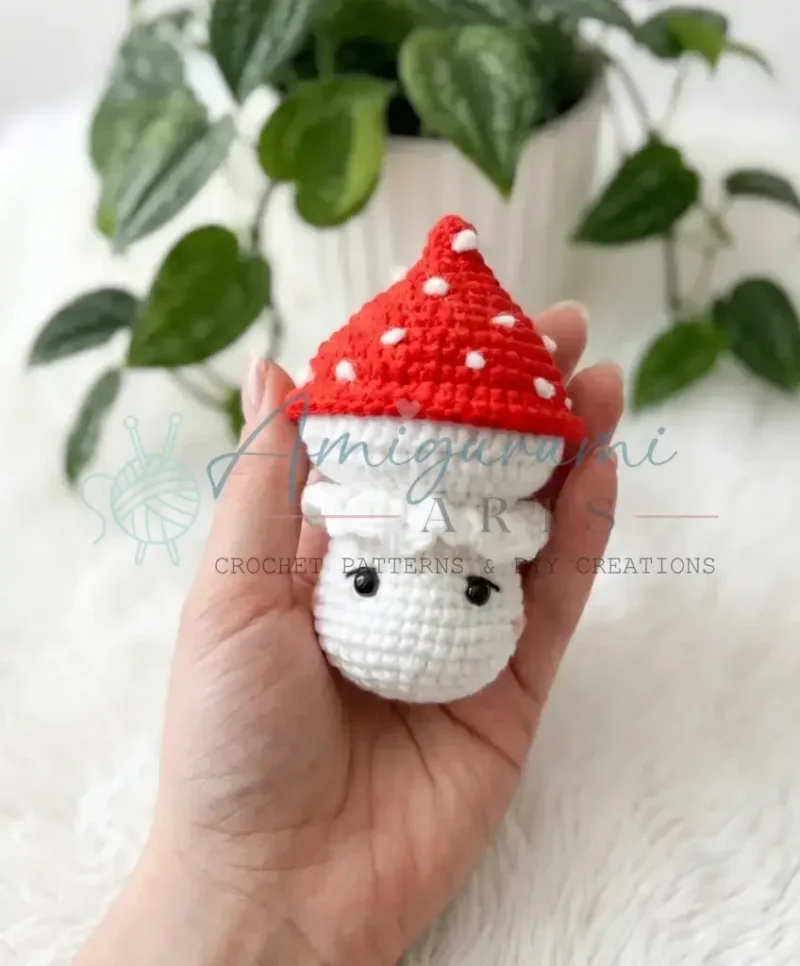
Intermediate 4-6 hours Worsted yarn

Worked on the glider, counted out loud —

Amigurumi mushroom crochet pattern for cozy stitching

A sweet stuffed mushroom for confident beginners – about 4-6 hours, two simple spiral parts plus assembly.

Jump to the rounds

What this one is

This one's for a quiet stretch of free time when you want something small and cheerful to show for it by the end. Maybe it's a gift for a kid who loves toadstools in storybooks, or a little shelf charm for yourself. Either way, you don't need a big yarn stash or a complicated plan — just two colors and a pile of stuffing waiting to become something round and sturdy.

Your hands will spend most of the time in continuous spiral rounds, increasing steadily to shape a dome for the cap and a tidy cylinder for the stem. Nothing here asks for fancy stitches, just plain single crochet worked round after round with a stitch marker keeping you honest. Between the two parts and the joining rounds, plan on an evening or two of easy, repetitive work.

Try it another way

The simplest way to change this pattern is yarn weight: swap to a fingering weight yarn with a smaller hook for a tiny, delicate mushroom, or go up to a worsted weight yarn for a larger, chunkier version — just keep your tension tight enough that the stuffing doesn't show through the fabric, whichever weight you pick. Color is the other easy swap: work it in classic red and white for a fairy-tale toadstool look, or experiment with any color pairing that speaks to you for the cap and stem.

There's real satisfaction in watching a flat circle of single crochet rounds climb into a dome — that's exactly what happens as the Cap grows from 6 stitches up through steady increase rounds. The Stem works the opposite trick, leveling off into a straight tube once the increases taper, so you get to feel the shape change under your hook. Joining the two pieces together with a double round of single crochet is oddly meditative, and tucking stuffing in as you close the gap feels like the moment the project actually becomes a toy. By the time you're embroidering spots onto the cap, you're not following rounds anymore — you're just making something your mushroom.
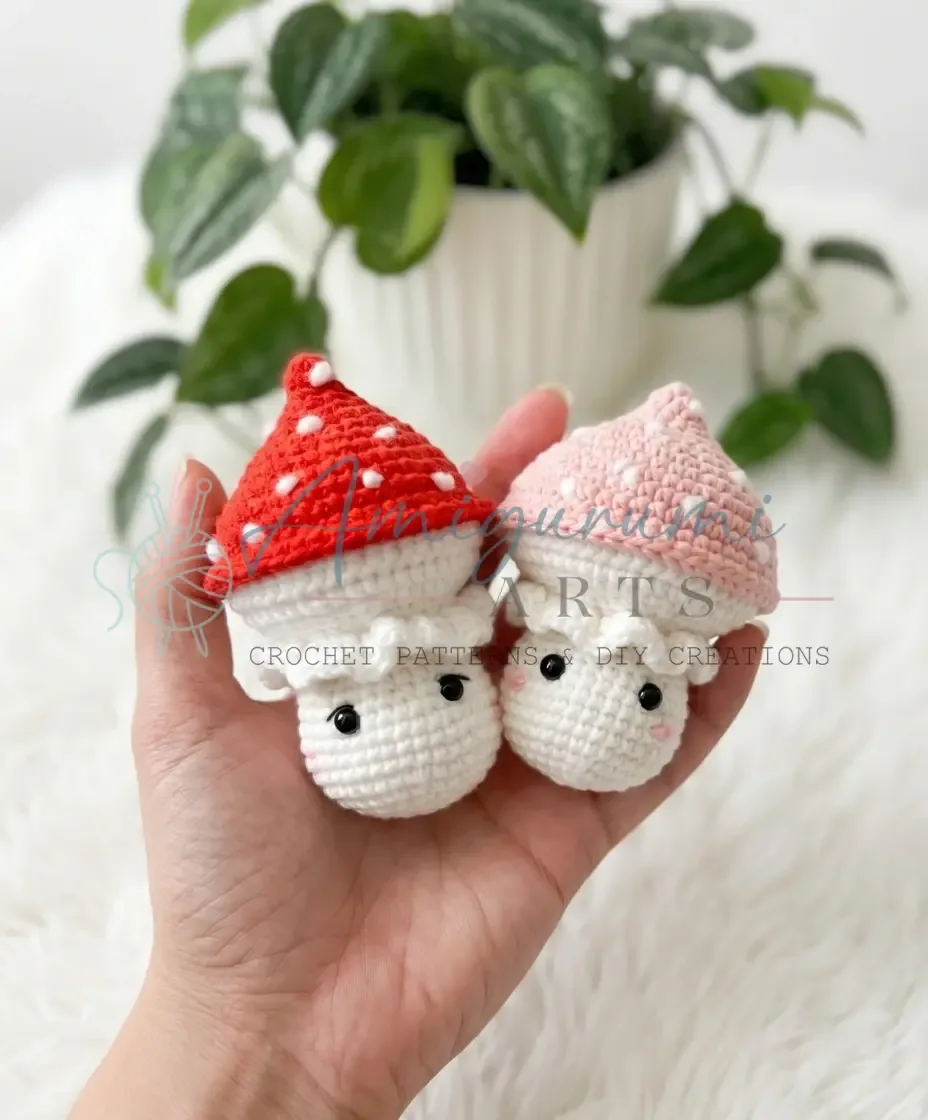
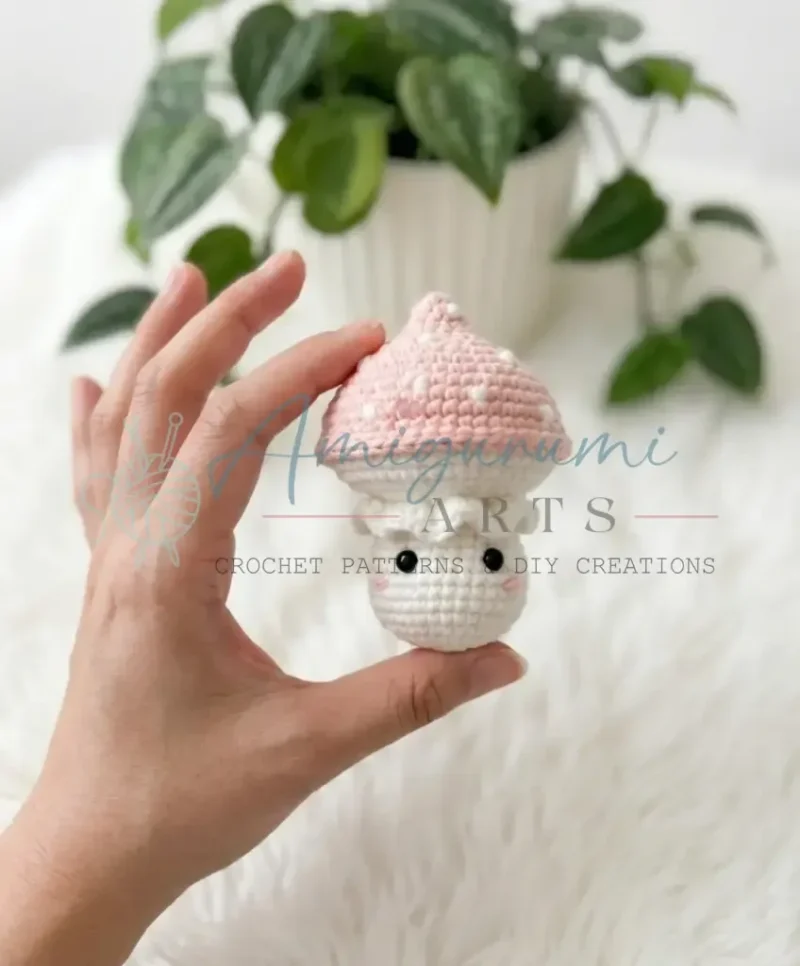
The rounds, in full

Written out, round by round

Intermediate4-6 hours2.0 mmWorsted

Bring to the porch

Everything this one takes, in the order you will reach for it.

Yarn

  • YarnArt Jeans (or any DK / Light Worsted weight yarn), in your chosen stem color and cap color

Hook

  • US B-1 / 2.0 mm

Safety eyes

  • 7 mm, 1 pair

Stuffing

  • Polyester fiberfill
  • Stitch marker
  • Yarn needle / tapestry needle
  • Scissors

Stem

  1. Round 16 sc in MR. (6)
  2. Round 2inc in each st around. (12)
  3. Round 3sc, inc repeat 6 times. (18)
  4. Round 4sc, inc, 2 sc, inc repeat 5 times, sc. (24)
  5. Round 53 sc, inc repeat 6 times. (30)
  6. Round 62 sc, inc, 4 sc, inc repeat 5 times, 2 sc. (36)
  7. Rounds 7–10sc in each st around. (36)
  8. Round 112 sc, dec, 4 sc, dec repeat 5 times, 2 sc. (30)For the neatest shaping, work your decreases as invisible decreases: insert your hook under the front loops of the next two stitches before pulling through. A standard decrease leaves a visible bump; the invisible version keeps the surface smooth.
  9. Round 12sc in each st around. (30)
  10. Round 133 sc, dec repeat 6 times. (24)By Round 14 the opening is narrow enough that adding fiberfill becomes awkward, so add a small amount of stuffing every few rounds from Round 10 onward, pushing it down firmly each time. The base of the Stem should feel solid, while the upper section near the eye placement can be slightly softer.
  11. Rounds 14–15sc in each st around. (24)Insert safety eyes between Rounds 10–11, spaced 8 stitches apart (measuring from one side of the stem to the other).
  12. Round 16Working in BLO of Round 15, sc in each st around. (24)Round 16 is worked into the back loops of Round 15 only, which creates the decorative ridge that separates the stem from the frilled skirt below. Drop a stitch marker into the front loops of Round 15 before starting Round 16 — you'll need those front loops later for the Cap Edging.
  13. Round 17sc in each st around, sl st to join. (24)
  14. Round 18Working in FLO. Ch 3 (counts as first dc), inc in dc repeat 24 times, sl st to third ch of beginning ch-3. (48)
  15. Round 19Ch 3 (counts as first dc), dc in each st around, sl st to third ch of beginning ch-3. (48)Cut yarn and weave in ends. Stuff the Stem firmly.

Cap

  1. Round 16 sc in MR. (6)
  2. Round 2sc in each st around. (6)
  3. Round 3sc, inc repeat 3 times. (9)
  4. Round 42 sc, inc repeat 3 times. (12)
  5. Round 53 sc, inc repeat 3 times. (15)
  6. Round 64 sc, inc repeat 3 times. (18)
  7. Round 7sc, inc, 2 sc, inc repeat 5 times, sc. (24)
  8. Round 83 sc, inc repeat 6 times. (30)
  9. Round 92 sc, inc, 4 sc, inc repeat 5 times, 2 sc. (36)
  10. Round 105 sc, inc repeat 6 times. (42)
  11. Round 113 sc, inc, 6 sc, inc repeat 5 times, 3 sc. (48)
  12. Round 12sc in each st around. (48)

Do not cut yarn.

Cap Edging: Join yarn into the remaining FLO loops from Round 15 of the Stem. Work an increase of 3 dc into each stitch around. Cut yarn and weave in ends.

Putting it together

Step 1

Working sc stitches through both layers simultaneously creates a much more durable seam than whipstitching the pieces together afterward — take your time lining up the stitches evenly before you begin so the join stays even.

Step 1

Hold the Stem and Cap together, aligning the open edges. Working through the corresponding loops of both pieces, sc around the entire opening — 48 sc total. As you work, add stuffing to the mushroom through the gap before closing it completely.

Step 2

Work a second round of 48 sc to secure the join firmly.

Step 3

Cut yarn, leaving a long tail. Weave in all ends securely.

Step 4

Using your yarn needle and a contrasting yarn color, embroider small dots onto the Cap to create the classic mushroom spots.

Step 5

If desired, embroider rosy cheeks onto the Stem near the safety eyes to finish the face.

Marlene's notes

Note 01

Work with your US B-1 / 2.0 mm hook and keep your tension on the firm side throughout — tight stitches are what keep the fiberfill from peeking through on a piece this size. YarnArt Jeans is a smooth, slightly firm yarn that works well for amigurumi; if gaps start appearing between stitches, try going down half a hook size to tighten things up.

Note 02

Both the Stem and Cap are worked in a continuous spiral with no joining slip stitch, so a stitch marker at the start of each round is not optional here.

Note 03

When you join Stem and Cap, you're working through corresponding loops of both pieces at once for 48 single crochet stitches, so count carefully before you close the gap.

Note 04

This crochet mushroom amigurumi pattern is written in US crochet terminology.

Note 05

Gauge is not critical for this project; consistent tension that keeps the fabric tight enough to conceal stuffing is what matters most.

Note 06

Rows 17–19 of the Stem and Row 18 of the Cap are worked as joined rounds (sl st to join, ch to begin).

Note 07

Stuff the Stem firmly before completing the final rounds. The Cap does not need to be stuffed separately — the mushroom is stuffed as you join the two pieces together.

Porch photos

Before you sit down

  • Check that you have enough DK or light worsted yarn in both your stem color and cap color, since both pieces are stuffed solid and use more yardage than their size suggests.
  • Place your stitch marker before Rnd 1 of whichever part you start with, and move it up every round — the spiral construction means there's no slip stitch to mark the turn.
  • Read through the Stem's 15 rounds and the Cap's 12 rounds once before you start, so you know roughly where the increases taper off into plain rounds.
  • Have your fiberfill within reach before you finish the final rounds of each part, since you'll want to stuff as you close rather than trying to stuff through a tiny hole after.

How the hours go

Stem
about 1.5 to 2 hours because it runs 15 rounds and includes several increase rounds that need careful counting
Cap
about 1 to 1.5 hours because its 12 rounds are shorter overall but the dome shaping asks for close attention near the top
Assembly and spots
about 1 to 1.5 hours because joining takes two full rounds of 48 single crochet plus stuffing, closing, and embroidering the dots by hand

Looking after it

  • Since this is worked in YarnArt Jeans or a similar DK-weight yarn with a cotton-acrylic blend feel, hand wash gently in cool water if it needs freshening up, and avoid wringing it since that can distort the stuffed shape.
  • Lay the mushroom flat to air dry away from direct heat, then reshape the cap and stem gently with your hands while still slightly damp so it dries sitting the way you intend it to be stored.
FAQs

Asked on the glider

the ones that come up on the glider

Can I use a different yarn weight for this mushroom pattern?

Yes — the finished size will simply change based on the yarn weight you choose. A fingering weight yarn with a smaller hook will produce a tiny, delicate mushroom, while a worsted weight yarn will give you a larger, chunkier version. Just make sure your tension is tight enough that the stuffing doesn't show through the fabric, regardless of which weight you use.

When exactly should I insert the safety eyes?

Insert the safety eyes after completing Round 15 of the Stem, placing them between Rounds 10 and 11 and spacing them 8 stitches apart. It's much easier to position and adjust the eyes before the opening becomes too small to reach inside comfortably. Once the backing washers are snapped on, the eyes cannot be repositioned, so take your time getting the placement right.

Why does Round 18 of the Stem use double crochet instead of single crochet?

Rounds 18 and 19 create the decorative ruffled skirt at the base of the Stem, and double crochets produce the height and drape needed to make that frill stand out. Single crochet stitches would be too short to create the ruffle effect. Working these rounds into the front loops only (set aside in Round 16) is what gives the skirt its three-dimensional, layered look.

How do I embroider the spots onto the Cap neatly?

Thread a yarn needle with a short length of white or contrasting yarn and use a simple satin stitch to fill in small circular shapes across the Cap. Keep your stitches close together so the base color doesn't show through, and vary the size of the spots slightly for a natural look. Secure each spot with a small knot on the inside of the Cap and weave in the tails carefully so they don't poke through to the front.