Intermediate 4-6 hours Worsted yarn

Worked on the glider, counted out loud —

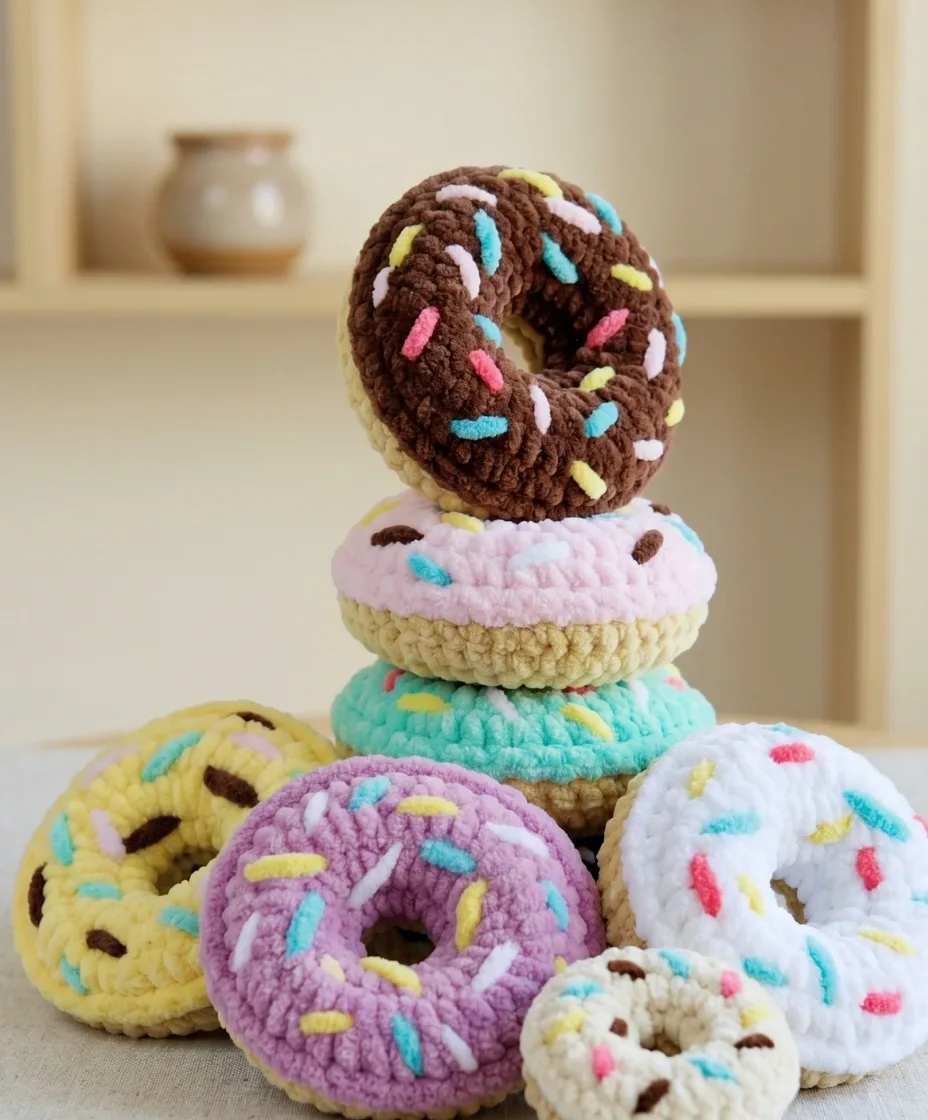
Amigurumi donut crochet pattern with two glazed halves

A cozy amigurumi donut for confident beginners with a few hours to spare, worked in two joined halves.

Jump to the rounds

What this one is

This one is for whoever needs a small, cheerful thing to sit on a shelf or land in a kid's play kitchen. Maybe it's a gift for someone who collects tiny food, or maybe you just want a project that doesn't ask much of you beyond a couple of quiet evenings. Either way, a stuffed donut with a bright glaze half is the kind of make that earns its keep in charm alone.

Your hands will spend most of their time in continuous spiral rounds, building two matching circles that curve into halves before you join them with a ring of single crochet and a good handful of stuffing. Between the two halves and the sprinkle embroidery at the end, you're looking at a few focused hours rather than a marathon project.

Try it another way

Once you've made one donut, the two-half construction makes it easy to play. Swap your glaze color between rounds for a two-tone glaze instead of a single contrasting shade, or work the whole thing in one color for a plainer bagel-like version. Because both halves are worked identically up to the color change, you can also experiment with a different main color entirely — pastel for a bakery-case look, or deep brown for a more toasted feel. The sprinkle embroidery is where you can really go wild: cluster them on one side only, scatter them evenly around the full 36-stitch join, or work them in a single bright color for a more graphic look instead of the assorted scrap yarn shades suggested. If you're making several as a set, keep the same main color across all of them and vary only the glaze so they read as a matching batch. And since the pattern doesn't call for a fixed size beyond the given round counts, working with a slightly thicker or thinner yarn than the DK or light worsted called for will nudge the finished donut a bit larger or smaller without changing a single instruction.

There's something quietly satisfying about working two identical spirals and watching them become two different things once color enters the picture. You start each half the same way — a foundation ring, then increases building outward — but flipping the glaze half inside out before joining new yarn is the small trick that makes the whole thing read as one seamless donut instead of two mismatched bowls. Joining the halves stitch for stitch while feeding in stuffing is fiddly in the best way, the kind of task that keeps your fingers busy and your mind loose. And finishing with scrap-yarn sprinkles means every donut you make ends up a little different, which is half the fun of making more than one.
The rounds, in full

Written out, round by round

Intermediate4-6 hours3.5 mmWorsted

Bring to the porch

Everything this one takes, in the order you will reach for it.

Yarn

  • Light Worsted or DK weight (CYCA #3), in a main color for the donut base and a contrasting color for the glaze

Hook

  • E-4 (3.5 mm)

Fiberfill

  • Polyester stuffing, enough to fill the donut firmly
  • Yarn needle / tapestry needle
  • Scissors
  • Stitch marker (to track the start of each round in the spiral)
  • Assorted scrap yarn in bright colors for embroidered sprinkles

First Half of the Donut (Main Color)

This half forms the base of your donut. Start with a foundation chain joined into a ring — this creates the characteristic hole in the center.

  1. Round 1Ch 12, join with sl st to form a ring, then sc 12 around the ring. (12)
  2. Round 2Inc in each st around. (24)
  3. Round 3sc, inc repeat around. (36)
  4. Round 4-5Sc in each st around. (36)Fasten off and cut yarn, leaving a short tail. Set this piece aside.

Second Half of the Donut / Glaze (Contrasting Color)

This half becomes the top of your donut and will show off your glaze color. Turn the first half inside out before joining the new yarn — this ensures the right sides face outward once the two halves are sewn together.

Turn the first half inside out. Join your contrasting glaze-color yarn on the inside of the donut and work in a continuous spiral from the center ring outward, exactly as you did for the first half.

  1. Round 1Inc in each st around. (24)
  2. Round 2sc, inc repeat around. (36)
  3. Round 3-4Sc in each st around. (36)

Do not fasten off yet — you will use this working yarn to join the two halves in the assembly step.

Putting it together

Step 1

Hold the two halves together with their right sides facing outward. The glaze (contrasting color) half should be on top, and the main color half on the bottom.

Step 2

Align both pieces carefully so the edges meet evenly all the way around — 36 stitches on each side.

Step 3

Begin joining the two halves by working 1 sc through corresponding stitches on both layers simultaneously. Work around the entire edge, inserting fiberfill stuffing as you go. Add stuffing gradually to distribute it evenly — the donut should feel plump and firm, but not so overstuffed that the seam pulls or distorts.

Step 4

Continue joining in sc until all 36 stitch pairs are joined around the full circumference. (36)

Step 5

Fasten off and cut yarn, leaving a long tail. Thread the tail onto a yarn needle and weave it into the interior of the donut so it is completely hidden — this keeps the underside looking tidy.

Step 6

Using a yarn needle and short lengths of brightly colored scrap yarn, embroider sprinkles across the glaze half of the donut. Simple straight stitches in varying angles and colors work beautifully. Space them randomly for the most realistic look.

Marlene's notes

Note 01

Work both halves in a continuous spiral rather than joining at the end of each round — losing track of the beginning is the easiest way to end up with a lopsided donut, so keep that stitch marker moving up with you.

Note 02

If your fabric feels loose or gappy after Round 1, drop down a hook size from the E-4 (3.5 mm) before you go further; gauge isn't critical here, but a tighter tension gives a firmer, neater donut.

Note 03

Add stuffing gradually as you join the two halves with single crochet rather than stuffing everything at once, so the fill distributes evenly and the ring keeps its shape all the way around.

Note 04

This pattern is written in US crochet terminology.

Note 05

To embroider sprinkles without a visible knot: thread your scrap yarn on a needle, insert it through the donut from the bottom, exit at your starting point on the glaze, make your stitch, then re-enter the donut and exit at the bottom. Pull gently and trim the tails close to the surface — the fiberfill inside will hold them in place without any visible knots on the glaze.

Before you sit down

  • Check that you have your main color and contrasting glaze color both wound and ready, plus a few short lengths of bright scrap yarn set aside for sprinkles.
  • Have your stitch marker within reach before you start Round 1 — both halves are worked in a continuous spiral with no joining, so it's your only way to track where each round begins.
  • Read through the note about turning the glaze half inside out before joining new yarn, since it happens before you pick up your contrasting color and is easy to miss if you skim ahead.
  • Fill your stuffing bag or bowl within reach now, since you'll be adding it gradually as you join the two halves rather than all at once at the end.

How the hours go

First half of the donut (main color)
about 45-60 minutes, because it's 4 rounds of continuous spiral increases building outward from the center ring
Second half / glaze (contrasting color)
about 45-60 minutes, because it repeats the same 4 rounds but starts with turning the piece inside out before joining the new color
Assembly and stuffing
about 30-45 minutes, because matching 36 stitches on each side while feeding in fiberfill evenly takes a slower, steadier pace

Looking after it

  • Hand wash your finished donut gently in cool water if it needs freshening up, since the DK or light worsted yarn and polyester stuffing inside hold up better without a hot machine cycle.
  • Reshape it while damp and lay it flat to air dry, then store it away from direct sunlight so the main and glaze colors stay bright.
FAQs

Asked on the glider

the ones that come up on the glider

Why does the glaze half need to be turned inside out before joining the new color?

Turning it inside out first means that once you join your two halves together, both right sides end up facing outward. Skip this step and you'll end up with one half showing its wrong side once assembled.

How much stuffing do I actually need?

There's no fixed amount given, just enough polyester stuffing to fill the donut firmly as you join the two halves. Add it gradually while you work the joining round so it distributes evenly rather than clumping in one spot.

Can I use this pattern to make multiple donuts with different glaze colors?

Absolutely — swapping the glaze color is the easiest way to make a whole box of unique donuts. The main color half stays the same for every piece, so you only need to change your contrasting yarn for the second half. Try pink, chocolate brown, white, or pale yellow for a variety of classic flavors, and mix up the sprinkle colors to match.