Intermediate 4-6 hours Worsted yarn

Worked on the glider, counted out loud —

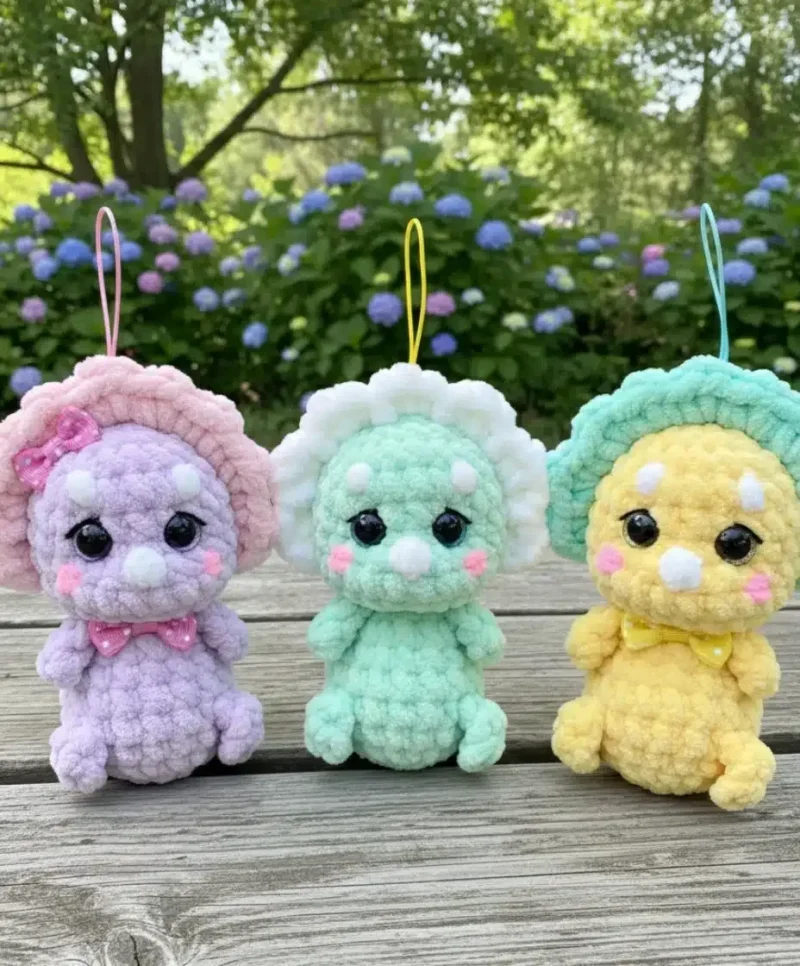
Little dinosaur keychain crochet pattern with horns and collar

A one-piece amigurumi dinosaur keychain worked tail to head, about 4-6 hours. Great for confident beginners.

Jump to the rounds

What this one is

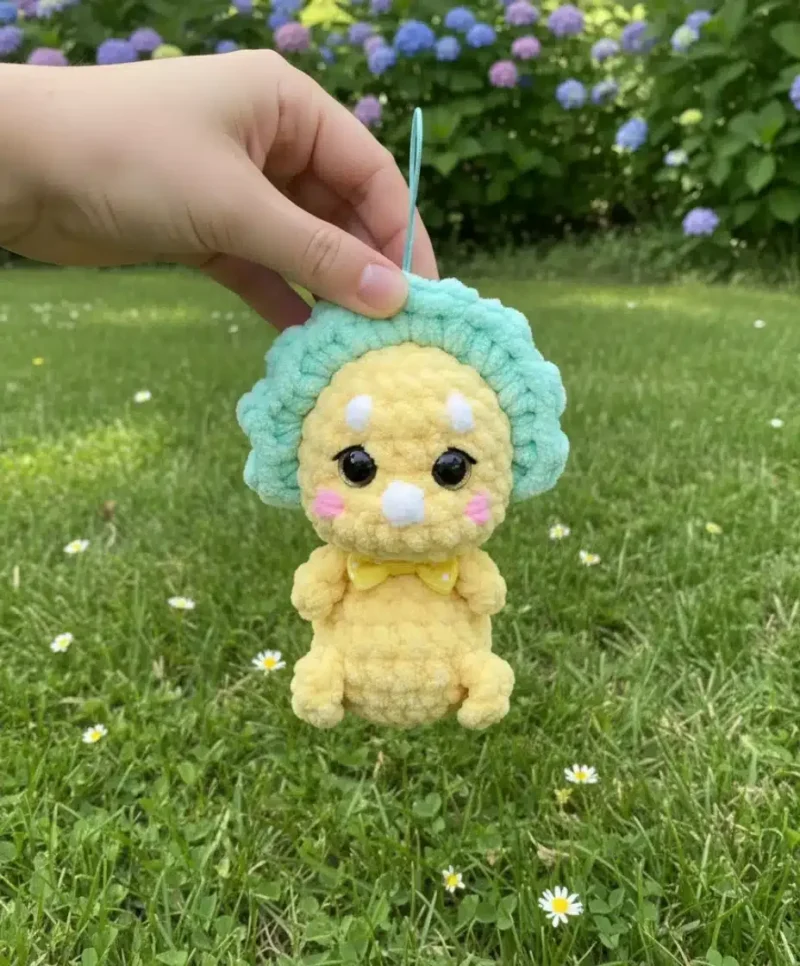
This little dinosaur is made for the friend who always says yes to something small and strange and charming attached to their bag. You know the one. It's the kind of project you pull out when you want to finish something completely in a sitting or two, not the sweater that's been sitting in the basket since spring. A keychain like this one earns its keep fast, and it fits in a pocket while you work it. Standing about 11 cm tall when made with the yarn weights below, it's a satisfying quick finish.

Your hands will spend most of the time in a steady spiral, building the tail first, then the body, then shaping up into the head, all in one continuous piece. The chains for the arms happen right in round four of the body, worked into a second loop, which keeps things moving without a break. Set aside about four to six hours total, and you'll come out the other side with a finished little friend, horns and collar and all.

Try it another way

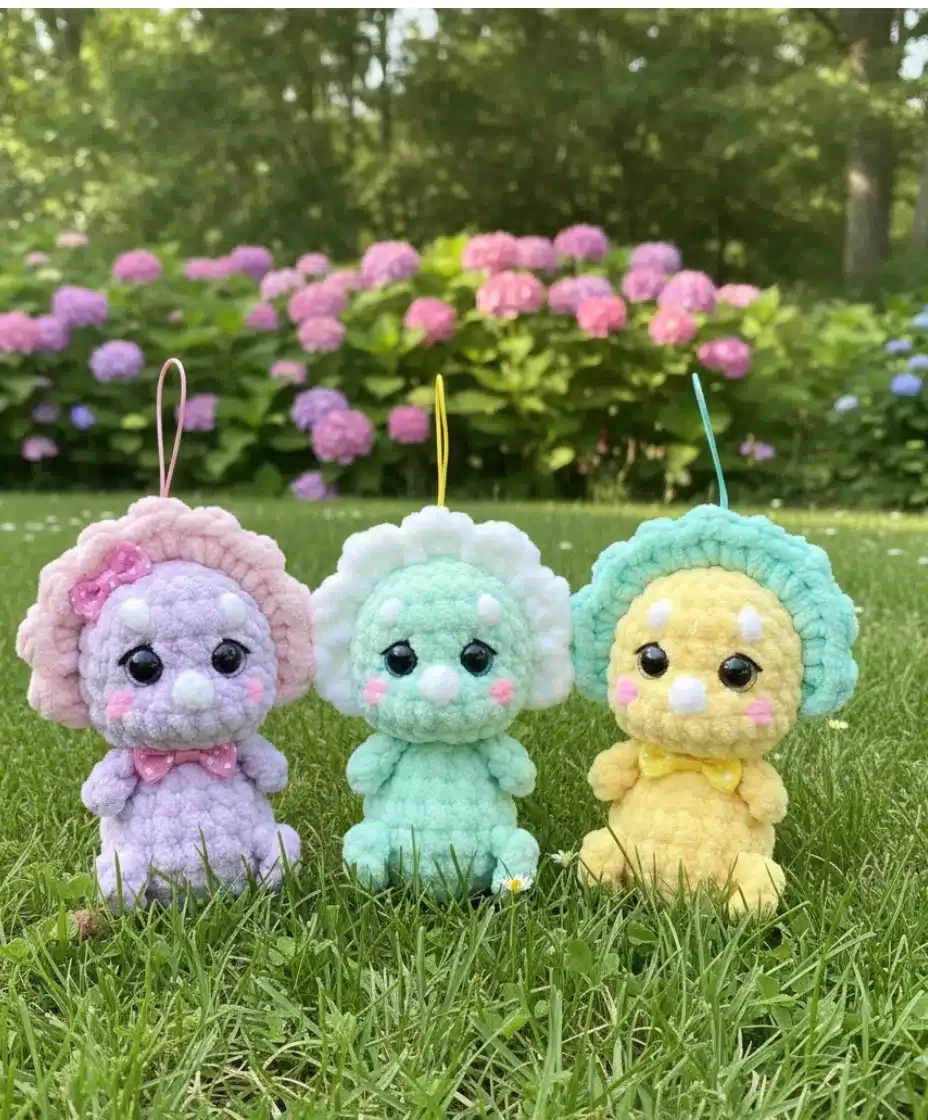
Once you've made one of these, it's easy to start playing with it. Swap the contrast color used for the horns and collar to match a gift recipient's favorite color, since both are worked separately from the main body and don't affect the shaping at all. You could also make the horns in a metallic or sparkle yarn instead of matching the collar, so they catch the light differently against the plain body. If you want a slightly larger version, moving up a hook size will loosen your gauge and give you a bigger dinosaur without touching a single stitch count, though you'll need a bit more yarn than the original calls for. For a larger dinosaur, try chunky yarn with a 6mm hook, and for a smaller one, use DK weight yarn with a 3mm hook throughout, adjusting your safety eye size to match. The embroidered cheeks and optional face shaping are where you can really change the personality, going for a sleepy look, a surprised one, or skipping the cheeks entirely for a plainer face. If keychains aren't your thing, leave off the hardware attachment step and sew on a loop instead for a bag charm, or skip both and let it sit on a shelf as a tiny stuffed dinosaur. The decorative bow is entirely optional too, so leave it off for a more neutral, gender-free gift.

There's real satisfaction in a toy that builds itself in one continuous run, no separate pieces to sew together except the tiny horns. You start at the tail, work the increases up through the body, and the arms simply appear as chains in round four, caught into the body loops as you go. The horns are their own small joy, worked in a contrast color at a tighter 2mm gauge, so they stand up crisp against the softer body. Adding the decorative collar and the optional face shaping at the end gives you a chance to make the piece your own, deciding how much personality this little dinosaur gets. It's a pattern that rewards patience with increases and gives you a genuinely finished, giftable object for the time you put in.
The rounds, in full

Written out, round by round

Intermediate4-6 hours4 mmWorsted

Bring to the porch

Everything this one takes, in the order you will reach for it.

  • Main color yarn: Himalaya Dolphin Baby (or similar bulky weight yarn)
  • Accent color yarn: for the decorative collar on the head
  • YarnArt Jeans yarn: for the horns
  • Crochet hooks: size 4mm (for body) and 2mm (for horns)
  • Safety eyes: 8mm, 9mm, or 12mm with secure fastening
  • Stuffing: polyester fiberfill or holofiber
  • Notions: yarn needle, stitch marker, scissors, embroidery thread for facial features
  • Keychain hardware: metal clasp or ring
  • Optional decorations: small bow or satin ribbon

Tail

  1. Round 16 sc in magic ring (6)
  2. Round 2(sc, inc) repeat 3 times (9)
  3. Round 3(2 sc, inc) repeat 3 times (12)
  4. Round 4(3 sc, inc) repeat 3 times (15)
  5. Round 515 sc, finish with ss (15)Cut the yarn and set the tail aside. You’ll attach it to the body in the next section.

Body

  1. Round 16 sc in magic ring (6)
  2. Round 2(inc) repeat 6 times (12)
  3. Round 3(sc, inc) repeat 6 times (18)
  4. Round 42 sc, 4 ch, then working back into the second loop from the hook work 3 sc along the chain, 5 sc, 4 ch, working into the second loop from the hook work 3 sc along the chain, 3 sc, then work 8 sc across the tail (18)

Note: Take the completed tail piece, position it against the body, and crochet through both the body and tail loops to join them together. The chains create the arms.

  1. Round 5sc, inc, 6 sc, inc, sc, then work 9 sc across the tail (working through both layers on the sides with sc) (21)

Note: Continue working around the outside edge of the tail.

  1. Round 621 sc (21)
  2. Round 7(5 sc, dec) repeat 3 times (18)
  3. Round 83 sc, 4 ch, working into the second loop from the hook work 3 sc along the chain, 5 sc, 4 ch, working into the second loop from the hook work 3 sc along the chain, 10 sc (18)
  4. Round 9(sc, dec) repeat 6 times (12)

Horns (Make 3)

Using YarnArt Jeans yarn and a 2mm hook, work in your collar accent color:

  1. Round 15 sc in magic ring (5)
  2. Round 25 sc (5)Fasten off, leaving a long tail for sewing. Position and sew the three horns along the top of the head, spacing them evenly.

Head

  1. Round 10(inc) repeat 12 times (24)
  2. Rounds 11–1524 sc (24) – Work 5 rounds evenInsert safety eyes between rounds 15 and 16, spacing them 2-3 stitches apart.
  3. Round 16(2 sc, dec) repeat 6 times (18)
  4. Round 17(sc, dec) repeat 6 times (12)
  5. Round 18(dec) repeat 6 times (6)Fasten off, leaving a long tail. Thread through remaining stitches and pull tight to close.

Decorative Collar

The collar adds personality and charm to your dinosaur! Work from right to left, joining your accent color yarn between rounds 13 and 14.

Method 1: Work slip stitches symmetrically around the head: 2 ss, 3 sc in one stitch, 2 ss. Continue facing forward without turning your work.

Method 2: Using main color, work: ss, sc, ch, sc in one stitch, and continue this pattern to the end of the row. Fasten off and cut the main color. Then, using white or accent color, bind the edge from right to left: ss, 3 sc, and continue to the end of the row.

Face Shaping (Optional)

For a more defined, adorable expression, you can add facial shaping. Insert a needle with strong thread under the edge of one eye, pass it through to the other eye creating a loop, then gently pull to tighten. This creates an indentation that gives your dinosaur character and dimension.

Alternatively, you can embroider 2 stitches on each side for a simpler approach.

Putting it together

Step 1

Complete your adorable Amigurumi Dinosaur Keychain with these final details:

Step 2

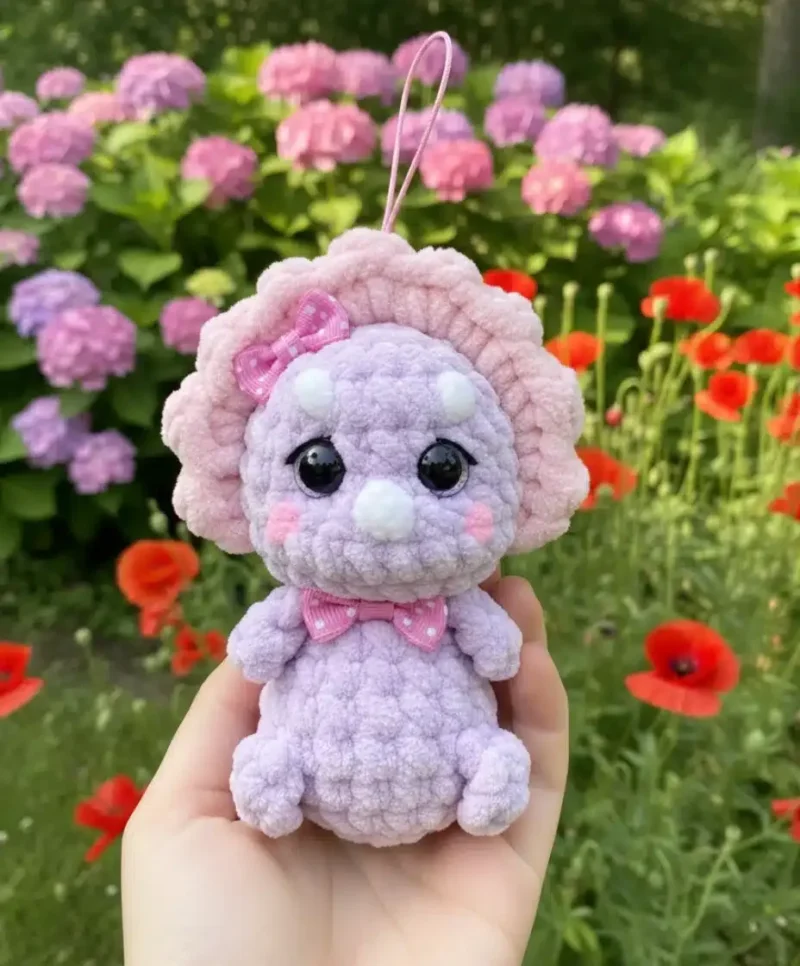
Embroidered cheeks: Using pink embroidery floss, add small circular stitches to create rosy cheeks

Step 3

Decorative bow: Attach a small satin bow beneath the collar or on the side of the head

Step 4

Keychain attachment: Securely attach your keychain hardware to the top of the head or back of the dinosaur

Step 5

Weave in ends: Carefully weave in all loose yarn ends using your tapestry needle

Marlene's notes

Note 01

This pattern works in continuous spiral rounds without joining except where the pattern says otherwise, so a stitch marker on your first stitch of each round will save you from losing your place.

Note 02

Stuff firmly as you work rather than waiting until the piece is closed, since that's what keeps the tail, body, and head holding their shape.

Note 03

Finished size: using Himalaya Dolphin Baby (bulky weight) for the body and YarnArt Jeans (DK/light worsted) for the horns as specified, the finished dinosaur stands approximately 11 cm tall.

Porch photos

Before you sit down

  • Check you have your main body color plus a contrast color set aside for the horns and collar accents before you start the magic ring.
  • Read through the Body section once, especially round 4, since that's where the tail joins in and the arm chains get worked, so you know what's coming.
  • Have a stitch marker ready to track the start of your rounds once you move past the tail into the body and head, where the spiral gets busier.
  • Stuff as you go rather than at the end, so keep your stuffing within reach from round one of the tail onward.

How the hours go

Tail
about 20-30 minutes because it's only 5 rounds but sets the increase pattern for everything above it
Body and Head
about 2-3 hours because between them you're working 14 rounds total, including the fiddly arm-chain join in round 4
Horns, collar, and finishing
about 1-2 hours because three small horns need sewing on evenly, plus the collar, cheeks, bow, and keychain hardware

Looking after it

  • Since this is worked in YarnArt Jeans yarn, hand wash it gently in cool water if it needs freshening up, and avoid wringing it, which can distort the stuffed shape.
  • Lay it flat to dry away from direct heat, and gently reshape the horns and collar with your fingers while damp so they dry standing the way you sewed them.
FAQs

Asked on the glider

the ones that come up on the glider

Do I need to join each round or work in a continuous spiral?

You work in a continuous spiral without joining throughout, except where the pattern specifically notes otherwise. A stitch marker on your first stitch of each round helps you keep track of where you are.

How does the tail attach to the body?

You crochet the tail separately for its 5 rounds, then in round 4 of the body you position the completed tail against the body and crochet through both sets of loops together to join them. This also happens to be the round where the arm chains are worked.

What are the arms made from?

The arms are formed from chains worked directly into round 4 of the body, with single crochet worked back along the chain into the second loop from the hook. There's no separate arm piece to sew on.

Do I need a smaller hook for the horns?

Yes, the horns are worked with a 2mm hook in your collar accent color, which is smaller than what you'd typically use for the body. This tighter gauge keeps the small horns firm enough to stand upright once sewn to the head.

Is the face shaping step required?

No, the face shaping section is marked optional, so you can finish the dinosaur without it if you prefer a simpler face. The embroidered cheeks and decorative bow are also optional finishing touches you can skip or include as you like.

How many horns do I need to make?

You'll make three horns total, each worked over 2 rounds and fastened off with a long tail for sewing. Space them evenly along the top of the head once all three are ready.

What size yarn should I use for this dinosaur amigurumi?

The pattern recommends Himalaya Dolphin Baby for the body, which is a bulky weight yarn. You'll also need YarnArt Jeans (a DK/light worsted weight) for the horns. Using these yarn weights will give you a dinosaur approximately 11 cm tall.

Can I make this dinosaur larger or smaller?

Yes! To change the size, use a different yarn weight and corresponding hook size. For a larger dinosaur, try chunky yarn with a 6mm hook. For a smaller version, use DK weight yarn with a 3mm hook throughout. Remember to adjust your safety eye size accordingly.