Intermediate 4-6 Hours DK / Light Worsted yarn

Worked on the glider, counted out loud —

Amigurumi Crochet Bear Plush Pattern (35 cm)

Make an adorable 35 cm amigurumi bear plush with safety eyes and a satin ribbon bow. Free crochet pattern with muzzle, body, and finishing tips.

Jump to the rounds

Before you sit down

Start by crocheting the small muzzle piece separately, working its rounds to build the rounded snout shape.

Move on to the body, working it in the round from a magic ring up through its shaping rounds.

Crochet the head using increase and decrease rounds to form its rounded, proportional shape before stuffing.

Stuff the head and body firmly and evenly as you close up each piece with fiberfill.

Insert and secure the 10 mm safety eyes and 15x12 mm safety nose, checking placement before locking them in.

Crochet and stuff the limbs, then pin them onto the body to check positioning before sewing.

Sew the muzzle onto the head, centering it carefully, then add embroidered mouth details with fine yarn.

Finish by tying the satin ribbon around the neck for a sweet, gift-ready presentation.

What this one is

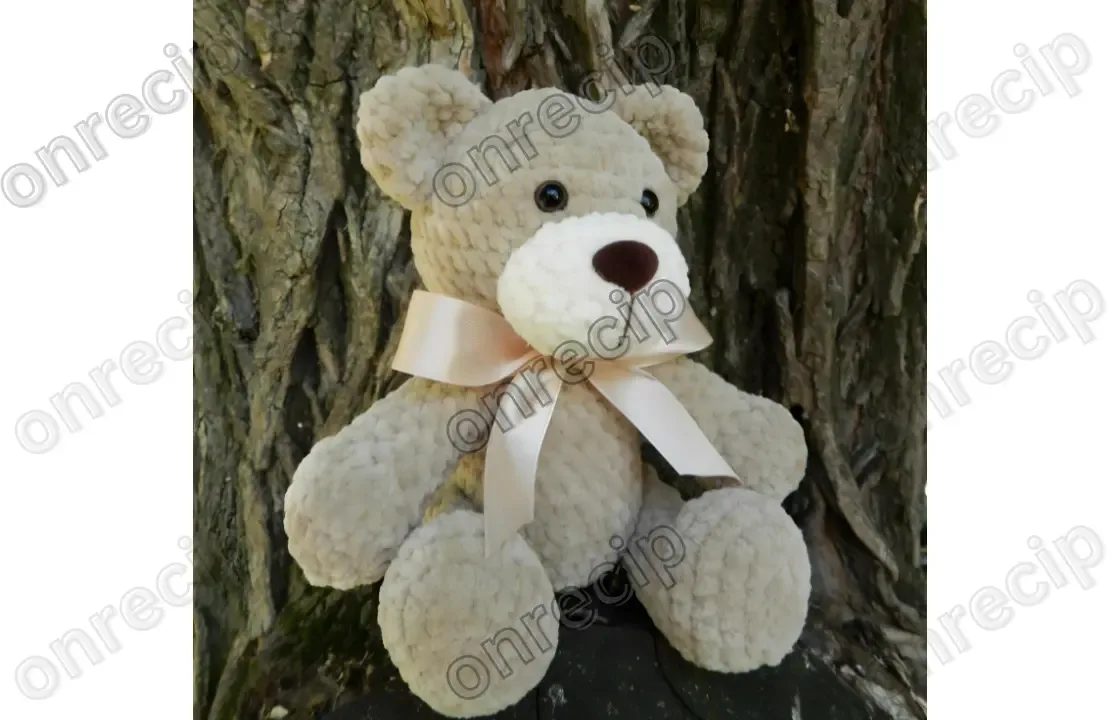
This amigurumi bear plush is the kind of pattern that turns a ball of soft yarn into an instant heirloom. Standing about 35 cm tall, this bear has a plush, rounded muzzle, gentle safety eyes, and a sweet embroidered nose bridge that gives it real personality. It's perfect for crocheters who want to make a nursery centerpiece, a birthday gift, or a special toy for a little one who deserves something made with love rather than store-bought.

You'll be working with soft baby yarn like Himalaya Dolphin Baby or Yarn Art Dolche on a 4.5 mm hook, building the body, head, muzzle, and limbs separately before sewing them together. Expect standard amigurumi techniques throughout: magic rings, single crochet increases and decreases, and careful stitch counting to keep every round perfectly round. This is a comfortable intermediate project, ideal for someone who has made at least a small amigurumi before and is ready to tackle a bigger, multi-part design.

The finished bear is soft, sturdy, and wonderfully squeezable thanks to generous fiberfill stuffing and secure 10 mm safety eyes with a 15x12 mm safety nose for that classic teddy-bear face. A 50 cm satin ribbon tied around the neck adds a polished, boutique-quality finish. At 35 cm tall, it's substantial enough to be a real cuddle companion, making it a beautiful handmade gift for a baby shower, birthday, or simply a treat-yourself project.

Variations

This bear is endlessly customizable once you've got the basic shape down. For a classic teddy look, stick with warm browns or honey-caramel Himalaya Dolphin Baby, but for a modern nursery piece, try dusty sage, blush pink, or soft lavender — all colors that photograph beautifully against neutral blankets. If you want a color-blocked bear, work the muzzle and inner ears in a contrasting cream while keeping the body and outer ears in your main shade; just remember to weave in extra ends carefully since amigurumi gets handled a lot. For yarn substitutions, Yarn Art Dolche is already listed as an option, but Pound of Love or Bernat Baby Velvet also work beautifully at this gauge and give a slightly different, extra-plush texture. If you want a mini version for a keychain or ornament, drop to a 3.5 mm hook and use a sport-weight yarn like Yarn Art Baby, which will shrink the bear down to roughly 20-22 cm while keeping the same stitch pattern proportions. For a bigger, huggable floor version, size up to a 6 mm hook with bulky yarn such as Bernat Blanket, which will push the finished size closer to 45-50 cm — just be sure to size up your safety eyes and nose to match. Seasonal fans can swap the satin ribbon for a plaid bow in autumn, a red velvet ribbon for winter gifting, or a pastel gingham strip for spring. You could also embroider a tiny heart or star on one paw pad for a personalized touch, or add a small crocheted scarf using leftover yarn for extra coziness.

I adore this bear because every single part has a purpose — the separately worked muzzle gives that realistic snout shape you just can't get by skipping straight to a round head, and it's such a satisfying piece to attach once it's stuffed and pinned in place. Working the body and limbs in soft Himalaya Dolphin Baby yarn on a 4.5 mm hook makes the stitches feel buttery and even, which honestly makes the increase and decrease rounds so much more enjoyable to track. I love that the safety eyes and that generously sized 15x12 mm nose do so much of the personality work — you place them, and suddenly you're looking at a real little face staring back at you. The satin ribbon at the end feels like the moment you get to dress your creation up, turning a stuffed shape into a genuine keepsake. It's a project that rewards patience: each round builds anticipation, and by the time you're sewing the final seam, you've made something that looks like it came from a boutique shelf, not your living room couch.
Common mistakes

  • Losing track of stitch countsUse a stitch marker at the start of every round and count out loud after each round before moving on — the muzzle only has a few rounds, so catching an error early saves major frustration.
  • Understuffing the head and bodyStuff in small pinches as you go rather than all at once at the end, pressing firmly into the seams and corners so the fiberfill distributes evenly through the rounded shape.
  • Placing the 10 mm safety eyes and 15x12Insert the eye and nose posts without snapping the backs on yet, then hold the head up and eyeball the placement from a few different angles before locking everything in permanently.
  • Sewing the muzzle onto the headPin the muzzle in place first with stitch markers or scrap yarn, check it's centered from the front, and use a whip stitch worked into the back loops only for an invisible, snug seam.
  • Working single crochet stitchesGo down half a hook size if your gauge feels loose, and aim for tight, consistent stitches especially through the increase and decrease rounds where gaps show most.
  • Tying the satin ribbon so tightly itTie the 50 cm ribbon in a simple bow with even tension, then tack a couple of small hidden stitches at the back of the bow to keep it securely in place long-term.

The rounds, in full

Written out, round by round

Intermediate4-6 Hours4.5 mmDK / Light Worsted

Materials

Everything this one takes, in the order you will reach for it.

  • Yarn Himalaya Dolphin Baby or Yarn Art Dolche
  • Hook size: 4.5 mm
  • Fiberfill
  • Safety eyes 10 mm
  • Safety nose 15*12 mm
  • Sewing needle
  • Fine yarn for embroidering
  • Satin ribbon 50 cm
  • Size: 35 cm

keep this to hand

Abbreviations

US crochet terms, as used in this pattern.

  1. Rrow
  2. mcmagic circle
  3. chchain
  4. ststitch
  5. scsingle crochet
  6. inc2 sc in the next stitch
  7. decsingle crochet 2 stitches together
  8. F.o.finish off
  9. (12)number of stitches you should have at the end of the round/row
  10. ( )*6repeat whatever is between the brackets the number of times stated

Head

  1. Round 16 sc in mc (6)
  2. Round 2(inc)*6 (12)
  3. Round 3(1 sc, inc)*6 (18)
  4. Round 4(2 sc, inc)*6 (24)
  5. Round 5(3 sc, inc)*6 (30)
  6. Round 6(4 sc, inc)*6 (36)
  7. Round 7(5 sc, inc)*6 (42)
  8. Rounds 8-1242 sc (5 rows)(42)
  9. Round 13(5 sc, dec)*6 (36)
  10. Round 14(4 sc, dec)*6 (30)
  11. Round 15(3 sc, dec)*6 (24)
  12. Round 16(2 sc, dec)*6 (18)
  13. Round 17(4 sc, dec)*6 (15)Insert eyes between R 9 and 10 at the distance of 4-5 stitches from each other.

F.o.

Muzzle

With white yarn.

Make 6 ch.

Make an oval starting from the 2nd ch from hook, work on both sides of the chain.

  1. Round 1From the 2nd ch from hook: 4 sc, 3 sc in last st, turn: 3 sc, inc (opposite site) (12)
  2. Round 2inc, 3 sc, 3 inc, 3 sc, 2 inc (18)
  3. Round 31 sc, inc, 3 sc, (1 sc, inc)*3, 3 sc, (1 sc, inc)*2 (24)
  4. Round 424 scInsert a nose between R 3 and 4.(24)

F.o., leaving a long tail for sewing.

Important notes

Note 01

💡 Use a 4.5 mm hook with Himalaya Dolphin Baby or Yarn Art Dolche for the snug, dense gauge amigurumi needs — a looser gauge will let stuffing show through.

Note 02

💡 Work the muzzle as its own small piece first so you get a feel for the increase pattern before tackling the larger body and head rounds.

Note 03

💡 Keep a stitch marker in the first stitch of every round throughout the body and limbs so you never lose track of where each round begins.

Note 04

💡 Stuff firmly but in stages, adding fiberfill a little at a time and shaping with your fingers as you go rather than cramming it in at the end.

Note 05

💡 Wait to attach the 10 mm safety eyes and 15x12 mm safety nose until you've test-fitted their placement, since these are permanent once snapped closed.

Note 06

💡 Save the fine embroidery yarn for last — add the mouth and any facial detailing after the nose is secured so you can center it properly around the muzzle.

FAQs

Asked on the glider

the ones that come up on the glider

What yarn weight works best for this bear pattern?

Himalaya Dolphin Baby or Yarn Art Dolche, both soft baby-weight yarns, are recommended for the plush texture and 35 cm finished size. A similar DK to light worsted weight yarn with a 4.5 mm hook will give comparable results.

Is this pattern good for a beginner amigurumi crocheter?

It's best suited for someone who already knows magic rings, single crochet increases and decreases, and basic amigurumi assembly. If you've completed one simple stuffed animal before, this bear is a great next step up.

Can I use a different size for the safety eyes and nose?

Yes, though the pattern calls for 10 mm safety eyes and a 15x12 mm safety nose for balanced proportions on the 35 cm bear. If you size up or down the whole pattern, adjust these hardware sizes to match.

How much fiberfill do I need for this project?

The exact amount isn't specified, but plan on a generous bag of polyester fiberfill since the body, head, muzzle, and limbs all need firm, even stuffing. It's better to have extra on hand than to run short mid-project.

What is the satin ribbon used for?

The 50 cm satin ribbon is tied around the bear's neck as a decorative finishing touch, giving it a polished, gift-ready look. It's a simple way to add color contrast and a boutique feel to the finished plush.