Intermediate 4-6 hours Worsted yarn

Worked on the glider, counted out loud —

How to crochet an amigurumi butterfly bunny

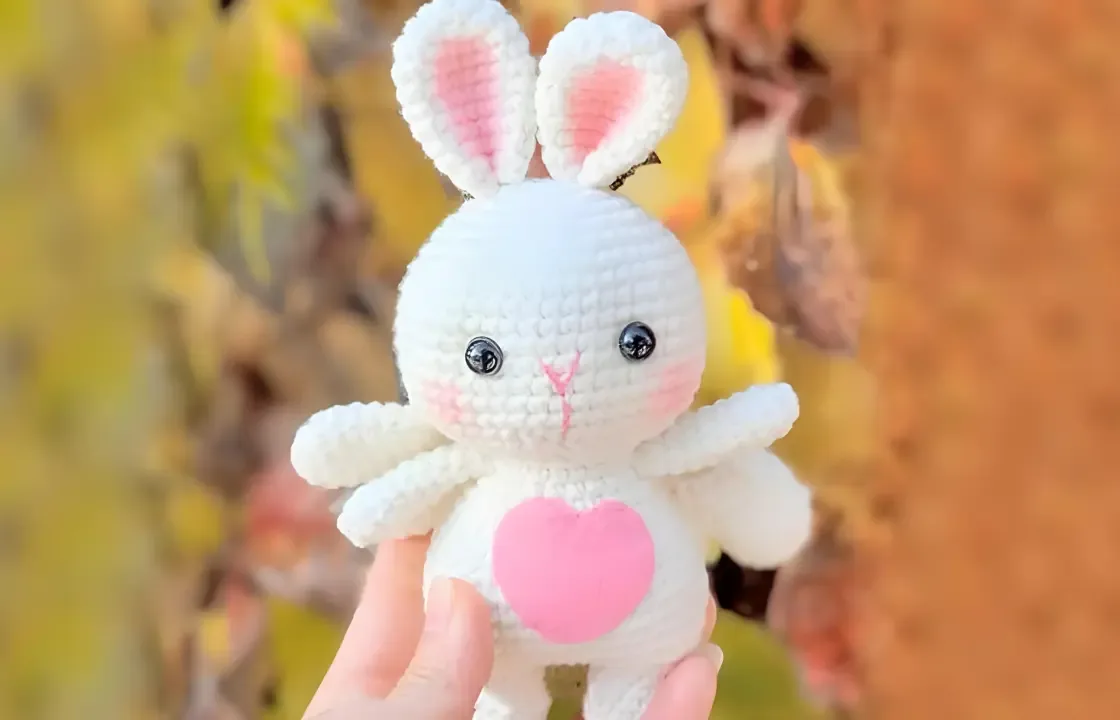
A soft amigurumi butterfly bunny for confident beginners, worked head to arms over a few quiet sittings.

Jump to the rounds

What this one is

There's a particular kind of quiet evening that suits a pattern like this one, where the shapes are familiar but the details keep you leaning in. This bunny with butterfly wings is for the maker who likes a project with a little story in it, and for the person on your gift list who'd love something soft with a bit of whimsy stitched into its ears. It works equally well as a first amigurumi with wings, or a comfort piece to make for someone who needs one.

Your hands will spend most of their time in magic rings and increase rounds, building the head first, then the legs and body as one joined piece, then a pair of matching arms. Between the twelve rounds of the head, the fourteen of the legs and body, and the short three-round arms worked twice, you're looking at a project you can finish over a few sittings rather than one long stretch. Nothing here moves fast, and that's the appeal.

Try it another way

The construction here is forgiving enough to play with once you know it. For a smaller bunny, drop down to a lighter weight yarn and a smaller hook, which will shrink the head's thirty-stitch round and the body's forty-five-stitch round proportionally without changing a single instruction. For a bigger, huggable version, size up your yarn and hook instead, letting those same increase rounds land you at a much larger finished piece. Colour placement is where this pattern really lets you have fun: keep the head, legs and body all in one main colour for a classic look, or break out a contrast shade for the butterfly wings alone so they stand out against a solid-coloured bunny. You could also work the arms in a third colour to echo the wings and tie the whole piece together. If you're making this as a gift, consider working the head in a soft pastel and the wings in something brighter, since the twelve-round head is the first thing anyone will notice. And because the legs and body join into one piece at round seven, you don't need to worry about seaming a separate bottom on, which makes this a good pattern to revisit again and again in different colourways.

What makes this one satisfying is the way the shaping does the work for you. You start each piece the same simple way, six single crochet into a magic ring, then watch the increase rounds carry you smoothly from six stitches to thirty on the head and forty-five on the body without any guesswork. The real trick is round seven of the legs and body, where you don't cut your yarn between legs but chain three, single crochet across, and join both legs into one continuous thirty-stitch round. It's the kind of construction detail that feels like a small magic trick the first time it clicks, and it's what turns two separate leg tubes into one settled little body.
The rounds, in full

Written out, round by round

Intermediate4-6 hoursWorsted

Bring to the porch

Everything this one takes, in the order you will reach for it.

  • Worsted weight yarn
  • Crochet hook (size to suit your yarn)

Head

  1. Round 16 sc in MR
  2. Round 26 inc (12)
  3. Round 3(sc,inc)*6 (18)
  4. Round 4(sc,inc,sc)*6 (24)
  5. Round 5(3sc,inc)*6 (30)
  6. Round 6(2sc,inc,2sc)*6 (36)
  7. Round 7(5sc,inc)*6 (42)
  8. Round 8(3sc,inc,3sc)*6 (48)
  9. Rounds 9–1648 sc
  10. Round 17(3sc,dec,3sc)*6 (42)
  11. Round 18(5sc,dec)*6 (36)
  12. Round 19(2sc,dec,2sc)*6 (30)Fasten off.

Legs and body

  1. Round 16 sc in MR
  2. Round 26 inc (12)
  3. Rounds 3–612 scFasten off first leg.
  4. Round 7Make the second leg, do not cut the yarn but make 3 ch then 12 sc on first leg + 3 sc on 3ch + 12 sc on second leg + 3 sc on 3 ch = 30 sc
  5. Round 8(sc,inc)*7 (45)
  6. Rounds 9–1245 sc
  7. Round 13(5sc,dec)*5 (40)
  8. Round 1440 sc
  9. Round 15(6sc,dec)*5 (35)
  10. Round 1635 sc
  11. Round 17(5sc,dec)*5 (30)
  12. Rounds 18–1930 sc
  13. Round 20(4sc,dec)*5 (25)
  14. Round 21dec, 23 sc (24)Fasten off. Leave a long tail for sewing.

Arms (Make 2)

Make 2
  1. Round 16 sc in MR
  2. Round 26 inc (12)
  3. Rounds 3–912 scFasten off. Leave a long tail for sewing.

Marlene's notes

Note 01

No specific hook size is listed here, so choose one that gives you a firm, dense fabric rather than a loose, gappy one, since amigurumi needs to hold its stuffing.

Note 02

Place a stitch marker at the start of every round and move it up as you go, since the head's twelve rounds and the body's fourteen make it easy to lose track without one.

Note 03

Stuff as you close each section rather than waiting until the end, adding small pinches through the increase and straight rounds so the head, body, and both arms stay evenly firm and round.

Before you sit down

  • Set aside your main color and whatever contrast color you want for the wings before you start, so you're not digging through your stash mid-round.
  • Keep a stitch marker close by for tracking the start of each round, especially through the increase rounds on the head where losing your place is easy.
  • Work a small single crochet swatch first to check your tension is tight enough to hold stuffing without gaps showing between stitches.
  • Read through round seven of the legs and body before you get there, since it's the part where both legs join into one body without cutting your yarn.

How the hours go

Head
about 45-60 minutes because it runs twelve rounds with several increase rounds to keep track of
Legs and body
about 1.5-2 hours because it's fourteen rounds long and includes the fiddly round seven join between the two legs
Arms (make 2)
about 30-40 minutes total because each arm is only three rounds, but you're making two identical pieces

Looking after it

  • Hand wash your finished bunny in cool water with a gentle detergent, then press out the excess water in a towel rather than wringing it, since twisting can distort the rounded shaping in the head and body.
  • Lay it flat to dry, reshaping the head, legs, and both arms gently with your fingers while damp, and store it somewhere dry and out of direct sun so the colours in the wings stay true.
FAQs

Asked on the glider

the ones that come up on the glider

Why does the pattern say not to cut the yarn at round seven of the legs and body?

Keeping the yarn attached lets you chain three and single crochet straight across from the first leg into the second, joining both legs into one continuous thirty-stitch round. Cutting and rejoining there would leave you with visible seams where the legs meet the body.

How much yarn do I need for the whole bunny?

The materials aren't broken out by amount in this pattern, so the safest approach is to have a full worsted weight skein on hand for your main colour and a smaller amount in your contrast colour for the wings. Amigurumi tends to use less yarn than you'd expect, but it's worth having extra rather than running short mid-round.

Can I make the arms in a different colour from the body?

Yes, the two arms are worked as separate three-round pieces and sewn on afterward, so there's nothing in the construction that ties their colour to the body. A contrast colour on the arms can echo the wings nicely.

What's the trickiest part of this pattern?

Round seven of the legs and body is the one to slow down for, since it's where you make the second leg without cutting yarn and then work across both legs plus the connecting chains to form one thirty-stitch body round. Everything after that settles back into straightforward increase and even rounds.

How firm should the stuffing be?

Aim for firm enough that the head and body hold their round shape without any dents, especially through the increase rounds where the fabric is more open. Stuffing gradually as you close each section, rather than all at once at the end, makes this much easier to control.

Is this pattern suitable if I've only made simple amigurumi before?

It's a good next step up, since the head and arms use techniques you'll likely already know, but round seven's leg join is more advanced than a typical single-piece body. If you've worked magic rings, increases, and decreases comfortably before, you should be able to follow it through.