Intermediate 10-14 Hours Lace yarn

Worked on the glider, counted out loud —

African Flower Granny Square Handbag – Free Crochet Pattern

Crochet a bold African flower granny square handbag with this free pattern — dramatic black and hot pink cotton blooms, plus strap and lining tips

Jump to the rounds

What this one is

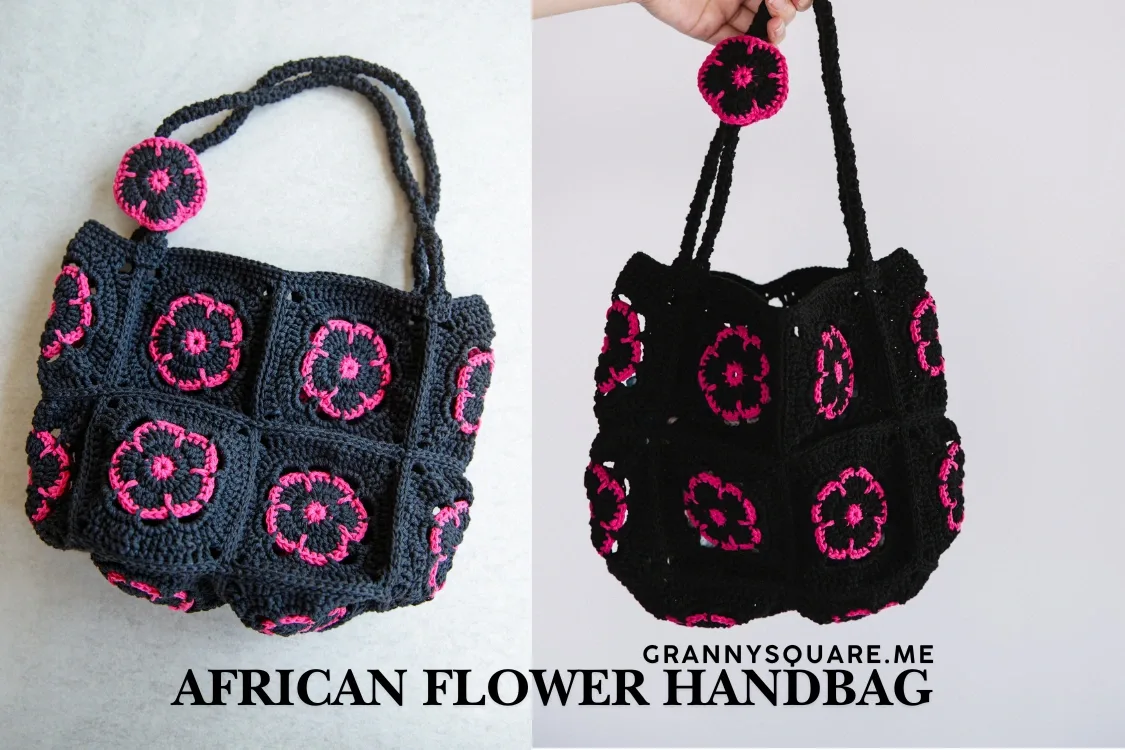
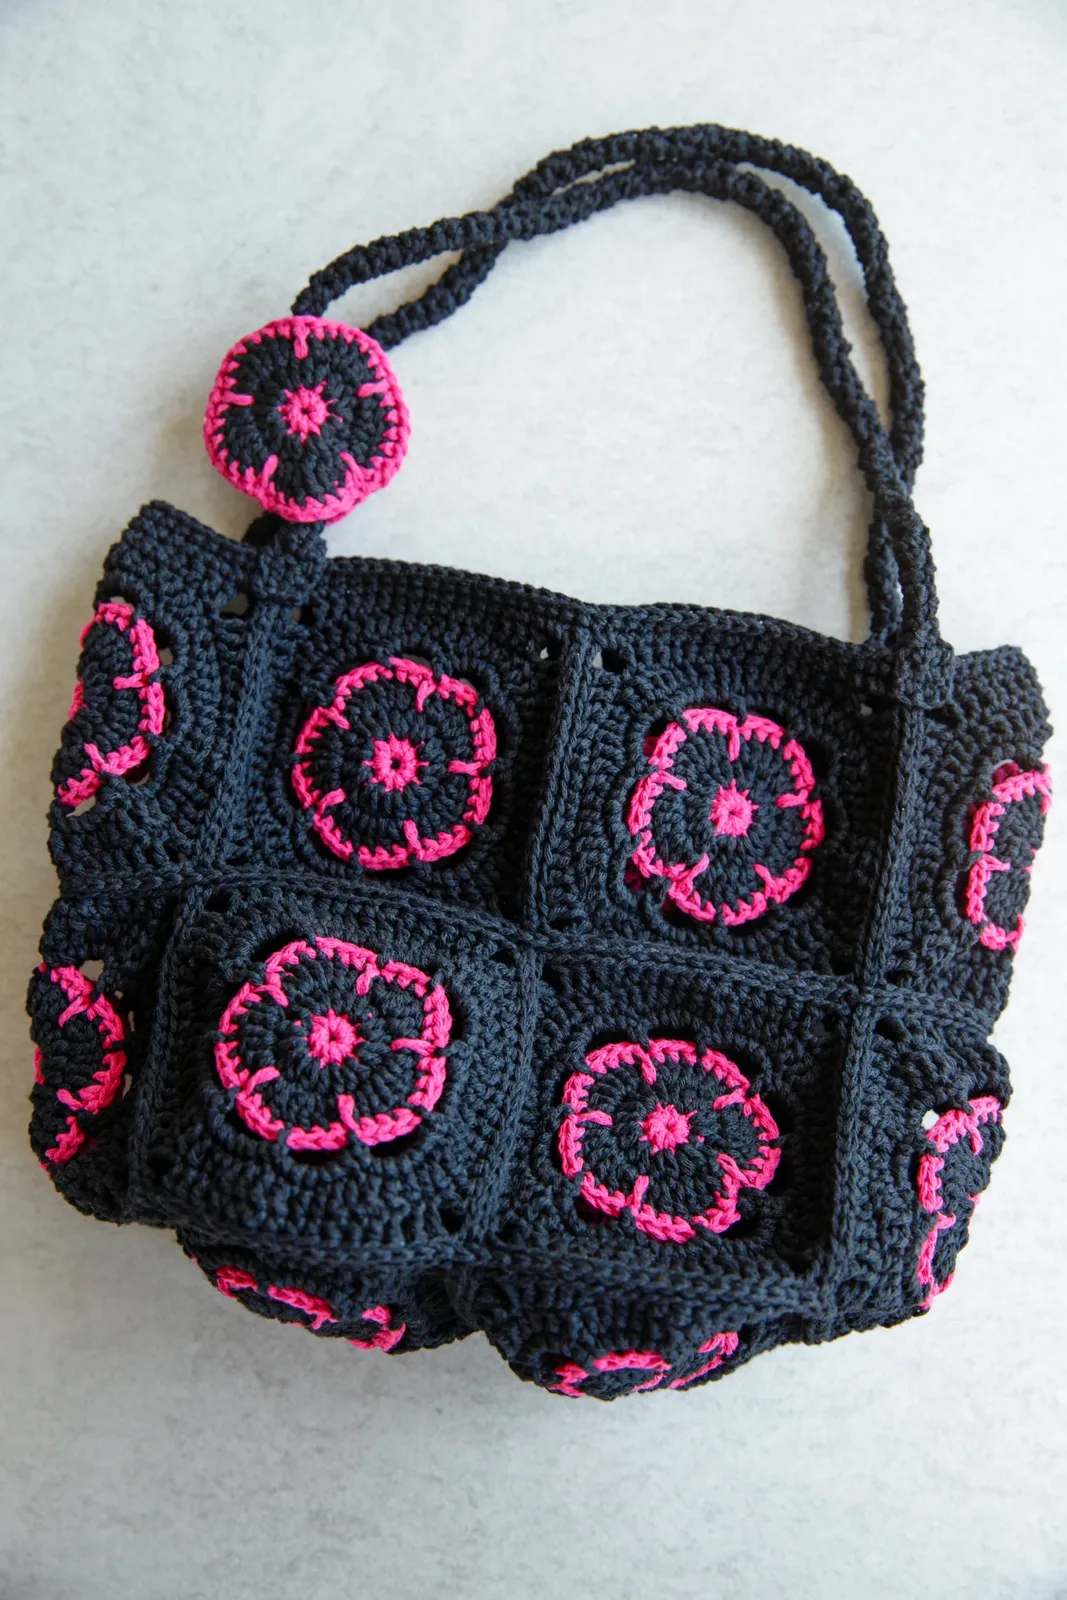
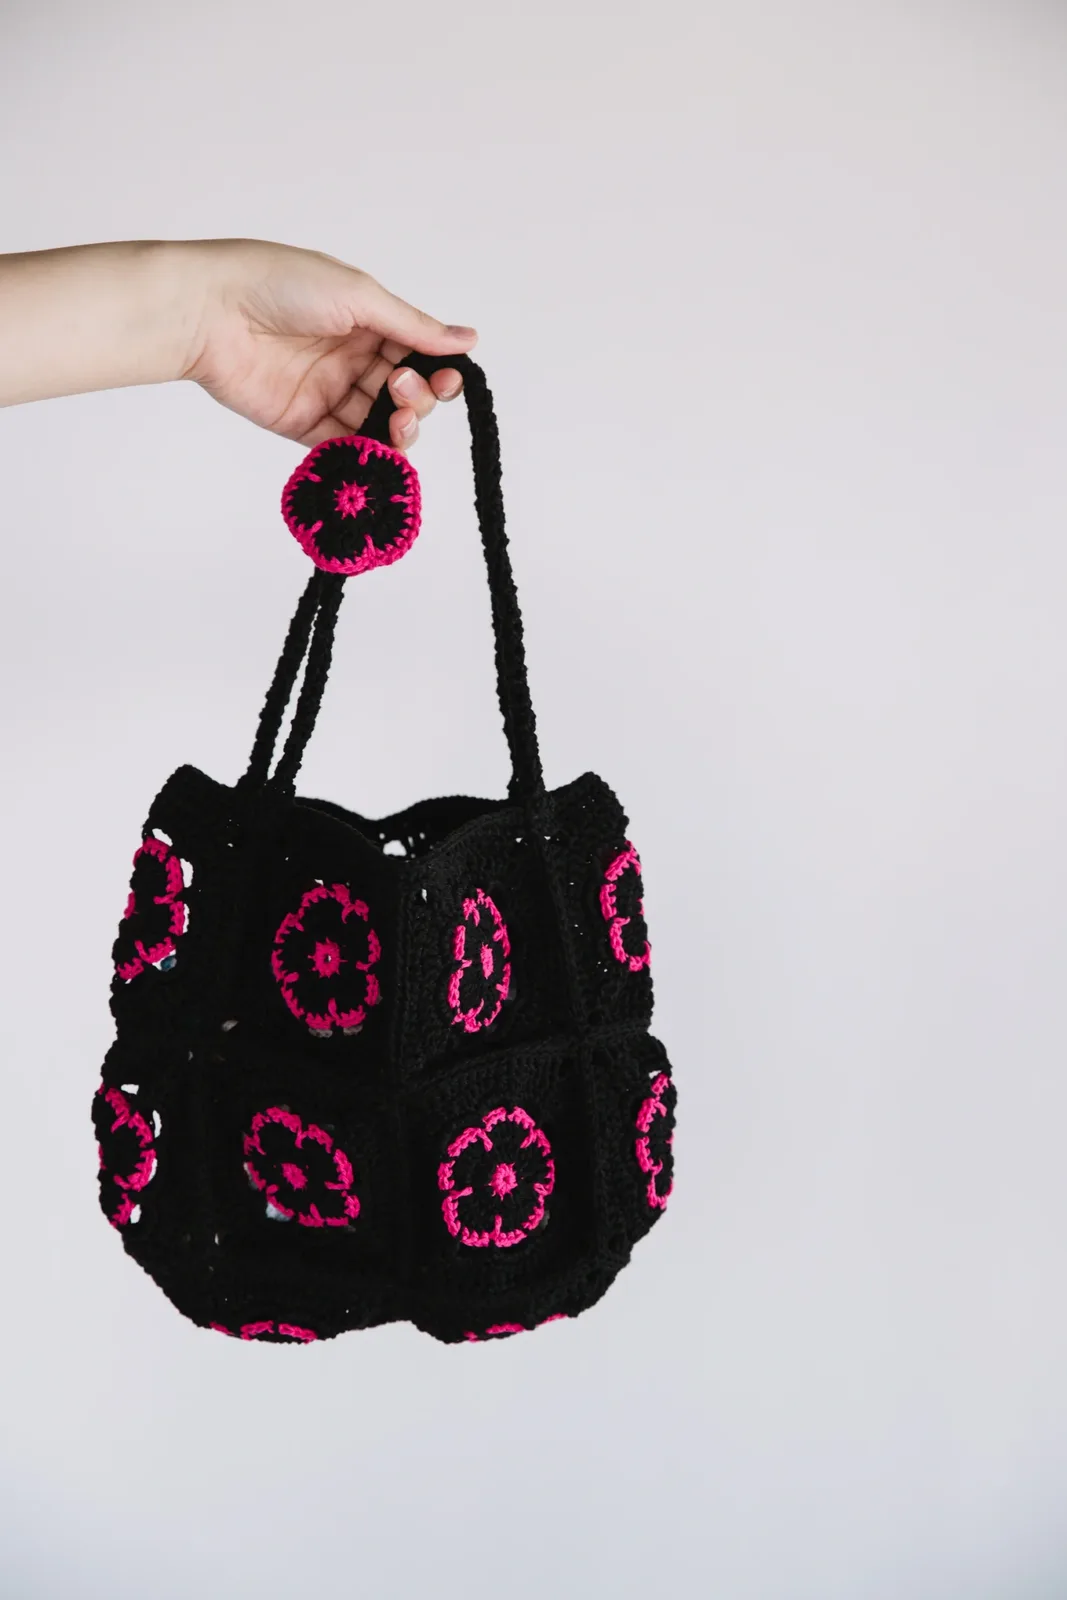
This free pattern turns a stack of African flower granny squares into a petite, structured handbag with serious personality. Worked mostly in black cotton with hot pink edges, each square holds a dramatic dark-centered bloom that glows against its pink framing. It's perfect for crocheters who adore making granny squares but want a finish line beyond another blanket — and because each motif is small and portable, it makes a wonderful take-along project for commutes, waiting rooms, and slow porch evenings

Each square is built in 8 rounds: rounds 1 through 6 grow the openwork African flower itself, with colors flowing gently from the center outward, while rounds 7 and 8 add a tidy border that frames the round bloom into a crisp square, ready for joining. You'll also work a short 2-round second piece and seam everything together with a darning needle. I'd call it a confident-beginner-to-intermediate make, and most crocheters finish over several relaxed evenings — roughly 10 to 14 hours in total

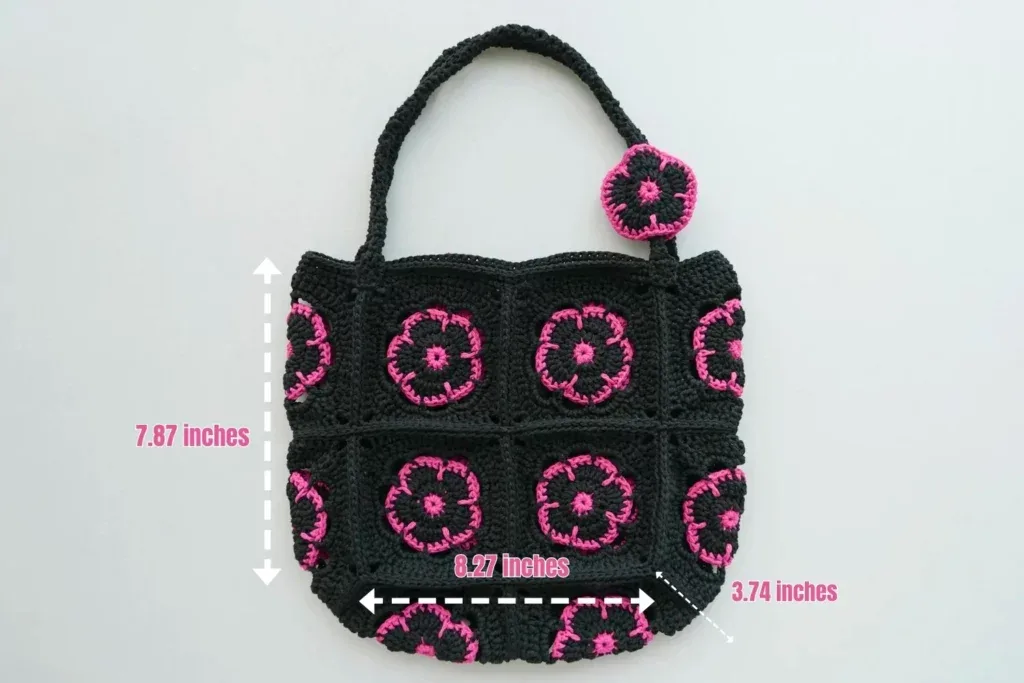
The finished handbag stands about 7.87 inches tall on a base of roughly 8.27 by 3.74 inches — just right for a phone, wallet, keys, and a small notebook. Because it's worked in super-strength cotton at a deliberately firm gauge, the bag holds its shape beautifully and stays cool against your side in summer heat. Add a fabric lining and it becomes a genuinely useful everyday bag — and an unforgettable handmade gift for a flower-loving friend

Variations

I have made more granny squares than I can count, and the African flower is still the motif that makes me sigh happily every single time. There's a lovely rhythm to rounds 1 through 6 — watching that openwork bloom unfurl from the center, the hot pink edging suddenly making the black petals look velvety and dramatic. Then rounds 7 and 8 do this quietly satisfying thing where the round flower becomes a perfectly behaved square, ready to line up with its siblings. The squares are small — just 3.54 inches — so each one is a tidy little win you can finish with one cup of tea. I also love how customizable this bag is: I added stitches to lengthen the strap for shoulder wear, and slip-stitching a spare square inside as a pocket for my keys took ten minutes and made it feel like a real boutique bag. Firm cotton, bold contrast, zero floppiness — this one collects compliments every single time I carry it

Common mistakes

  • Squares come out slightly different sizes, so the bag assembles crookedAfrican flower motifs are sensitive to tension drift across their many color changes. Measure your first finished square against the 3.54-inch target before making the rest, keep the same 3.00 mm hook throughout, and block all squares to a uniform size before joining — small differences multiply across a whole row
  • Losing track of petal and stitch counts in the openwork flower rounds (1–6)Count your stitches at the end of every round rather than only at the end of the square, and drop a stitch marker into the first stitch of each round. Catching a missed petal one round late is a two-minute frog; catching it at round 8 means redoing most of the square
  • Muddy, knotted joins where one color hands off to the nextComplete the very last yarn-over of a round with the new color instead of tying the new yarn on afterward. Leave 4–6 inch tails and weave them in as you go — with several color changes per square across the whole bag, the tail pile grows fast if you save them all for the end
  • The framing rounds (7–8) don't produce a true, flat squareThe corners are where flowers become squares, so mark the four corner spaces before starting round 7 and double-check placement as you pass each one. If the border ruffles or cups, your stitch placement drifted — rip back the border only (the flower underneath is fine) and rework it
  • Joining the squares with the flowers rotated inconsistentlyAfrican flower petals have a visible direction, and one rotated square jumps out on a finished bag. Lay out the entire arrangement first, snap a quick photo for reference, and seam with your darning needle following that layout square by square
  • A floppy bag that slouches and won't hold its shapeThe firm pairing of a 3.00 mm hook with light cotton is intentional — it creates a dense fabric that stands up on its own. If your fabric feels loose and drapey, go down a hook size, and add the fabric lining the designer recommends for extra structure

The rounds, in full

Written out, round by round

Intermediate10-14 Hours1.00 mmLace

Materials

Everything this one takes, in the order you will reach for it.

  • This project uses super-strength cotton yarn throughout, creating a sturdy bag that stays cool in summer heat. You’ll need 3 balls of black yarn and 1 ball of hot pink in total. We used 1.00mm light cotton yarn and a 3.00mm hook for this petite, adorable size. If you want a bigger one, simply use worsted or bulky-weight yarn with a correspondingly larger hook.
  • A pair of scissors and a darning needle to sew are also needed.

keep this to hand

Abbreviations

US crochet terms, as used in this pattern.

  1. chchain stitch
  2. dcdouble crochet
  3. hdchalf treble crochet
  4. scsingle crochet
  5. Sl Stslip stitch for joining to different round
  6. ch-spchain space
  7. ststitch
  8. incincrease
  9. skskip
  10. reprepeat
  11. BLback loop

Main Pattern

Special stitch — standing stitch: Begin the round with a chain worked as a standing stitch: ch counts as sc, ch2 counts as hdc, ch3 counts as dc.

Special stitch — encasing sc: Work a sc into the hdc from Round 2 corresponding to the next st, so the stitch encases Round 3.

In this part we only add single crochet for two rounds to the current bag body. At the beginning of each round, make ch1 as a standing st, while at the end, sl st to the first true sc.

  1. Round 1Start with a magic loop, ch as a standing st, 10sc in this loop, pull the tail tightly, sl st to the top of the first sc, fasten off.

The top edge serves as a sturdy foundation for the straps while reinforcing the bag's opening; this reinforcement distributes weight evenly, maintains the bag's shape, and keeps the opening accessible. If you want a higher edge, just add to the number of rounds.

  1. Round 2Add new yarn in any st, ch2 as a standing st(count as hdc), make another hdc in this st to form a hdc inc. hdc inc in the remaining sts, sl st to the top of the first ch2.Spread the petals. Mix several stitches in different heights on purpose, drawing the shape of each petal.
  2. Round 3ch as a standing st, sc in this st, hdc+dc, dc inc, dc+hdc. *sc, hdc+dc, dc inc, dc+hdc* rep 4 times, sl st to the top of the first sc, fasten off.Place single crochet stitches thoughtfully, choosing the color that matches the flower center to create visual continuity.
  3. Round 4Add new yarn in any sc, ch+sc in this st, 5sc, sc in the hdc from Round 2 corresponding to the next st, so we can encase Round 3.Step by step: Add new yarn in any sc, ch+sc in this st, 5sc, sc in the hdc from Round 2 corresponding to the next st to encase Round 3; then work *6sc, sc in the next corresponding hdc from Round 2 to encase Round 3* rep 4 times, sl st to the top of the first sc, fasten off.*6sc, sc in the next corresponding hdc from Round 2 to encase Round 3* rep 4 times, sl st to the top of the first sc, fasten off.

In this round, the openwork area is established using only chain spaces and single crochet.

  1. Round 5Add new yarn in any encasing sc, ch as a standing st, sc+ch5 in this st, sk3, sc+ch5 in the next st, [sk2, sc+ch5 in the next encasing sc, sk3, sc+ch5 in the next st] repeat 4 times, sl st to the first sc.Still single crochet in this round. Work in the chain space to keep and strengthen the openwork design.
  2. Round 6sl st to the next ch sp.ch as a standing st, 6sc in this ch-sp.*6sc in the next ch-sp* rep 9 times, sl st to the first sc (6).In the next two rounds, we move from the flower to creating the border. These border rounds not only frame and protect the flower design but also provide crucial stability when the squares are joined into a handbag.(6)
  3. Round 7ch3 as a standing st(count as dc), dc, 2hdc, 2dc. *2dc, 2hdc, 2dc*rep 9 times, sl st to the top of the first ch3.Step by step: ch3 as a standing st (count as dc), dc, 2hdc, 2dc; then work *2dc + 2hdc + 2dc in the next ch-sp* rep 9 times, sl st to the top of the first ch3.
  4. Round 8ch3 as a standing st(count as dc), 3hdc, 3sc, 3hdc, 3dc, ch3, 2dc. *dc, 3hdc, 3sc, 3hdc, 3dc, ch3, 2dc*rep 3 times, sl st to the top of the first ch3, fasten off.Two Flowers on the Strap Only repeat Round 1 to Round 4 to finish two appealing African flowers.Join the Basic SquaresMake a knot on your hook. Insert the hook through the BL of the matching stitches of two adjacent squares. Work sl st along this edge to join. Join all 14 patterns in the same way according to the layout shown.

Top Edge

Part 2

In this part we only add single crochet for two rounds to the current bag body. At the beginning of each round, make ch1 as a standing st, while at the end, sl st to the first true sc.

  1. Round 1Add new yarn in any st, ch, sc in each st around, sc in each slst at the seam, and 2sc in each corner as you go, sl st to the first sc.

The top edge serves as a sturdy foundation for the straps while reinforcing the bag's opening; this reinforcement distributes weight evenly, maintains the bag's shape, and keeps the opening accessible. If you want a higher edge, just add to the number of rounds.

  1. Round 2ch, sc in each st around, sl st to the top of the first sc, fasten off. Bag StrapStart with a knot, ch4, sk the 4th ch, sc in the third loop of each ch.Turn. ch to start, work sc in each st across. Repeat [turn over, ch1 to start, and work sc in each st], until the strap reaches your desired length.Sew the long edges of each strap together to form a rope-like tube. Leave both ends unsewn and flat for attaching to the bag.Place the strap between two flower pieces, aligning them perfectly so the patterns match on both sides. Using matching yarn colors, sew around the edges of the flowers to join them together, catching only the flower pieces not the strap. Keep your stitches loose enough that the joined flowers can slide freely along the strap.

Assemble Sew the two straps to the top edge of the bag body.

Important notes

Note 01

💡 The 3.00 mm hook paired with the light 1.00 mm cotton is intentionally snug — that dense fabric is what gives this handbag its structure. If your first square feels stiff to work, you're doing it right; don't size up the hook or the bag will slouch

Note 02

💡 Buy all three black balls from the same dye lot before you start. Black cotton varies between lots more than you'd expect, and one off-shade square is very visible once the bag is assembled

Note 03

💡 Weave in your ends after every finished square instead of saving them for the end — each 8-round square carries several color-change tails, and across a full bag that's a mountain of ends

Note 04

💡 Wet-block your squares to a uniform 3.54 inches before joining. Even tiny size differences compound across a row and can twist the bag body out of shape

Note 05

💡 Test the strap length before fastening off: pin the bag together, drape the strap over your shoulder in a mirror, and add stitches now if you want a longer drop — lengthening after everything is seamed is much fussier

Note 06

💡 If you're adding the fabric lining, insert it before attaching the pocket: slip stitch a spare granny square to the lining on three sides, leaving the top open, so the pocket's weight pulls on the lining instead of stretching the crochet fabric

Note 07

🎨 Colors: While cotton creates firm summer bags, soft wool or acrylic yarns offer cozy alternatives for colder weather. For a striking variation, mostly black with hot pink edges creates dramatic dark-centered flowers. You could also introduce multiple colors for a rainbow effect, add colorful petals to each flower, or work a multicolored border. In Round 4, choose the color that matches the flower center to create visual continuity.

Note 08

🧩 16 pieces in total: 14 African flower granny squares for the bag body, plus 2 flower pieces without a border for the strap. Each full square is 8 rounds — Rounds 1-6 build the flower, Rounds 7-8 add the border; the two strap flowers only repeat Round 1 to Round 4.

Note 09

🧩 Lay out the 14 squares one by one in the recommended arrangement before joining, then join with slip stitches: make a knot on your hook, insert the hook through the back loops of matching stitches of two adjacent squares, and work sl st along the edge.

Note 10

🧩 Bag strap: start with a knot, ch4, sk the 4th ch, sc in the third loop of each ch; turn, ch1 to start, sc in each st across, and repeat until the strap reaches your desired length. Fold each strap and sew the long edges together into a rope-like tube to make it stronger and less stretchy, leaving both ends flat and unsewn for attaching to the bag.

Note 11

🧩 Sew the two straps onto the top edge of the bag body.

Note 12

🧩 Sliding flower decor: place the strap between the two flower pieces, aligning them so the flowers match on both sides, then sew around the edges of the flowers with matching yarn, catching only the flower pieces (not the strap) and keeping the stitches loose enough that the joined flowers slide freely along the strap.
More photos

FAQs

Asked on the glider

the ones that come up on the glider

How many African flower squares do I need for this handbag?

It depends on the size you want — each finished square measures 3.54 inches, and the sample bag stands 7.87 inches tall on a base of roughly 8.27 by 3.74 inches. Make a handful of squares first, arrange them into the body shape, then add or remove squares to adjust capacity, exactly as the designer suggests

Do I really need to add a lining?

It's optional but worth it. The firm cotton holds its shape well on its own, but a fabric lining adds structure, stops small items from poking through the openwork flower centers, and gives you a base for the slip-stitched pocket square

Is this pattern beginner friendly?

I'd rate it intermediate — you'll want to be comfortable with basic granny squares and clean color changes. That said, the 8-round square is repetitive in the best way: once your first flower is done, the rest become relaxing muscle memory

What yarn should I use if I can't find super-strength cotton?

Any firm mercerized cotton at a similar weight works beautifully — Scheepjes Catona and DMC Petra are reliable picks. Avoid soft, drapey yarns for the summer version, though a wool or acrylic swap makes a lovely cozier cold-weather bag, as the designer notes