Intermediate 4-6 hours Worsted yarn

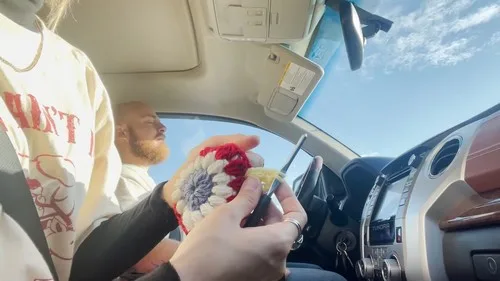
Worked on the glider, counted out loud —

Starburst granny square baby sweater for beginners

A beginner-friendly baby sweater from starburst granny squares in red, blue, yellow, and white. About 4-6 hours.

Jump to the rounds

What this one is

This one's for you if you've got a stack of granny squares in your head already and a little one on the way who needs something soft. I think of it as a quiet-evening project, the kind where you sit with your hook and a few colors of yarn and build a small, bright square at a time until a sweater shows up.

Try it another way

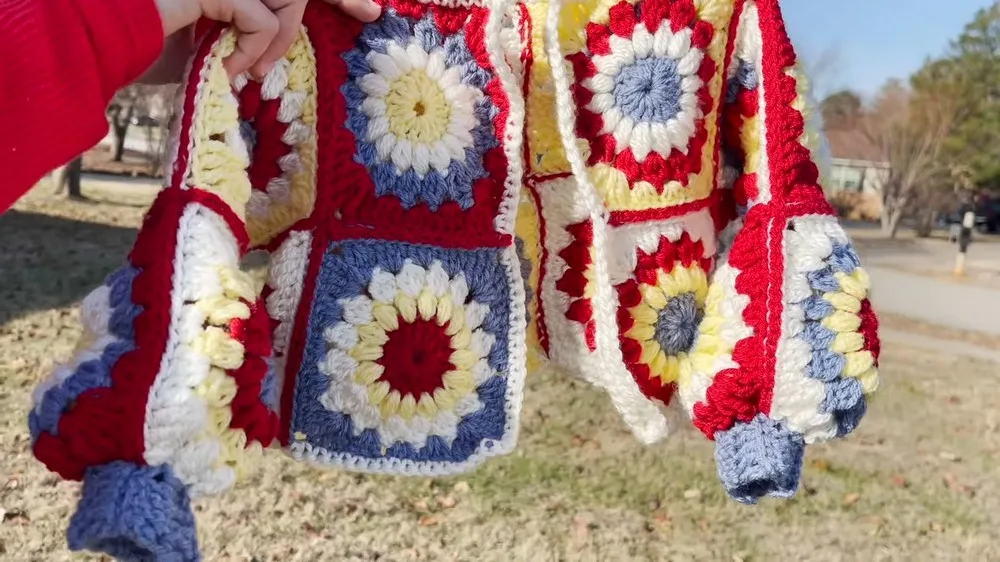
Once you've got the Starburst Granny Square down, there's a lot of room to make this your own. Swap the color order inside the square — try starting with white instead of red, or let light yellow take the final shaping round instead of red, so every square in the sweater reads a little differently even though the stitch count never changes. You can also assign colors by panel rather than by round: an all-blue back grid against red-and-yellow front L-shapes gives a bolder, blockier look without touching a single stitch pattern. For sizing, the 2x2 back grid and L-shaped fronts mean you can add or subtract whole squares to size up or down, as long as you keep the sleeve strips matched to the new armpit depth. If you want a plainer finish, skip the contrast border and work the single crochet edge in whichever color already dominates the body, so the cuffs and neckline blend rather than pop. And if this sweater's meant for everyday wear rather than a special outing, consider working the cuffs and neckline border a round or two deeper for extra durability where little hands and heads do the most rubbing.

What I love about this sweater is how the starburst square changes character round by round. You start with sixteen tidy double crochets, then pile on puff stitches for Round 2 — that satisfying squish of seven loops pulled through at once. Round 3 brings in the double crochet decrease rhythm between puffs, and then Round 4 brings the real trick: easing triple crochets down to half-double crochets and back up again to coax a circle into four straight corners. It's a small lesson in shaping with tension alone, no cutting or darts, just stitch height doing the work. Watching that round circle square itself off, corner by corner, is the moment that makes this pattern worth your time.
The rounds, in full

Written out, round by round

Intermediate4-6 hoursWorsted

Bring to the porch

Everything this one takes, in the order you will reach for it.

  • Yarn in red, powdery blue, light yellow, and white.
  • Crochet Hook.

Starburst Granny Square

  1. Round 1Make a slip knot, insert your hook, chain 4; slip stitch into the first chain to form a ring; chain 3 (counts as the first double crochet); work 15 more double crochets into the ring (total of 16 double crochets); slip stitch to join into a circle, chain 1, cut yarn, and pull through to secure. (16 dc)
  2. Round 2Adding a New Color Attach a new color yarn (e.g., white) at the top of the double crochets; chain 3; yarn over, insert hook, pull up a loop, repeat 2 more times, you should have 7 loops on your hook; yarn over, pull through all loops, chain 1 to close, this creates a puff stitch; repeat around the circle to create a total of 16 puff stitches; slip stitch into the top of the first puff stitch, chain, and tie off. (16 puff stitches)(16)
  3. Round 3(Change Color Again, e.g., Red): Attach new color yarn in between puffs; chain 3; yarn over, insert in between puffs, pull up a loop, pull through two—don't complete the double crochet; repeat until you have 4 loops on your hook, yarn over, pull through all loops, chain 2; continue this pattern around the square.
  4. Round 4Turning into a Square: In the final round, work on turning the circular shape into a square by adjusting the height of the stitches from triple crochets to half-double crochets and then back to triple crochets, ensuring to create corners by working sets of stitches into the same space and chaining 3 between these corner sets.

Putting it together

Step 1

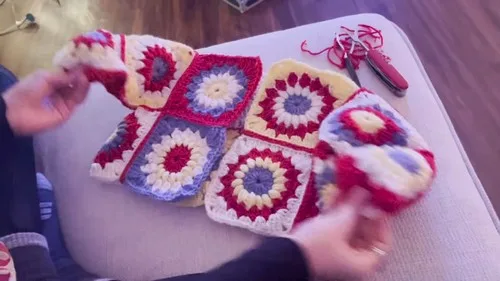
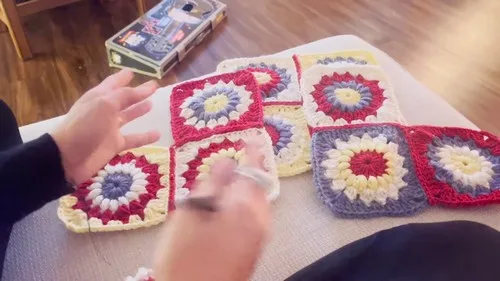
Front Panels and Back Panel: Sew squares together into two "L" shapes for the front panels, and a 2x2 square grid for the back panel.

Step 2

Sleeves: Create sleeves by joining squares into a strip.

Step 3

Joining: Use a slip stitch join for a flat seam. Attach sleeves to the body, ensuring to adjust for a proper fit around the armpit area.

Step 4

Finishing Touches: Sew the top shoulders partially, leaving an opening for the head. Add borders and cuffs in desired colors, using single crochets for edges and half double crochets for cuffs.

Step 5

Final Touches: Consider adding a button for closure and any additional decorative elements.

Marlene's notes

Note 01

You'll be cutting and reattaching yarn at the start of nearly every round, so leave tails long enough to weave in later rather than short ones you'll fight with.

Note 02

The puff stitch in Round 2 asks for seven loops on the hook before you pull through, and loose tension here keeps the puff from pulling the circle out of shape.

Note 03

Because Round 4 turns a circle into a square by changing stitch height, keep an eye on your corner groups. If one corner looks flatter than the others, you likely missed a stitch into the shared space.

Porch photos

Before you sit down

  • Lay out your red, powdery blue, light yellow, and white yarn and decide which color opens each square and which one handles the corner-shaping final round, since that choice repeats across every motif you make.
  • Make one full Starburst Granny Square before committing to a stack of them, so you can see exactly how Round 4's triple-to-half-double-to-triple shift behaves in your hands.
  • Read through Round 4 twice before you start it. The corner sets and the chain-3 spaces between them are the part most likely to trip up a first-timer, and it helps to know where you're headed.
  • Set a stitch marker (or a scrap of contrast yarn) in the first stitch of Round 1 on your very first square, so you always know where a round begins when you're cutting and reattaching colors.

How the hours go

Starburst Granny Squares
about 2-3 hours total because each square has four rounds and you'll need several of them for the panels and sleeves
Panel and sleeve assembly
about 1-2 hours because the front L-shapes, the 2x2 back grid, and the sleeve strips each need careful square-to-square joining
Seaming, shoulders, and borders
about 1 hour because slip-stitch seaming at the armpits takes patience and the single crochet borders go on last

Looking after it

  • Hand wash the finished sweater in cool water with a gentle soap, then press out the excess water in a towel rather than wringing, since twisting can distort the granny square corners you worked to shape.
  • Lay it flat to dry on a towel, easing the squares back into their corners while damp, and store it folded rather than hung so the shoulder seams don't stretch over time.
FAQs

Asked on the glider

the ones that come up on the glider

How many Starburst Granny Squares do I need to make the whole sweater?

The pattern doesn't fix an exact number since it depends on the baby's size, but you'll need enough for two front L-shapes, a 2x2 back grid, and two sleeve strips. Make one extra square at the start as a tension test so you know how many you'll truly need.

Can I use a different yarn than the colors listed?

Yes, the red, powdery blue, light yellow, and white are just the sample palette, and you can substitute any colors you like in the same weight. Just keep one color dedicated to the final shaping round so the squares stay consistent.

What if my square comes out more round than square after Round 4?

That usually means a corner set got worked into the wrong space rather than the shared corner space the pattern calls for. Check that you've chained 3 between each corner group and that both stitches of a corner set land in the same spot.

Is this really a beginner pattern with the puff stitch and stitch-height shaping?

It's approachable for a confident beginner who's comfortable with basic double crochet, since the puff stitch and the triple-to-half-double shift are the only new skills. Practicing one full square before starting your stack, as suggested above, makes the learning curve gentle.

How do I join the sleeves without a bulky seam at the armpit?

The pattern calls for a slip stitch join to keep the seam flat, and the armpit area needs a little adjusting as you attach the sleeve strip to the body. Take it slow there and check the fit against the body panel before you seam the whole way around.

Do I need to block the squares before assembling them?

A light steam or damp press on each square before seaming helps the corners sit flat and square against each other. It's not required, but it does make the final assembly noticeably tidier.