Beginner 4-6 hours Any Weight yarn

Worked on the glider, counted out loud —

A flower motif baby vest worked one round at a time

An easy, colorful flower motif vest for babies, worked in joinable rounds over about 4-6 hours.

Jump to the rounds

What this one is

This is the project for a quiet evening when you want something that grows fast and feels generous under your hands. Picture it for the newest member of the family, or for a baby shower gift that doesn't look like everyone else's. Each flower motif comes together on its own, so you can work a petal or two while the rest of the house settles down, then set it aside without losing your place.

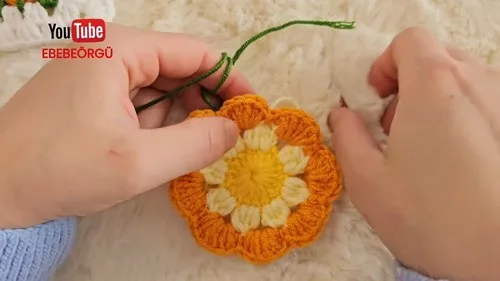
Your hands spend most of their time circling: a magic ring, two layers of double crochet, then the fun part where straight stitches bend into petals. After that you add a contrasting scalloped edge and a ring of little leaves around each motif. One motif comes together in well under half an hour once you've got the rhythm, and the vest grows motif by motif until you have enough to lay out your design.

Try it another way

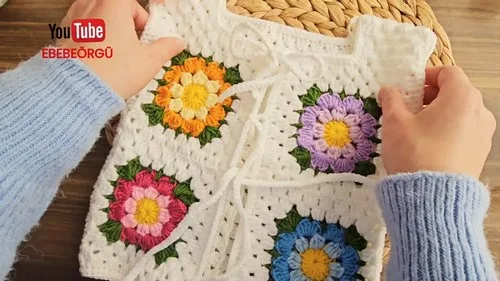
Because each motif stands alone, sizing the vest up or down is just a matter of how many you make and how you lay them out — add an extra row of motifs down the body for an older baby, or trim the layout for a tighter fit on a newborn. Yarn choice changes the whole feel: a soft worsted gives you a cozy, slightly structured vest, while a lighter cotton blend keeps things breathable for warmer rooms. Color placement is where this pattern really lets you play — keep rounds one and two in one neutral and save the brightest shades for the round three petals, so the flower reads clearly across all 8 petals, and for the round five leaves. Or go scrappy and let every motif be its own color story. The scalloped edge in round four is also a natural spot to repeat one accent color across all your motifs, which ties a mixed palette together even if nothing else matches. If a vest isn't what you're after, the same 16-DC, 32-DC motif works just as well stitched into a baby blanket or lined up as coasters.

What makes this one satisfying is watching a flat ring of double crochet turn into something structured — that moment in round three when plain stitches start reading as petals instead of just increases. Then you get to play colorist: a fresh shade ties on for round two, another for the petals in round three, and another again for the scalloped edge in round four, so every motif can be its own small color story. The leaf border in round five pulls it all together, framing the scalloped edge with a tidy little finish before you've even picked up a needle to join anything. And because the vest is built from motifs rather than worked as one long piece, you can carry a bag of in-progress rounds anywhere and never lose momentum.
The rounds, in full

Written out, round by round

Beginner4-6 hoursAny Weight

Bring to the porch

Everything this one takes, in the order you will reach for it.

  • Yarns of various colors (specified in the pattern as you work through it)
  • Crochet hook suitable for your yarn choice
  • Scissors
  • Yarn/tapestry needle (for joining motifs and weaving in ends)

Main Pattern

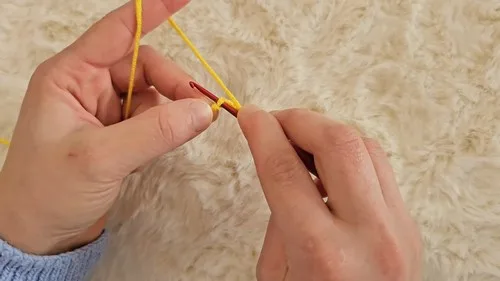
  1. Round 1Starting and First Layer Create a magic ring; chain 1, work 16 double crochets (DC) into the ring; slip stitch to the first DC to join. (16 DC)Round 2: Tie on a new color before beginning this layer.
  2. Round 2Second Layer (Change Color) Chain 2, work a DC in the same space, then work 2 DC in each stitch around for a total of 32 DCs; join with a slip stitch to the first DC. (32 DC)Round 3: Change color before beginning the petals.
  3. Round 3Creating Flower Petals Chain 2, then work stitches into subsequent spaces to form a 'petal' shape; repeat around to create 8 petals. (8 petals)Round 4: Use a new color for the scalloped edge.(8)
  4. Round 4Add Third Color (Add Third Color): Begin at any petal; work an SC around, adding more SCs in the spaces between the petals to form a scalloped edge; fasten off.Round 5: Change to green (or leaf color) for the leaf border.
  5. Round 5Leaf Pattern Start with a slip stitch on any SC from the previous round; chain 2, work 3 DCs, chain 2, and slip stitch into the first chain space to form a leaf; continue this pattern around each SC edge to create a border of leaves; fasten off.

Putting it together

Step 1

Lay out motifs according to your vest design.

Step 2

Using a needle or crochet hook, join the motifs by their corners or sides as planned.

Step 3

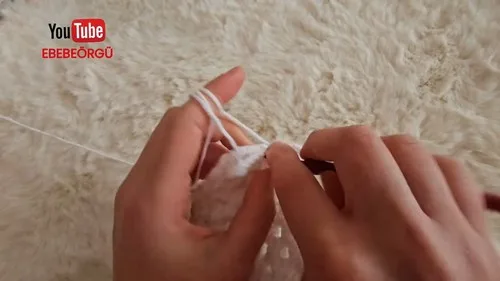
Once joined, create a border around the vest (if desired) by chaining and SC around the edges.

Step 4

For the armholes and neck, ensure smooth edging by evenly spacing SC stitches.

Step 5

Add ties or embellishments as desired.

Step 6

After joining all motifs and finishing the edges, you can add extra rows around the neckline or armholes for a cleaner finish.

Step 7

Consider creating a lace border along the hem or neckline for a decorative touch.

Step 8

Attach your finished ties by weaving through the edges at the front of the vest, allowing for adjustable closure.

Step 9

Secure all loose ends with a needle, trimming excess.

Step 10

Block your vest if necessary to achieve the desired shape and size.

Marlene's notes

Note 01

Choose a hook that keeps your double crochet dense enough to hold the ring flat — if round one's 16 DC starts to cup or ruffle, drop down a hook size.

Note 02

A stitch marker on the first DC of each round makes the slip-stitch join painless, especially once you're past 32 stitches and the petals start crowding the count.

Note 03

Keep color changes tidy by tying on the new shade at the start of the round as instructed, and weave in ends as you go rather than saving a pile for the end.

Note 04

This pattern involves creating colorful crochet motifs that are combined to form a vest.

Note 05

Each motif features flower petals, framed with multiple layers of crochet stitches, in a variety of colors.

Note 06

Suitable for crocheters at any skill level.

Porch photos

Before you sit down

  • Sketch a rough vest shape first — front, back, and two shoulder seams — so you have a sense of how many motifs you'll actually need before you start making them.
  • Sort your yarn by color group ahead of time, since round two, round three, and round four each call for a fresh shade.
  • Work one full motif as a test piece before committing to a full batch, checking that your double crochet holds the ring flat through round two's increase to 32 stitches.
  • Read through round three once before you begin it, since the petal shaping asks you to look ahead at the spacing rather than just repeat a stitch count.

How the hours go

Working one motif, rounds 1 through 5
about 20-30 minutes because of three color changes and the petal and leaf shaping
Joining all motifs into the vest layout
about 1-2 hours because each corner and side needs to be matched against your planned layout
Edging the hem, armholes, and neckline
about 30-45 minutes because evenly spaced SC stitches around curves take a bit more care than straight edges

Looking after it

  • Since you can use pretty much any fiber for the motifs, the safest wash is a gentle hand wash in cool water unless your yarn label says otherwise, which protects both the color changes and the leaf border from pulling out of shape.
  • Lay the vest flat to dry and gently reshape each flower's petals and leaves with your fingers while it's still damp, then store it folded rather than hung so the motifs keep their shape.
FAQs

Asked on the glider

the ones that come up on the glider

How many motifs will I need for one vest?

That depends on your baby's size and how you lay out the front, back, and shoulders, so it's worth arranging your motifs on a flat surface before joining. Make a couple of extra in case one needs replacing after blocking.

Do I have to change colors for every round?

No, only rounds two, three, and four call for a fresh shade according to the pattern, so round one and round five can stay in whatever color you're already holding. Feel free to repeat a color across rounds if you'd rather weave in fewer ends.

What's the best way to join the motifs?

The pattern has you join by corners or sides as you've planned your layout, using a needle or a crochet hook, whichever gives you more control. Lay everything out first so you're matching corners before you start stitching them together.

Can I skip the leaf border in round five?

You can, since it's really a finishing touch on top of the scalloped edge from round four. Leaving it off will make each motif slightly smaller and plainer, so you may want an extra motif or two to compensate.

My motif is cupping instead of lying flat — what's wrong?

This usually means round one or round two is a touch too tight, so try going up a hook size to give the 16 DC and then 32 DC room to spread. Checking tension on a single test motif before making a full batch catches this early.

How do I handle the armhole and neck edges neatly?

The pattern has you space single crochet evenly around those curves rather than crocheting straight across, which keeps the edge from pulling tight or flaring. If it still looks uneven, adding an extra row around the neckline or armhole can clean up the line.