Beginner 1-2 hours Worsted yarn

Worked on the glider, counted out loud —

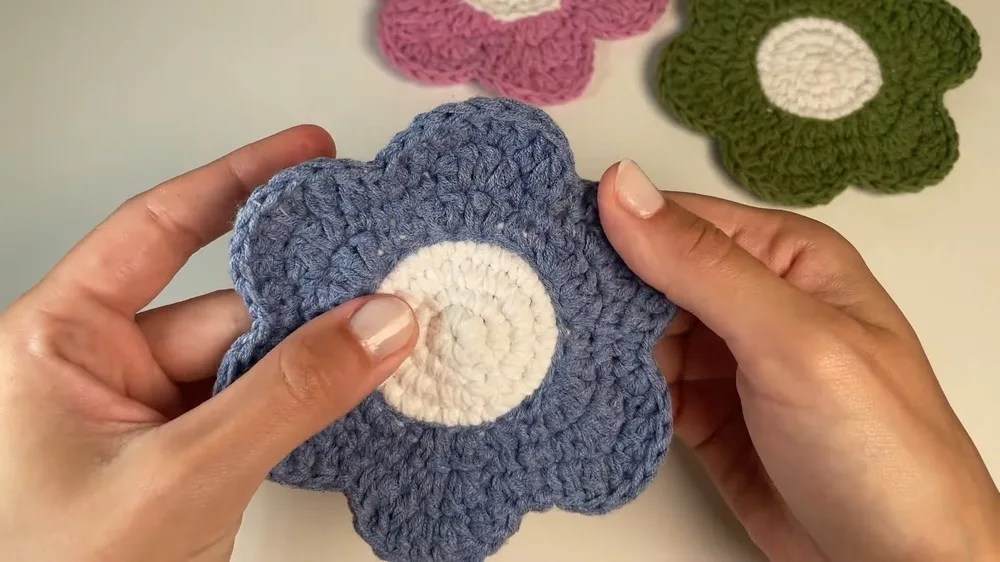
Simple crochet flower coaster with petal rounds

A beginner-friendly flower coaster with double crochet petals and a color change, done in under two hours.

Jump to the rounds

What this one is

This little flower coaster is for the evening you want something finished before the kettle cools — a project you can pick up while you catch up on a show and set down again with a real, useful thing in your hands. It suits anyone who wants a taste of shaping without committing to a whole blanket, and it works just as well as a small gift, a coffee cup companion, or a bit of color on your own table.

Your hands spend most of the time working single crochet and double crochet increases in rounds, watching a flat circle spread out from six stitches into layered petals. You'll change color once the petals begin, joining with a slip stitch, then work through the back loop only for a ridged, textured look. Start to finish, with weaving in ends, you're looking at under two hours.
Try it another way

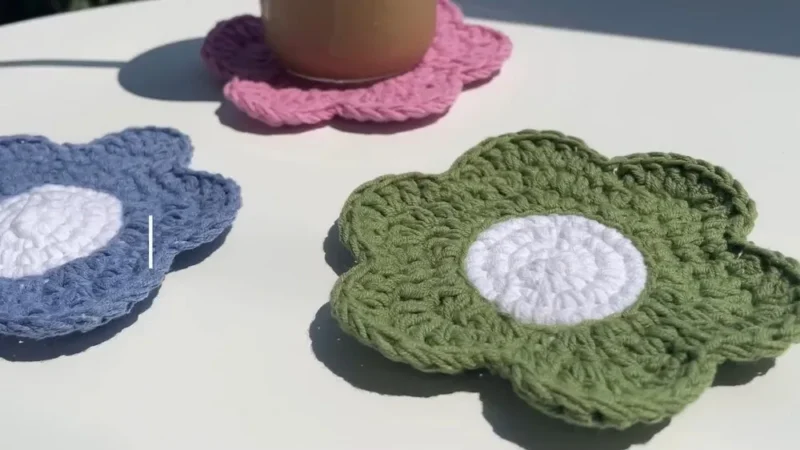
What makes this one satisfying is watching the petals actually happen in front of you — the increases from single crochet into two double crochets stack up round by round until the flat circle you started with, that first ring of 6 sc, suddenly reads as a flower. Working the petal rounds through the back loop only is the part I like best: it leaves a little ridge on the front side, so the petals have a defined edge instead of blending into the center. Add a color change right where the petals start, joined with a slip stitch in the new shade, and you get a coaster that looks far more deliberate than the stitch count actually asks of you.

The rounds, in full

Written out, round by round

Beginner1-2 hoursWorsted

Bring to the porch

Everything this one takes, in the order you will reach for it.

Yarn

  • Any yarn (60% cotton, 40% acrylic used in sample); use 100% cotton for heat-resistant coasters; two colors recommended

Main Pattern

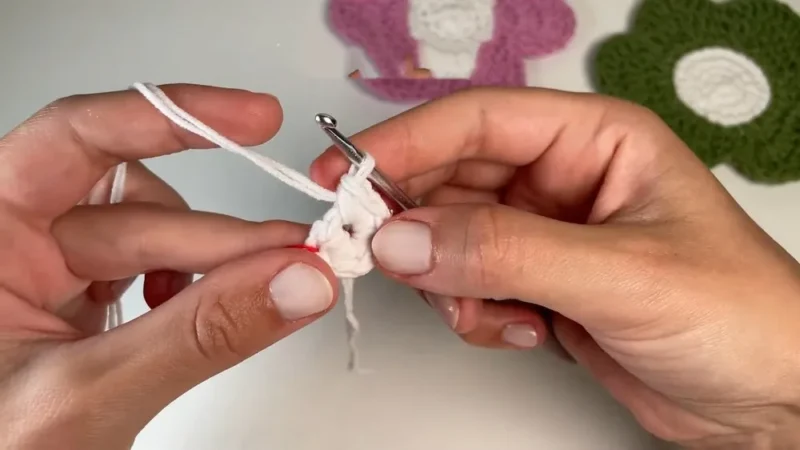
  1. Round 1Ch 1 (does not count as a st). Work 6 sc into the circle . Place stitch marker in first sc.Pull tail to close the center tightly.Join: Remove marker, sl st to first sc.(6)
  2. Round 2Ch 1. In same st (where marker was), 2 sc (inc) and mark first sc. 2 sc in each st around .Join: Remove marker, sl st to first sc.(12)
  3. Round 3Ch 1. In same st, 2 sc (inc) and mark first sc. 2 sc in each st around . Join: Remove marker, sl st to first sc.(24)
  4. Round 4Ch 1. 1 sc in each st around (24 sc), placing marker in first sc. Join: Remove marker, sl st to first sc.(24)
  5. Round 5Color Change & Slip Stitch Row Change color: During sl st, pull through new color.Hold old color at back, tighten as needed.Ch 1 to secure new color.Slip st in each st around (24 sl st), mark first sl st.Join: Remove marker, sl st to first st (through back loop).(24)
  6. Round 6Petal Base (Work in Back Loops Only) Pattern repeat: 1 sc in next st 2 dc in next st2 dc in next st 1 sc in next stCh 1.In same st, 1 sc (back loop only) , place marker.(2 dc in next st, back loop only), (2 dc in next st, back loop only), (1 sc in next st, back loop only); rep around.
  7. Round 7Petal Expansion Pattern repeat: 1 sc in next st 1 sc in next st 2 dc in next st 2 dc in next st1 sc in next st 1 sc in next stCh 1.In same st, 1 sc (back loop only) , mark first sc.1 sc in next st (back loop only).(2 dc in next st), (2 dc in next st), 1 sc in next st, 1 sc in next st; rep around.Continue this sequence to end.Join: Remove marker, sl st to first sc.(24)
  8. Round 8Final Petal Row Pattern repeat: 1 sc in next st 1 dc in next st 1 dc in next st 2 dc in next st2 dc in next st 1 dc in next st 1 dc in next st 1 sc in next stCh 1.In same st, 1 sc (back loop only) , mark first sc.1 dc in next st (back loop only).1 dc in next st (back loop only).2 dc in next st (back loop only).2 dc in next st (back loop only).1 dc in next st (back loop only).1 dc in next st (back loop only).1 sc in next st (back loop only).Repeat this petal sequence around.Join: Remove marker, sl st to first sc.Finishing Ch 1, cut yarn.Pull end through and weave in all ends with a yarn needle, going back and forth, ensuring they are secure and invisible.Trim any excess.(24)

Putting it together

Step 1

Ch 1, cut yarn.

Step 2

Pull end through and weave in all ends with a yarn needle, going back and forth, ensuring they are secure and invisible.

Step 3

Trim any excess.

Step 4

Save

Marlene's notes

Note 01

Count your stitches after every round, especially right after an increase round — it's easy to drift off from 6 sc if a stitch gets missed or doubled.

Note 02

When you change color, work the slip stitch join in the new shade rather than the old one; that's what keeps the color break clean at the start of the round.

Note 03

If you want a firmer, more substantial coaster, work with the yarn held double — it thickens up the fabric without changing any of the stitch counts.

Porch photos

Before you sit down

  • Keep a stitch marker on hand; you'll be moving it every round to mark the first stitch, and losing track of it is the fastest way to lose count on the increases.
  • Work a quick test round or two first if you've never done back-loop-only double crochet increases — it feels different from working into both loops, and it's worth getting the tension right before the actual petals.
  • Read through the petal expansion round before you pick up your hook — it repeats a short sequence of single and double crochets around, and it helps to see the shape of it once before you're mid-round.

How the hours go

Main Pattern (6 rounds)
about 30-40 minutes because you're working six rounds of steady single crochet increases before any petal shaping starts
Second petal round (continued sequence)
about 15-20 minutes because the repeat continues and needs a closer count to keep the petals even

Looking after it

  • If you've used cotton, these coasters can take a quick hand wash in cool water for spills or stains; lay them flat to dry so the petals keep their shape instead of curling at the edges.
  • Store them flat rather than folded, and if the petals lose their crispness over time, a light steam or a quick reshape by hand while damp will bring the ridges back.
FAQs

Asked on the glider

the ones that come up on the glider

Can I use just one color instead of two?

Yes, the pattern works fine in a single color throughout — you'll lose the visual color break between the center and petals, but the increases and back-loop texture will still show.

Do I need to use cotton yarn?

Only if this is going under hot drinks; the sample was made in a cotton-acrylic blend, but 100% cotton is recommended for heat resistance if you're using it as an everyday coaster.

Why do the petal rounds ask for back loop only?

Working through the back loop only leaves the front loop as a raised ridge, which is what gives the petals their defined, slightly textured edge instead of a flat, blended look.

How many petals does this make?

The petal count follows from the increase repeat worked all the way around the round, so it comes out even and matches the stitch total from the earlier increase rounds.

What if I lose track of my stitch marker?

Count back to your last confirmed stitch total, since the pattern lists an expected count after each round, then reposition the marker in the first stitch of the current round before you continue.

Can I make this thicker or sturdier?

Yes, working the yarn held double throughout gives you a firmer, more substantial fabric without changing any of the stitch counts in the pattern.