Beginner 3-4 hours Worsted yarn

Worked on the glider, counted out loud —

Easy crochet succulent leaves for a beginner rosette

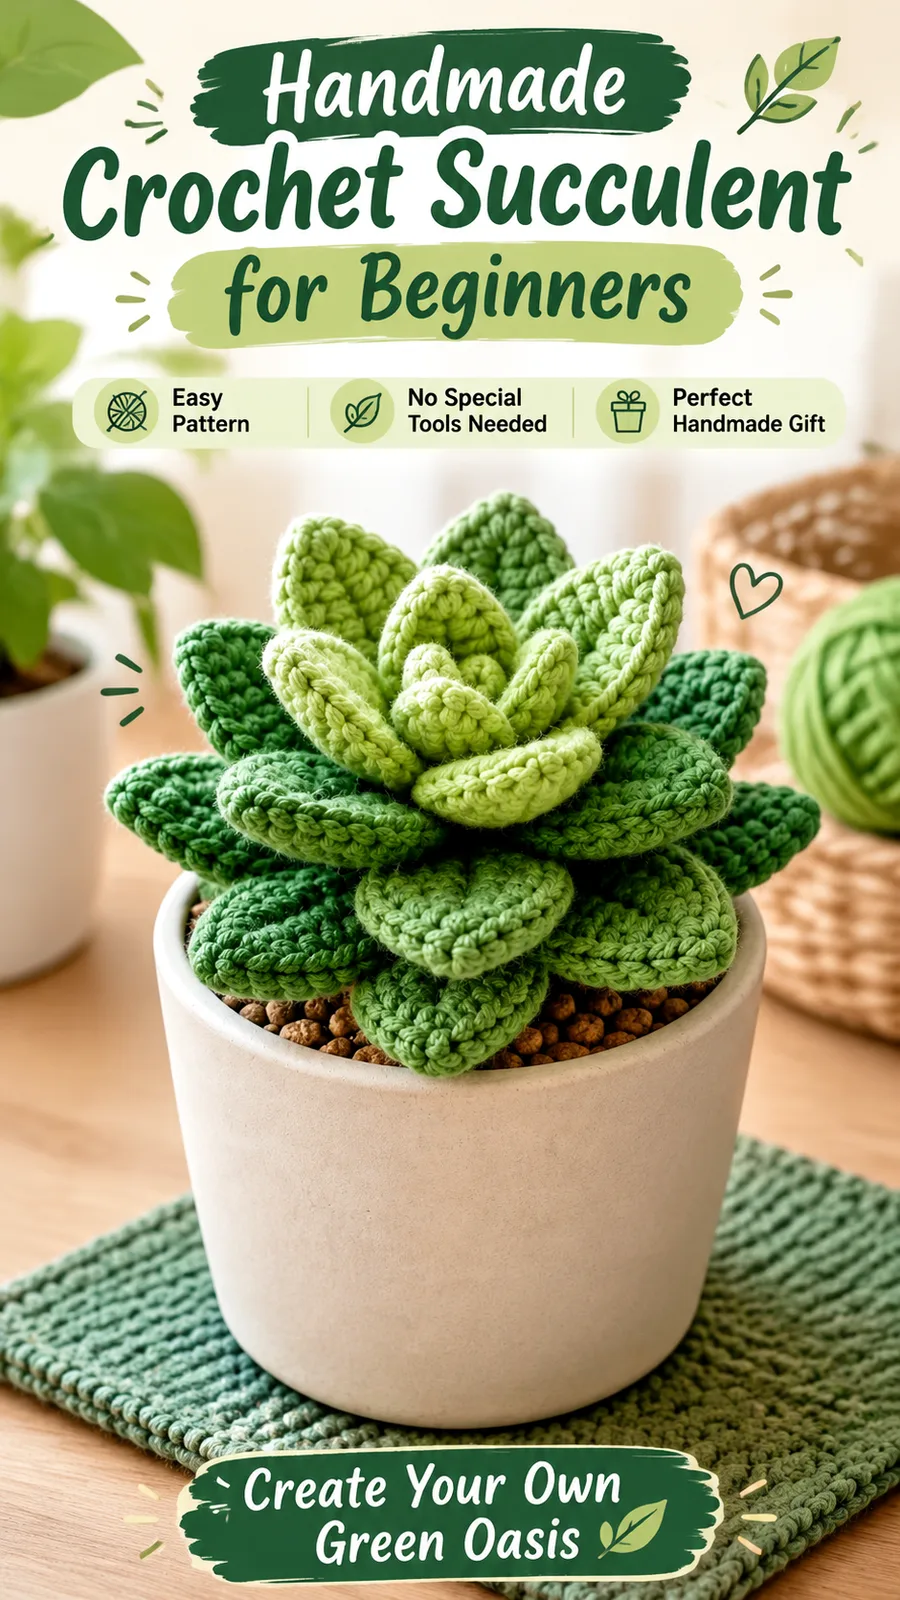
A beginner-friendly crochet succulent made from 15 layered leaves in three sizes, ready in a few hours.

Jump to the rounds

What this one is

This little crochet succulent is made for the evening when you want something green on your shelf but you've already let one too many real plants dry out on you. It's for the beginner who can sc, hdc, and dc but hasn't shaped a leaf before, and for anyone hunting a gift that won't wilt by next week. If you want a low-stakes project that still reads as a real plant from across the room, this is the one.

Your hands spend most of the time making leaves, not rounds, fifteen of them in three graduated sizes, each one chained, turned, and shaped with increases and decreases until it curves on its own. You'll work through the large leaves first, then the mediums, then the smalls, before arranging and sewing the whole rosette together. Set aside a stretch of a few hours, or split the work across a couple of sittings.

Try it another way

You can scale this down easily: work only small leaves (the 13 to 17 stitch ones) for a tiny succulent, or drop to ten leaves total instead of fifteen for a sparser rosette. Swap the cotton for soft acrylic if you want a lighter, pillowy finish instead of crisp stitch definition, especially nice for a nursery shelf. Play with your three shades of green by putting the darkest on the six large outer leaves and the lightest on the four small inner ones, which pushes the rosette look and makes the center pop. You could also skip the pot entirely and glue a magnet or brooch pin to the stuffed base, turning the same fifteen leaves into a fridge magnet or a wearable pin. For a gift set, make two or three in different shade combinations, one more blue-green, one more yellow-green, and group them in a small tray the way real succulent arrangements get grouped. None of this changes the stitch counts in the pattern, just how you deploy them.

What makes this one satisfying is watching a plain chain turn into a pointed leaf tip in a single stitch, that 5 dc worked into the last chain is doing all the shaping work, and it happens the same way on every one of the fifteen leaves you make. You go from 21 stitches to 25 on the large leaf's second row, then back down to 20 by the fourth, and feeling that count rise and fall under your hook is oddly addictive. The sc, hdc, and dc combination along each edge builds a plush, slightly raised surface that actually feels like a leaf, not flat fabric. By the time you're arranging six large, five medium, and four small leaves into a rosette, you can see the whole shape you've been building stitch by stitch.
The rounds, in full

Written out, round by round

Beginner3-4 hours3.5 mmWorsted

Bring to the porch

Everything this one takes, in the order you will reach for it.

  • Worsted weight yarn in three shades of green, approximately 120 yards (110 meters).
  • Small amount of brown or tan yarn for the soil area if desired.
  • 3.5 mm crochet hook (US E-4).
  • Polyester fiberfill stuffing.
  • Yarn needle.
  • Scissors.
  • Stitch marker.
  • Small decorative pot or container.

Large Leaf

Ch 10.

  1. Row 1Starting in second ch from hook, sc 2, hdc 3, dc 3, 5 dc in last chain. Working along opposite side of chain, dc 3, hdc 3, sc 2. (21 sts)
  2. Row 2Ch 1, turn. Sc across 9 sts, 2 hdc in next st, 3 dc in next st, 2 hdc in next st, sc across remaining 9 sts. (25 sts)
  3. Row 3Ch 1, turn. Sc across 10 sts, dec twice, sc across remaining 11 sts. (23 sts)
  4. Row 4Ch 1, turn. Sc across 8 sts, dec 3 times, sc across remaining 9 sts. (20 sts) Fasten off and leave a long tail for sewing.

Medium Leaf

Ch 8.

  1. Row 1Starting in second ch from hook, sc 2, hdc 2, dc 2, 5 dc in last chain. Continue around opposite side: dc 2, hdc 2, sc 2. (17 sts)
  2. Row 2Ch 1, turn. Sc across 7 sts, 2 hdc in next st, 3 dc in next st, 2 hdc in next st, sc across remaining 7 sts. (21 sts)
  3. Row 3Ch 1, turn. Sc across 7 sts, dec 3 times, sc across remaining 8 sts. (18 sts) Fasten off with sewing tail.

Small Leaf

Ch 6.

  1. Row 1Starting in second ch from hook, sc 1, hdc 2, dc 1, 5 dc in last chain. Continue around opposite side: dc 1, hdc 2, sc 1. (13 sts)
  2. Row 2Ch 1, turn. Sc across 5 sts, 2 hdc in next st, 3 dc in next st, 2 hdc in next st, sc across remaining 5 sts. (17 sts) Fasten off with sewing tail.

Special Stitch Explanation

Leaf shaping stitch: The leaf shape is created by increasing stitches near the center and decreasing toward the pointed end. This creates a natural curved silhouette.

Putting it together

Step 1

Arrange the six large leaves in a circle with the pointed ends facing outward.

Step 2

Sew the leaf bases together to create the first layer.

Step 3

Add five medium leaves above the first layer, spacing them evenly.

Step 4

Place the four small leaves in the center to create the raised succulent crown.

Step 5

Add a small amount of stuffing underneath the center if extra height is desired.

Step 6

Place the finished crochet succulent into a decorative container.

Step 7

Weave in all loose yarn ends carefully. Gently shape each leaf with your fingers to create natural curves. Light blocking with steam may help flatten uneven areas, but avoid heavy moisture that could distort the leaf structure.

Marlene's notes

Note 01

Use a 3.5 mm (US E-4) hook throughout and keep your tension even across all fifteen leaves, since a looser medium leaf next to a tighter one will show once they're arranged side by side.

Note 02

A stitch marker on the first stitch of each row makes it much easier to track which stitches belong to the pointed tip versus the rounded base, especially where the count jumps on Row 2 of the large and medium leaves.

Note 03

The fiberfill stuffing is meant for building a small rounded base to anchor the leaves into, not for the leaves themselves, which stay flat and get their curve from hand-shaping after sewing.

Note 04

Finished size is approximately 5 inches (12.7 cm) wide and 4 inches (10 cm) tall once the rosette is assembled.

Note 05

Approximate gauge: 18 single crochet stitches by 20 rows equals 4 inches (10 cm), so swatch first if you need the finished succulent to match that size exactly.

Before you sit down

  • Check you have roughly 120 yards of worsted-weight yarn split across three shades of green before you start your first chain, so you don't run short partway through the fifteen leaves.
  • Read through the Special Stitch Explanation once before you pick up your hook, since the same increase and decrease pattern repeats across every leaf size.
  • Place a stitch marker at the start of Row 1 on your first leaf so you can tell at a glance which side you're on after each ch-1 turn.
  • Make one small leaf first as a quick two-row test piece; it'll show you your tension before you commit to the rest of the set.

How the hours go

Large Leaves (make 6)
about 1.5 hours total because each leaf runs 4 rows with increases and decreases to track along the way
Medium Leaves (make 5)
about 1 hour total because the 3-row shaping pattern feels familiar by now and moves faster
Small Leaves (make 4) and Assembly
about 1 hour because the 2-row small leaves are quick, but shaping and sewing all 15 leaves into the rosette asks for a little patience

Looking after it

  • If you've worked this in cotton, hand wash gently in cool water only if it gets visibly dusty or marked, then reshape each leaf by hand while damp and let it dry flat away from direct heat.
  • If you've used acrylic, a light wipe with a damp cloth is usually enough; store the finished piece somewhere dry and out of direct sun so the shades of green don't fade or the fiberfill base doesn't flatten over time.
FAQs

Asked on the glider

the ones that come up on the glider

Is this pattern worked in rounds or rows?

Rows, not rounds. Each leaf starts with a chain, works around both sides of it, then turns with a ch-1 for the following rows.

Can I use acrylic yarn instead of cotton?

Yes, the pattern notes that soft acrylic works well too, it just won't show stitch definition quite as crisply as cotton does. Either one gets you a stable, lightweight succulent.

How many leaves do I actually need to make?

Fifteen in total: six large, five medium, and four small. That mix is what gives the finished rosette its layered, realistic shape.

What if my large leaf doesn't come out at 20 stitches after Row 4?

Double-check your decreases in Row 3 and Row 4, since those are the rows that pull the stitch count down. A slightly loose or tight tension across different leaves is usually the culprit, not a mistake in the increases.

Do I need the brown or tan yarn?

Only if you want a soil-colored area at the base; it's listed as optional in the materials. You can skip it entirely and still finish a complete rosette.

How do I get that gentle curl on each leaf?

A lot of it comes from natural stitch tension as you work, then a bit of hand-shaping once the leaf is fastened off. If leaves curl too much, check your tension since very tight stitches create stiff pieces; relax your grip or move up one hook size. Light steam blocking can also help flatten uneven spots, but avoid heavy moisture since it can distort the leaf shape.