Intermediate 4-6 Hours Worsted yarn

Worked on the glider, counted out loud —

How to Crochet a Floor Pouf: Cozy Round Pattern

Learn how to crochet a floor pouf with this cozy round pattern featuring a flat base, worked sides, and simple decreases for a sturdy finish.

Jump to the rounds

Before you sit down

Start with a small circle and increase evenly round by round to build a flat, sturdy base.

Work several base rounds until the circle reaches your desired pouf diameter.

Transition from increasing to straight rounds to begin shaping the sides of the pouf.

Work the side round to your desired pouf height, keeping stitches even and snug.

Begin decreasing by crocheting two double crochets together to start closing the top.

Continue decreasing evenly until only a small opening remains at the center.

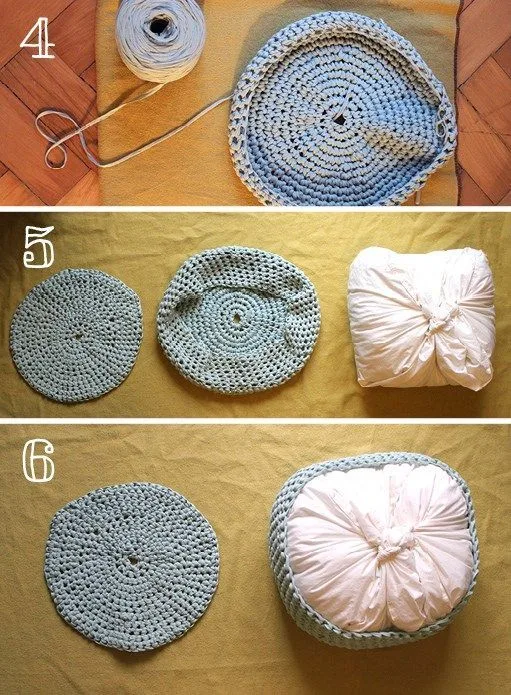
Fasten off with a long tail, then turn the pouf right-side out if needed.

Stuff firmly with fiberfill or foam, then sew the opening closed with the tail.

What this one is

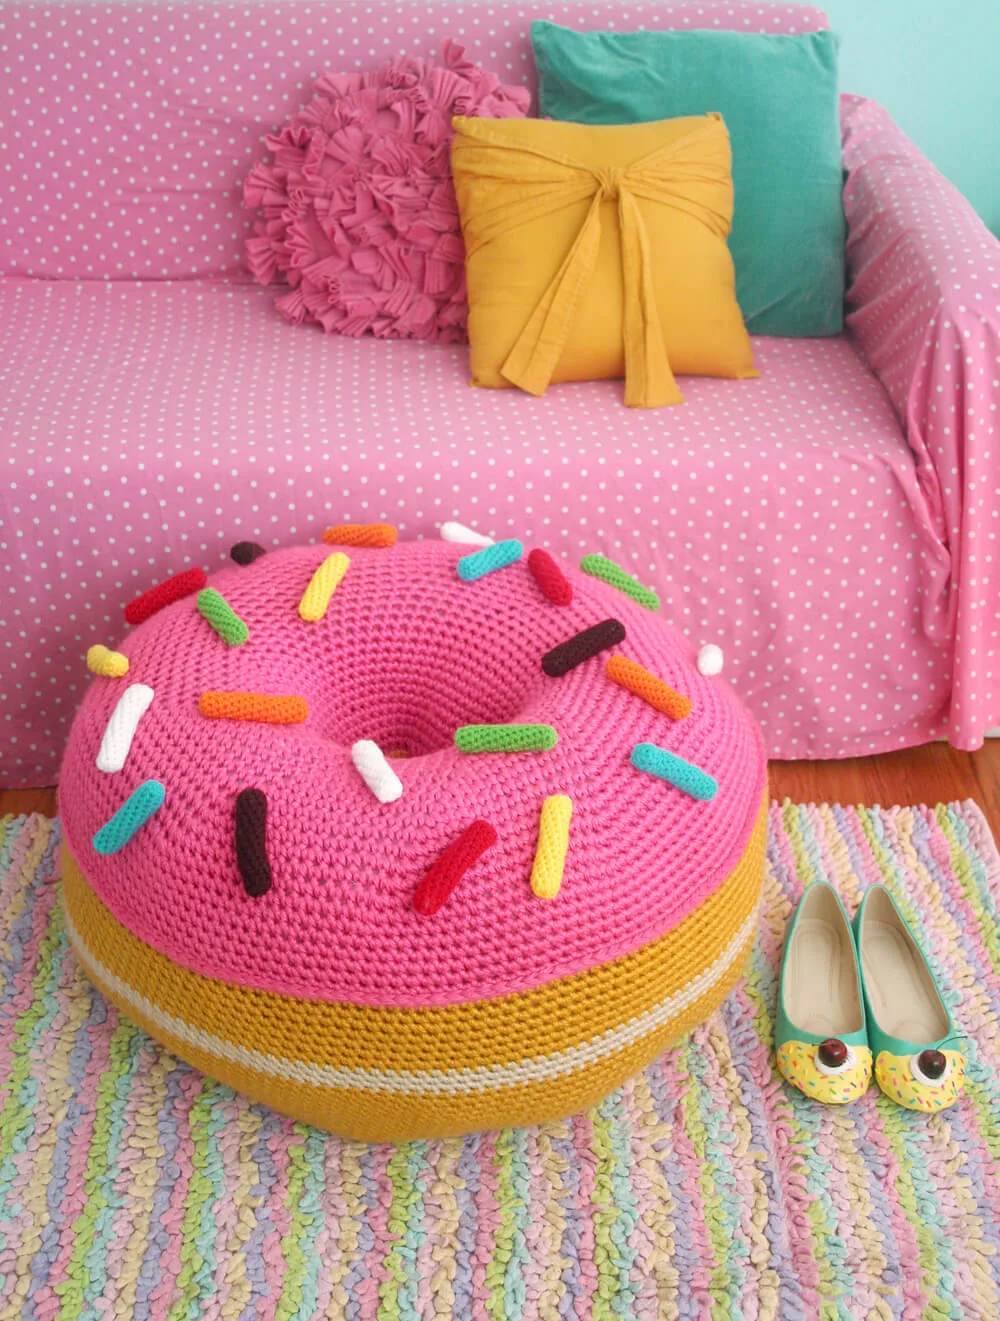
This crochet floor pouf pattern creates a sturdy, squishy round cushion that's as functional as it is charming. Worked from a flat circular base up through cushioned sides, it's the kind of project that transforms a simple pile of yarn into a genuinely useful piece of home decor. It's especially perfect for a child's playroom, a cozy reading nook, or as an extra seat when guests come over — practical, plush, and made entirely by hand.

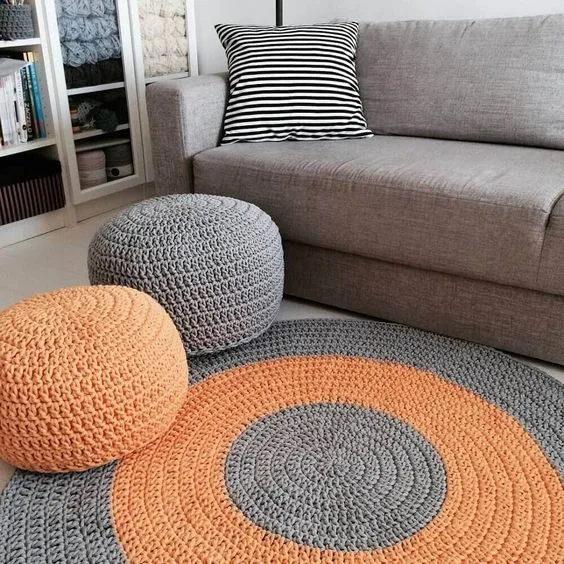
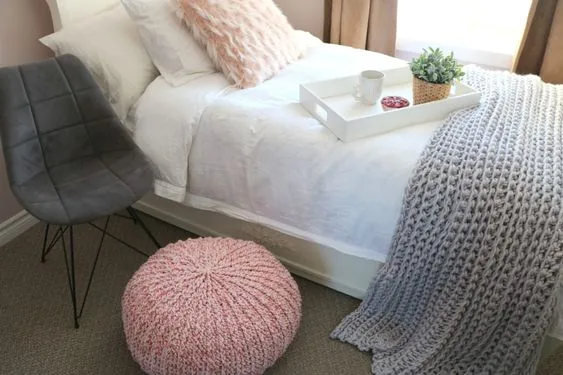
The finished pouf is a plump, rounded cushion with a smooth, structured shape that holds its form thanks to a generous fill of fiberfill or foam. It has that satisfying, sculptural look that instantly upgrades a floor space, and the tactile, squishy feel makes it irresistible to kids and adults alike. Because it's entirely customizable in color and size, it also makes a wonderfully thoughtful handmade housewarming or nursery gift.

Variations

There's something incredibly satisfying about watching a flat circle of double crochet rounds slowly rise into a real, three-dimensional cushion — that's exactly what happens here. I love how the base rounds build such a solid, even foundation, and then the sides just click into place with straightforward straight rounds, no fuss. When you get to the decreasing stage, crocheting two double crochets together to close the top feels like the satisfying final act of a good story — you watch the hole shrink round by round until you're ready to stuff and seal it up. Turning the piece right-side out (or inside out, depending on your approach) and stuffing it with fiberfill or foam is honestly my favorite part; it's like watching a balloon inflate into its final shape. This pattern is forgiving enough for confident beginners but still gives more experienced crocheters a chance to enjoy that steady, rhythmic round-after-round flow. Plus, it's endlessly practical — once it's done, you actually get to use it every single day, which isn't true of every crochet project!
Common mistakes

  • Losing track of stitch countPlace a stitch marker at the start of each round and count your stitches before moving on — the base rounds only work correctly if your increases are evenly distributed.
  • Working the side rounds too looselyGo down a hook size for the sides if your tension is naturally loose, and keep your double crochets snug and even so the walls hold their shape once stuffed.
  • Rushing the decrease rounds and losingWork your double-crochet-two-together decreases evenly spaced around the round rather than clustering them, so the top closes into a smooth, centered point instead of a lopsided pucker.
  • Under-stuffing the pouf, resulting inPack the fiberfill or foam firmly into every corner, pushing it into the base first, then the sides, checking that the pouf holds its shape when you press down on it before sewing the opening closed.
  • Forgetting to leave a long enough yarnLeave at least 12-15 inches of tail so you have plenty of length to sew the small closing hole shut securely with a needle.
  • Not checking that the baseLay your finished base flat and count stitches around the outer edge — if it doesn't match your side round's stitch count, adjust your last increase round before moving on.

The rounds, in full

Written out, round by round

Intermediate4-6 HoursWorsted

Materials

Everything this one takes, in the order you will reach for it.

  • Worsted weight yarn
  • Crochet hook (size to suit your yarn)
  • Fiberfill or foam (for stuffing the pouf)
  • Needle and thread (to sew the opening closed)
  • Yarn needle (for weaving in loose ends)

keep this to hand

Abbreviations

US crochet terms, as used in this pattern.

  1. dcdouble crochet

Step 1: Crochet the Base of the Pouf

Make a Magic Circle : Start by creating a magic ring with your yarn. This will be the center of the pouf.

  1. Round 1Chain 3 (counts as the first double crochet). Work 11 double crochets (DC) into the magic ring. Pull the ring tight to close the circle.
  2. Round 2In the next round, increase each stitch by working two double crochets (DC) into each stitch from the previous round. You should now have 24 stitches.
  3. Round 3In the next round, increase by making 1 double crochet into the first stitch and 2 double crochets into the next stitch. Repeat this around the entire circle. You’ll now have 36 stitches.
  4. Round 4and Beyond: Keep increasing in the same manner (1 DC in the first stitch, 2 DC in the next) until the base of your pouf reaches the desired size. Typically, the diameter of the pouf should be around 18-24 inches , but you can adjust it to suit your space.

Step 2: Crochet the Sides

Build the Sides : Once you’ve reached the size of the base, stop increasing and begin working in rounds without increasing. This will start to build the sides of your pouf.

  1. Round 1Continue crocheting in double crochet around the edges, placing one double crochet in each stitch around. Keep the stitches loose enough so the pouf remains flexible.Continue Rounds: Keep crocheting in rounds, without increasing, until the height of the pouf reaches your desired measurement. Usually, around 12-18 inches works well for most poufs.

Step 3: Close the Top

Decreasing : Once you’ve reached the top of the pouf, it’s time to close it.

  1. Round 1To do this, begin to decrease stitches by crocheting two double crochets together.

Finish : Continue decreasing until you have just a small hole left. At this point, you can fasten off the yarn, leaving a long tail to sew the opening closed.

Step 4: Stuff the Pouf

Add Fill : Turn your pouf inside out if necessary and begin stuffing it with fiberfill or foam. Ensure it’s filled enough to provide support and structure, but not too much that it becomes overly stiff.

Test the Firmness : Press down on the pouf to check its firmness. Add more stuffing if needed to achieve your preferred level of softness or firmness.

Step 5: Close the Opening

Sew the Top Closed : Use a needle and thread to sew up the remaining hole at the top of the pouf. Make sure to sew tightly to avoid any stuffing coming out.

Weave in Loose Ends : Finally, weave in any loose yarn ends using a yarn needle to complete your pouf.

Important notes

Note 01

💡 Use a hook one size smaller than you'd normally choose for worsted weight yarn if you want extra-firm, structured sides that hold up well under weight.

Note 02

💡 Stuff generously but check firmness as you go — press down on the pouf periodically while filling to make sure it's supportive without becoming rock-hard.

Note 03

💡 Keep a stitch marker in the first stitch of every round throughout the base and side sections so you never lose track of where each round begins.

Note 04

💡 If using foam instead of fiberfill, consider cutting it slightly smaller than the pouf's interior so it settles evenly without straining the seams.

Note 05

💡 Weave in loose ends before stuffing, not after — it's much easier to manage tails while you can still reach inside the piece.

Note 06

💡 When sewing the final opening closed, use a whip stitch or mattress stitch with the long tail for an invisible, secure seam that won't unravel under regular use.

More photos

FAQs

Asked on the glider

the ones that come up on the glider

What size will my finished floor pouf be?

The finished size depends on your yarn weight, hook size, and how many rounds you work on the base and sides, so gauge and tension will naturally shape the final dimensions. Working with worsted weight yarn and a standard hook typically produces a medium-sized, sturdy floor cushion suitable for sitting or lounging.

Can I use fabric-safe stuffing alternatives besides fiberfill or foam?

Yes, some crocheters use recycled fabric scraps, old pillow stuffing, or even upcycled foam chunks from packaging as a budget-friendly alternative. Just make sure whatever you use is clean, dust-free, and distributed evenly for a smooth, supportive shape.

How do I know when to start decreasing at the top?

You'll start decreasing once you've completed the side rounds and reached the desired height for your pouf. At that point, begin crocheting two double crochets together evenly around the round to start closing the opening.

Is this pattern beginner-friendly?

It's best suited for confident beginners or intermediate crocheters who are comfortable working in continuous rounds and tracking increases and decreases. If you've made a few amigurumi pieces before, you'll feel right at home with this construction.

Can I wash the finished pouf?

Washability depends on your chosen yarn and stuffing — cotton yarns with polyester fiberfill can often be spot-cleaned or hand washed gently, while foam fill should generally be kept dry. Always check your specific yarn's care instructions before washing.