Beginner 4-5 hours Worsted yarn

Worked on the glider, counted out loud —

An easy fisherman cap crochet pattern for cozy days

A beginner-friendly fisherman cap worked in double crochet rounds, ready in about 4 to 5 hours.

Jump to the rounds

What this one is

This cap is for anyone who wants a quick, no-fuss project to work up before the weather turns cool. Picture yourself on the porch some evening, hook in hand, watching a simple ring of double crochet spiral outward into a hat. It suits a crocheter who likes visible, logical shaping — someone who wants to watch a small circle become a wearable shape without fussing over color changes or complicated stitch patterns along the way.

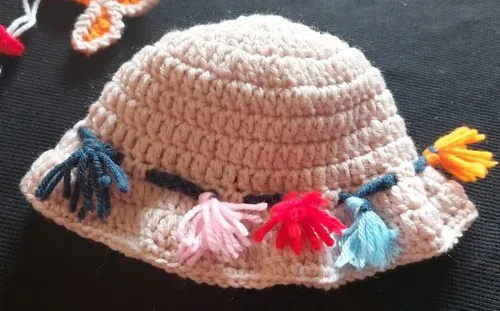
Your hands will spend most of the time working double crochet into double crochet, chaining three to turn each round, then slip-stitching to close before the next one begins. There's only one hook size to keep track of and one weight of yarn, with a small set of simple increases that build the shape round by round. Once the crown and sides are done, you can weave a contrasting rope through the stitches and add a yarn fringe for the classic fisherman look. All told, this comes together over a few focused hours, depending on how fast your hands like to move.
Try it another way

There's a real satisfaction in watching nine double crochet stitches, worked straight into a simple chain-5 ring, double themselves into a full circle just one round later. By round three, the increase pattern shifts — one double crochet, then two in the next stitch — and you can feel the hat start to curve outward instead of just growing flat. Working the whole thing in a single medium-weight yarn with one 4mm hook means you never have to second-guess your tools or hunt for a second ball. Over the twelve rounds of the Main Pattern, the chain-3-turn-slip-stitch rhythm becomes almost automatic, and that steady, repeatable motion is exactly the kind of mindless-but-productive work that makes a quiet stretch of time feel well spent.

The rounds, in full

Written out, round by round

Beginner4-5 hours4 mmWorsted

Bring to the porch

Everything this one takes, in the order you will reach for it.

  • Medium-weight yarn
  • 4mm crochet hook
  • Contrasting color yarn (for weaving the rope)
  • Small pieces of yarn in various colors (for the fringe)
  • Scissors

Main Pattern

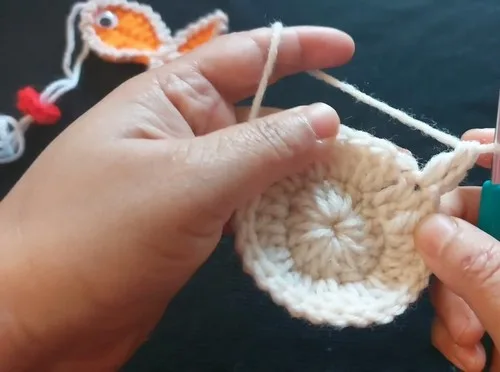
Starting the Base Begin by making a slip knot. Chain 5 stitches. Join the last chain to the first chain with a slip stitch to form a ring.

  1. Round 1Chain 3 stitches (counts as first double crochet). Work 9 double crochet stitches into the ring. Join with a slip stitch to the top of the initial chain 3.
  2. Round 2Chain 3 stitches. Work 2 double crochet stitches into each stitch around. Join with a slip stitch to the top of the initial chain 3.
  3. Round 3Chain 3 stitches. Repeat the pattern (1 double crochet, 2 double crochet in the next stitch) around. Join with a slip stitch to the top of the initial chain 3.
  4. Round 4Chain 3 stitches. Repeat the pattern (1 double crochet, 1 double crochet, 2 double crochet in the next stitch) around. Join with a slip stitch to the top of the initial chain 3.
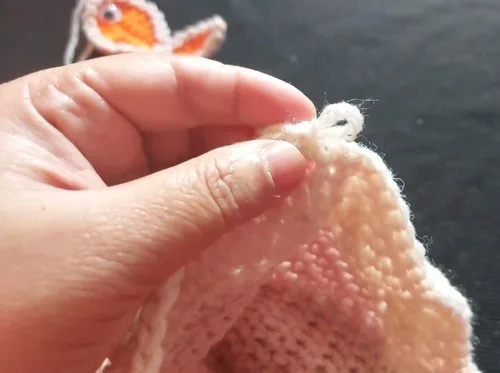
  5. Rounds 5–8Work 1 double crochet stitch in each stitch around without increasing. Join with a slip stitch at the end of each round.Ensure the crown measures approximately 5 inches in height for a newborn size.
  6. Round 9Chain 2 stitches. Work 1 half double crochet stitch in each stitch around. Join with a slip stitch.
  7. Round 10Chain 3 stitches. Work 2 double crochet stitches in each stitch around. Join with a slip stitch.
  8. Round 11Chain 3 stitches. Work 1 double crochet stitch in each stitch around. Join with a slip stitch.
  9. Round 12Chain 1 stitch. Work 1 single crochet stitch in each stitch around. Join with a slip stitch.Using a contrasting color yarn, chain 60 stitches (or your desired length). Weave the chained rope through the stitches of the cap, skipping a few stitches as you go.Cut small pieces of yarn in various colors. Fold a piece of yarn in half, insert your hook into a stitch on the cap, loop the folded yarn through, and pull the ends through the loop to create a knot. Repeat this process around the cap as desired. Trim the fringe to an even length.

Marlene's notes

Note 01

Stick with the 4mm hook throughout the whole cap; sizing up or down changes how snugly the finished piece sits on the head.

Note 02

A removable stitch marker in the first stitch of each round saves you from miscounting where your chain-3 and slip-stitch join actually land.

Note 03

Keep your double crochet tension even across Rounds 1 and 2, since any looseness there shows up as a wavy crown once the increases taper off in later rounds.

Note 04

a newborn size, aim for the crown (Rounds 1-8) to measure approximately 5 inches in height before moving on to Round 9.

Porch photos

Before you sit down

  • Check you have enough medium-weight yarn on hand for the full cap body, plus a little extra if you plan to add a brim or trim of your own.
  • Have your 4mm hook ready and work a quick swatch of double crochet so you know how your tension is sitting before you commit to the chain-5 ring.
  • Read through Round 3 before you get there, since the increase pattern shifts from doubling every stitch to doubling only every other one.
  • Decide now whether you want a marker in the first stitch of each round, so you are never hunting for where your chain-3 turn began.
  • Set aside a contrasting-color yarn for the rope and a few small pieces of yarn in various colors for the fringe, so you are ready to finish the cap once the rounds are done.

How the hours go

Rounds 1 and 2 (ring and first increase round)
about 20 minutes because it's just the chain-5 ring and two quick, even increase rounds
Round 3 and the shifting increase pattern
about 15 minutes because the stitch placement changes here and is worth going slow
Remaining rounds to complete the Main Pattern
about 3 to 4 hours because the bulk of the cap's 12 total rounds happens here
Adding the rope and fringe
about 20 to 30 minutes to chain and weave the contrasting rope through the stitches and knot on the fringe pieces

Looking after it

  • Hand wash the finished cap in cool water with a mild detergent, then press out the extra water in a towel rather than wringing it, so the double crochet rounds keep their shape.
  • Lay the cap flat to dry over a towel, gently reshaping the brim and crown with your hands while damp, then store it flat or loosely folded rather than hung, so it does not stretch out of shape.
FAQs

Asked on the glider

the ones that come up on the glider

Do I need a stitch marker for this pattern?

You don't strictly need one, since each round ends with a slip stitch into the top of the chain-3, but a marker in the first stitch of the round makes that join much easier to find. It's especially handy once you get past Round 3 and the increases become less frequent.

How long does this cap actually take to finish?

Most crocheters get through the chain-5 ring and first two rounds in about 20 to 35 minutes combined. The remaining rounds of the Main Pattern usually take another 3 to 4 hours, depending on your speed, plus a little extra time if you add the contrasting rope and fringe at the end.

Why does the increase pattern change in Round 3?

Rounds 1 and 2 double every stitch to grow the circle quickly, but by Round 3 the pattern shifts to one double crochet, then two in the next stitch. That shift slows the rate of increase so the shape starts curving into a cap instead of staying flat.

Does this pattern include any color changes?

The main cap body stays in a single yarn throughout all 12 rounds of the Main Pattern. The pattern does call for a contrasting-color yarn to chain and weave a rope through the finished stitches, plus small pieces of yarn in various colors for the fringe trim around the edge.