Beginner-Friendly 2-3 Hours Worsted yarn

Worked on the glider, counted out loud —

Crochet Pumpkin Plant Pot Cozy: A Cute Fall Pattern

Make a charming crochet pumpkin plant pot cozy with this easy 6-round pattern. Perfect autumn decor using simple stitches and worsted weight yarn.

Jump to the rounds

What this one is

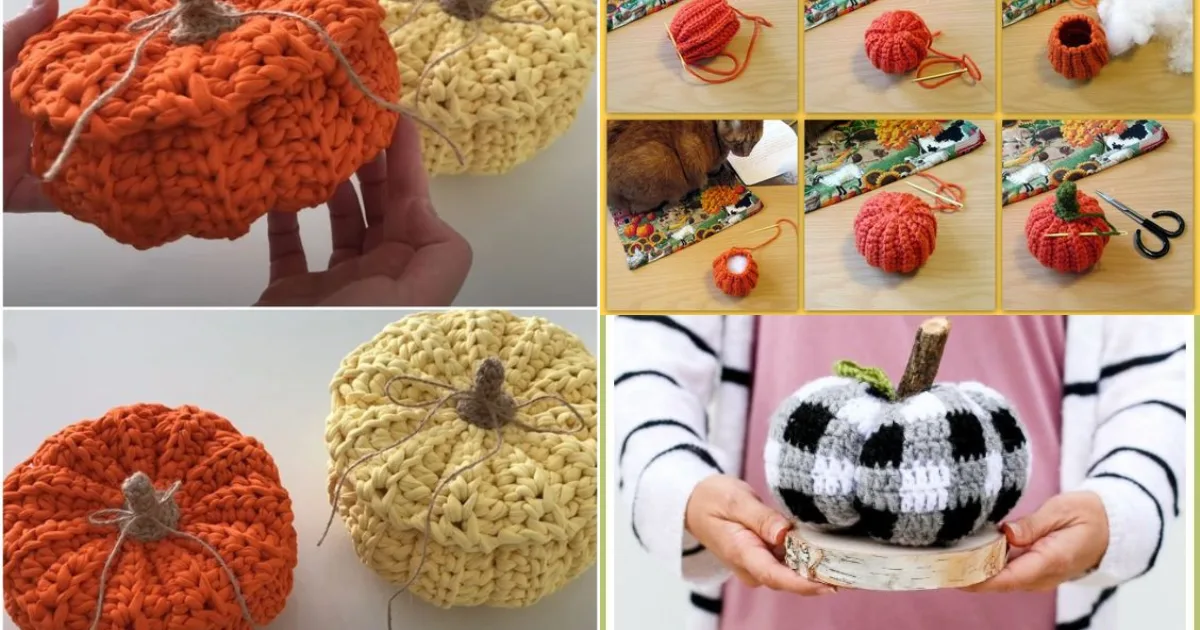
This Pumpkin Plant Pot Cozy is one of those small projects that makes a huge visual impact. Worked in just 6 rounds, it transforms a plain terracotta or plastic pot into an adorable autumn accent piece. It's perfect for crocheters who want a satisfying quick win, or anyone looking to add a handmade seasonal touch to their windowsill, porch, or entryway without committing to a large project.

The pattern relies on foundational amigurumi techniques worked in the round, using orange yarn for the pumpkin body and a touch of green for the stem or vine detail. With only 6 rounds total, this is an excellent project for beginners who've mastered single crochet and basic increases, and it can easily be finished in a single sitting — think one cozy afternoon with your favorite show playing in the background.

The finished cozy slips snugly over a small to medium plant pot, giving it that signature ribbed pumpkin silhouette in warm orange with a pop of green. It's compact, huggable, and instantly recognizable as fall decor. Because it comes together so quickly, it also makes a thoughtful last-minute gift — tuck a small succulent inside a fitted pot and you've got a ready-made autumn housewarming present.

Variations

There's something so satisfying about a project that delivers big seasonal charm in just 6 rounds. I love how the Pumpkin Plant Pot Cozy uses simple stitches worked in the round to build that classic ribbed pumpkin shape — no fussy shaping, no complicated decreases, just steady rounds that click together fast. The orange and green combo is instantly recognizable as fall, so the moment you slip it over a pot, it just feels like autumn arrived. I also appreciate that this isn't a fussy amigurumi with dozens of small pieces to sew together — it's a straightforward, functional accent that dresses up something you probably already own. It's the kind of project I keep a skein of orange yarn on hand for, ready to whip up whenever I want instant seasonal decor without a big time investment. Whether you're decorating your own home or making a few as gifts for coworkers and neighbors, this pattern rewards you quickly, which keeps the motivation high from start to finish. It's crochet gratification in its purest form.

Common mistakes

  • Starting the magic ring too loosely, leaving a visible hole at the base of the cozy.Pull the tail firmly after your first round of stitches and give it a second tug once a few rounds are complete — check that the center is fully closed before moving forward.
  • Losing track of round counts since there's no stitch marker mentioned in the pattern.Place a locking stitch marker in the first stitch of every round and move it up as you go — with only 6 rounds, this small habit prevents accidental round skips or repeats.
  • Increases getting misaligned, causing the pumpkin shape to spiral or pucker unevenly.Count your stitches at the end of every round before starting the next one — if a round should have a specific stitch count, verify it matches before continuing.
  • Yarn tension changing between the orange and green sections, creating a loose or puckered color transition.Crochet a couple of practice stitches with the new color before committing, and keep your tension consistent by not pulling the working yarn too tight right after a color change.
  • Weak or visible seams where the stem or green details are attached.Use a yarn needle to weave the tail through several stitches in different directions before trimming, ensuring the join is secure and hidden within the stitch bumps.

The rounds, in full

Written out, round by round

Beginner-Friendly2-3 HoursWorsted

Materials

Everything this one takes, in the order you will reach for it.

  • Orange yarn
  • Green yarn
  • Crochet hook
  • Fiberfill stuffing
  • Yarn needl

keep this to hand

Abbreviations

US crochet terms, as used in this pattern.

  1. chchain
  2. ststitch
  3. sl stslip stitch
  4. scsingle crochet
  5. hdchalf double crochet
  6. dcdouble crochet
  7. incincrease
  8. decdecrease
  9. mrmagic ring
  10. fofinish off

Pumpkin Plant Pot Cozy

  1. Round 1Single crochet 6 stitches into the ring. (6 stitches)(6)
  2. Round 2Increase in each stitch around. (12 stitches)(12)
  3. Round 3*Single crochet 1, increase* - repeat around. (18 stitches)(18)
  4. Round 4-6Single crochet in each stitch around. (18 stitches)(18)
  5. Round 7*Single crochet 1, decrease* - repeat around. (12 stitches) Stuff the pumpkin with fiberfill.
  6. Round 8Decrease in each stitch around. (6 stitches) Fasten off, leaving a tail. Weave the tail through the remaining stitches, pull tight, and secure.Attach green yarn to the top of the pumpkin.Chain 5 and slip stitch into the second chain from the hook and in each chain across.Fasten off and sew the stem to the pumpkin.

Via FREEE PATTERN Via

Creating pumpkin crochet projects is not only enjoyable but also a fantastic way to add a touch of autumn to your home.

Via Pinterest VIDEO TUTORIAL PATTERN

Whether you're a seasoned crocheter or just starting, these ideas and free patterns will inspire you to make wonderful creations. So, grab your crochet hooks, choose your favorite pumpkin project, and get crafting!

How useful was this post?

Click on a star to rate it!

Average rating 4 / 5. Vote count: 4 No votes so far! Be the first to rate this post.

Important notes

Note 01

💡 Choose a hook size roughly one size smaller than what's recommended on your yarn label — this keeps stitches tight and prevents your finished cozy from looking gappy or loose around the pot.

Note 02

💡 Measure your plant pot's circumference before you begin so you know approximately how many rounds you'll need to reach a snug fit, especially if you plan to resize the pattern.

Note 03

💡 Keep your orange and green yarn tails long enough (at least 6 inches) when changing colors so you have plenty of length to weave in securely with your yarn needle later.

Note 04

💡 If your pot has a slight taper, work your final round a touch looser than the rest so the cozy can stretch comfortably over the widest part of the pot.

Note 05

💡 Block your finished cozy lightly with a warm damp cloth if the rounds look slightly uneven — this helps the stitches settle into a smoother, rounder pumpkin shape.

Note 06

💡 Store any leftover green yarn scraps — they're perfect for adding a curling vine or extra leaf embellishment later if you want to embellish the cozy further.

FAQs

Asked on the glider

the ones that come up on the glider

What size pot does this crochet pumpkin cozy fit?

The pattern is designed for a small to medium plant pot, but you can easily adjust the stitch count in the first couple of rounds to fit larger or smaller pots. Just measure your pot's circumference and test the fit as you work through the rounds.

What yarn weight works best for this pattern?

Worsted weight yarn is ideal since it creates sturdy, well-defined ribbing that holds its pumpkin shape nicely over a pot. A matching worsted weight hook, sized to your tension, will give the best結果 firm, snug fit.

Can beginners make this pumpkin plant pot cozy?

Absolutely — with only 6 rounds and basic stitches worked in the round, this is a great project for beginners who know how to single crochet and increase. It's a wonderful confidence-building project before moving into more complex amigurumi.

How much yarn do I need for one cozy?

You'll only need small amounts of orange and green worsted weight yarn, making this a great scrap-yarn project. One skein of each color will typically make several cozies depending on your pot size.

Can I make this cozy without stuffing it?

Yes, this pattern is designed to slip over a pot rather than be stuffed like a typical amigurumi. Fiberfill stuffing is listed in the materials in case you want to add a small stuffed stem or decorative accent, but the main body stays open to fit around the pot.