Intermediate 4-6 hours Worsted yarn

Worked on the glider, counted out loud —

Crochet mushroom garland for wall and shelf decor

A quick worsted-weight garland for confident beginners, mushroom caps and stems in a few hours.

Jump to the rounds

What this one is

This is the kind of project you pull out when you want something finished by the time the light fades, a string of little mushrooms to hang on a bare bit of wall or drape along a shelf that's been asking for a bit of life. It suits the crocheter who likes small, repeatable shapes and the satisfaction of watching a chain grow longer with every mushroom added. It also makes a sweet, low-pressure gift for someone who loves a cottagecore corner.

Your hands spend most of the time in half double crochet, building a rounded cap in three rounds before shaping a stem that folds and whipstitches into a little bell. Between caps and stems and the chains that link them, you're looking at something you can start after dinner and have off the hook in one sitting, longer if you're making a full garland of several mushrooms.

Try it another way

The two-color setup of white stems and red caps is really just a starting point, so swap in any colors you like for a different mood entirely, muted neutrals for a quiet shelf or brighter shades if you want the garland to stand out. You can also change how many mushrooms go on the string, since the assembly steps simply repeat the chain-and-attach process until you hit the length you want, so a short three-mushroom cluster works as well as a long strand for draping across a mantel. The hanging loop is adjustable too, chain 10 for something snug or chain 20 if you want extra length to loop over a hook or nail. If you'd rather skip the loop altogether, you could leave that chain out and simply lay the finished garland flat along a shelf instead of hanging it. Playing with cap size is possible as well, since the increase round takes the base from 8 stitches to 12, and if you wanted a slightly larger cap you'd extend that increase pattern a touch further before working the plain rounds. Even sticking to the pattern as written, varying the gap length between mushrooms changes the whole rhythm of the garland, tighter chains for a clustered look, longer ones for something airier.

There's real pleasure in how few stitches it takes for the cap to go from a ring of 8 hdc to a dome of 12, then hold steady for two more rounds with no shaping at all. The stem is the clever bit: a straight chain worked back in slip stitches, then single crochet, then half double crochet, so the row itself curves before you've even folded it. Whipstitching that folded stem into a bell shape and stretching the wide end is a small trick that pays off completely, and joining each mushroom to the garland chain with a slip stitch through the cap's center feels tidy and deliberate rather than fussy. It's a project built entirely from stitches you already know, arranged in a way that keeps surprising you.
The rounds, in full

Written out, round by round

Intermediate4-6 hours5 mmWorsted

Bring to the porch

Everything this one takes, in the order you will reach for it.

  • 5 mm crochet hook
  • Worsted weight yarn in two colors (white for the stem and red for the mushroom cap, or any colors of your choice)
  • Scissors
  • Yarn needle

Mushroom Cap

  1. Round 1Start with a slip knot; chain 4 and form a ring by doing a slip stitch into the first chain; chain 1 (counts as the first hdc); make 7 more hdc into the ring (total of 8); join with a slip stitch to the top of the first hdc (not the chain 1). (8 hdc)
  2. Round 2Chain 1, then work the second round with the following pattern: hdc in the next stitch, 2 hdc in the following stitch and repeat around to create increases (total of 12 stitches); join with a slip stitch to the first hdc. (12 hdc)
  3. Rounds 3–4Chain 1 and hdc into each stitch around for two more rounds (no increase).Fasten off and weave in the ends.

Mushroom Stem

  1. Round 1Form a slip knot with white yarn; chain the desired length for the stem (in the example, 12 chains were used); slip stitch back for about 5 stitches to create the start of the bell shape; change to single crochets for 2 stitches; finish the row with half double crochets.
  2. Round 2Chain 1 and turn; repeat the above step to create another row.Fasten off leaving a long tail for sewing.Fold the piece in half and whipstitch the sides together to form the stem, stretch the larger end to create the bell shape.Weave in any remaining ends.

Putting it together

Step 1

Start by chaining 10 (or 20 if you desire a loop for hanging), then connect with a slip stitch to create a hanging loop.

Step 2

Chain again for the length you prefer between each mushroom (10 was used in the example).

Step 3

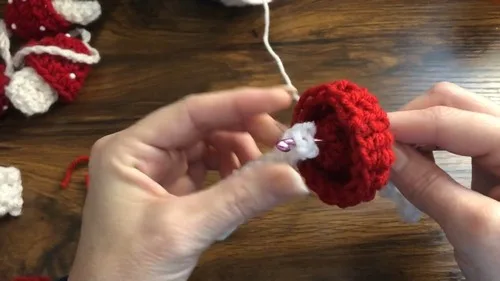
To attach the mushroom cap to the stem, slip stitch through the center of the cap, then insert the hook through the top center of the stem and slip stitch to join.

Step 4

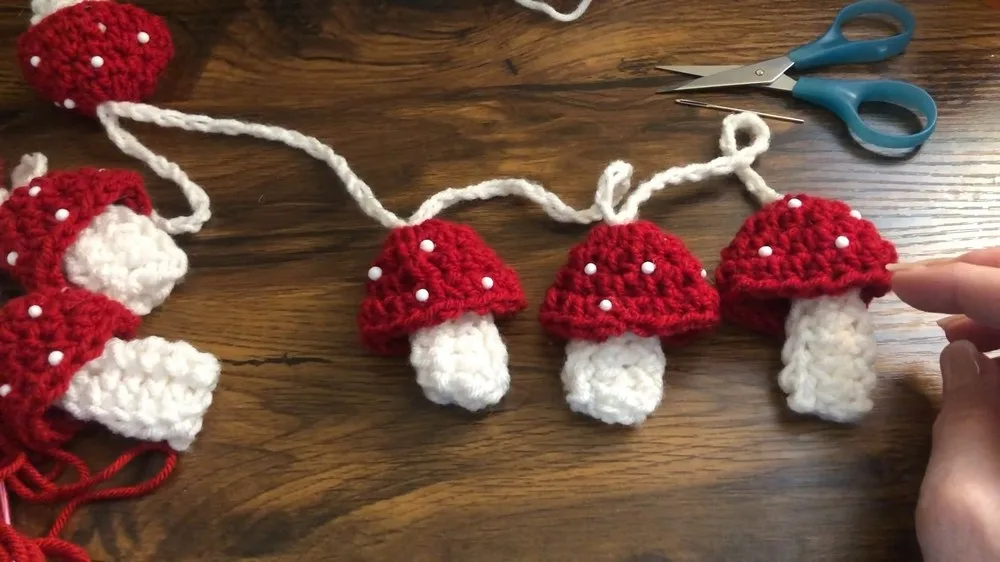
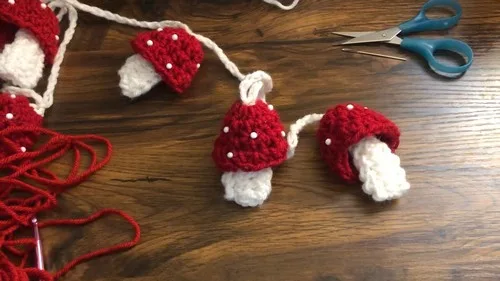
Continue chaining and attaching mushrooms until you reach your desired garland length.

Step 5

Optional: You can add dots to the mushroom cap using styrofoam balls dipped in glue or creating yarn pom-poms to sew or glue onto the cap.

Marlene's notes

Note 01

Use your 5mm hook consistently across both the cap and the stem so the fabric density matches when you sew the two pieces together.

Note 02

The stem's bell shape depends on stretching the wider end after whipstitching, so don't pull that seam too tight or you'll lose the shape you're going for.

Note 03

Weave in ends as you finish each mushroom rather than saving them all for the end, since a garland with several mushrooms adds up fast.

Porch photos

Before you sit down

  • Have your worsted weight yarn ready in two colors, one for stems and one for caps, plus extra of whatever color you'll use for the connecting chain.
  • Read through the Mushroom Stem round once before you start it, since the slip stitch, single crochet, and half double crochet all happen within the same row and it helps to know where each section begins.
  • Decide on your garland length and how many mushrooms you want, so you know whether to chain 10 or 20 for the hanging loop at the start.
  • Keep a yarn needle within reach for weaving in ends and for whipstitching the stem closed, since that step happens right after fastening off.

How the hours go

Mushroom Cap
about 20-30 minutes because it's just three rounds of hdc with one increase round to shape the dome
Mushroom Stem
about 15-20 minutes because the mixed-stitch row and the fold-and-whipstitch shaping take a bit more care than a plain round
Assembly and chaining
about 15 minutes per mushroom added, since each one means chaining the gap, then slip stitching the cap to the stem

Looking after it

  • Since this is worked in worsted weight yarn, hand wash gently in cool water if it needs freshening up, and lay it flat on a towel to dry rather than hanging it wet, so the stem's bell shape isn't pulled out of place.
  • Store the garland loosely coiled in a drawer or draped over a hook rather than folded tightly, and reshape the stems by hand if they get flattened in storage.
FAQs

Asked on the glider

the ones that come up on the glider

How many mushrooms should I make for a full garland?

That's entirely up to you, since the assembly steps have you repeat the chain-and-attach process until you reach your desired length. A shelf accent might only need three or four, while a longer wall piece could use quite a few more.

Why does the stem look different from a typical crocheted round?

The stem row mixes slip stitches, single crochet, and half double crochet all in one pass, which naturally curves the fabric before you even fold it. That mixed-stitch technique is what gives the bell shape its start.

Do I need stitch markers for this pattern?

They're not required since each round is quite short, but placing one at the join point of the Mushroom Cap rounds can help you keep track of where each round begins and ends.

What if I want to skip the hanging loop?

You can leave out the initial chain of 10 or 20 and simply start attaching mushrooms directly, which works well if you plan to lay the garland flat on a shelf rather than hang it.

How do I get the stem's bell shape to hold?

After whipstitching the folded stem closed, gently stretch the wider end by hand to open it into the bell shape described in the pattern. Letting it dry or rest in that stretched position helps it keep the shape.