Beginner 2 to 3 hours Worsted yarn

Worked on the glider, counted out loud —

Crochet a Masquerade Mask With Eye Openings and Ties

A worsted weight crochet masquerade mask with shaped eye openings, ready in about two to three hours for costume nights.

Jump to the rounds

What this one is

This mask is for the evening you want to feel a little transformed—a costume party, a theater gala, a themed dinner where everyone arrives as someone else for a few hours. It suits the crocheter who likes an unexpected project, something that isn't a blanket or a hat but still uses stitches you already know. Make it in deep jewel tones like purple, emerald, or royal blue, or keep it classic in black and gold. Either way, you'll walk in wearing something no one else made.

Your hands spend most of this project in half double crochet, building a rectangle across eight rows before the shaping begins. Then you chain past stitches to open two eye spaces, close them on the next row, and taper the lower edge with decreases. From foundation chain to finished trim, most crocheters finish in about two to three hours, which makes this a satisfying one-sitting project rather than a weeks-long commitment.

Try it another way

There's real satisfaction in watching a flat rectangle turn into a face-shaped mask without any pattern pieces or sewing. The half double crochet fabric you build across rows 2 through 8 gives you a firm, substrate-like base—sturdy enough to hold its shape, soft enough to wear. The eye openings are the clever part: instead of cutting or seaming, you simply chain 7 and skip 7 stitches on row 9, then crochet right into those chains on row 10 to close the gap neatly. After that, the half double crochet decreases on row 11 pull the lower edge in, so the mask actually follows the curve of your cheekbones instead of sitting flat. It's shaping through stitch count alone, which feels like a small magic trick every time.

The rounds, in full

Written out, round by round

Beginner2 to 3 hours4.0 mmWorsted

Bring to the porch

Everything this one takes, in the order you will reach for it.

  • The right hook size is crucial for your stitches. For worsted weight yarn, a G/4.0mm or H/5.0mm hook is usually best. Always check your yarn label for the recommended hook size.
  • Worsted weight yarn in your choice of color — classic black, gold, or silver, or deep jewel tones like purple, emerald green, or royal blue.
  • Yarn needle, for weaving in ends and sewing.
  • Stitch markers, to mark important points in the pattern, like the eye openings.
  • Sharp scissors, for clean cuts.
  • Measuring tape, for even sides.
  • For your mask to be wearable, you'll need more than yarn and hooks. Elastic cord or satin ribbon is needed for the tie. Elastic fits different head sizes, while ribbon adds elegance.
  • Fabric stiffener is optional but recommended for extra structure. Apply it after crocheting but before adding embellishments for best results.
  • Blocking pins and a foam board, to pin your work to exact dimensions while it dries for a professional look.
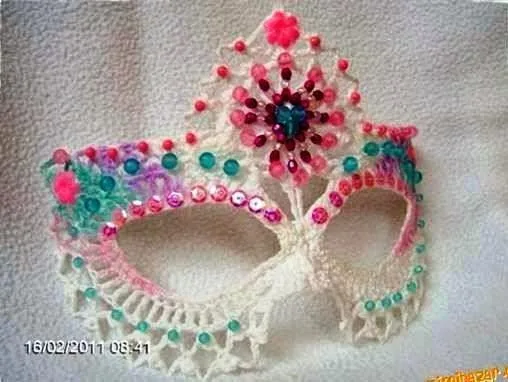
  • Optional embellishments — sequins, beads, feathers, or buttons — to enhance your finished mask.

Starting Your Mask with the Foundation Row

The foundation row establishes the width and structure of your entire mask. Getting this part right ensures everything else falls into place smoothly. Take your time with these initial steps to set yourself up for success.

Chain 36 stitches to begin your mask foundation. This length creates a mask that fits most adult faces comfortably. If you need a smaller mask for a child or teen, reduce the chain to 30 stitches instead.

Keep your chain loose and even as you work. A tight foundation chain will make your first row difficult and could cause your mask to pucker. Test the chain by gently stretching it—it should have some give without being floppy.

  1. Row 1Single crochet in the second chain from your hook, then single crochet in each chain across. You should have 35 stitches total. Chain 1 and turn your work to prepare for the next row.Count your stitches at the end of this row to confirm you have the correct number. This habit prevents errors from compounding as you continue working. Mark the beginning of each row with a stitch marker if helpful.

Creating the Main Body of the Mask

The main body gives your mask its distinctive curved shape and structure. You'll work in half double crochet stitches for these rows, which creates a fabric with nice drape and flexibility. This section builds height while maintaining the width established in your foundation.

  1. Row 2Half double crochet in each stitch across (35 stitches). Chain 2 and turn. The turning chain counts as your first stitch in subsequent rows.Rows 3-5: Repeat Row 2 three more times. You're building the upper portion of the mask that will rest across your forehead.
  2. Row 6Half double crochet in each stitch, but work 2 half double crochet stitches in the first and last stitch of the row (37 stitches total). This gentle increase begins shaping the mask to curve around your face.
  3. Rows 7–8Half double crochet across without any increases (37 stitches). Chain 2 and turn after each row.Consistent tension creates a professional-looking finished product. Your stitches should be snug enough to create a firm fabric but loose enough that your hook slides through easily. Check your work every few rows by laying it flat on a table.

If you notice your edges pulling in or flaring out, adjust your tension accordingly. Many crocheters naturally tighten up as they work, so consciously relax your grip on the yarn. Your mask should lie flat without curling at the edges.

Forming the Eye Openings

The eye openings transform your crochet piece into a functional mask. This section requires attention to detail as you'll work decreases to create the distinctive almond shapes. The openings should be large enough for comfortable vision while maintaining the mysterious masquerade aesthetic.

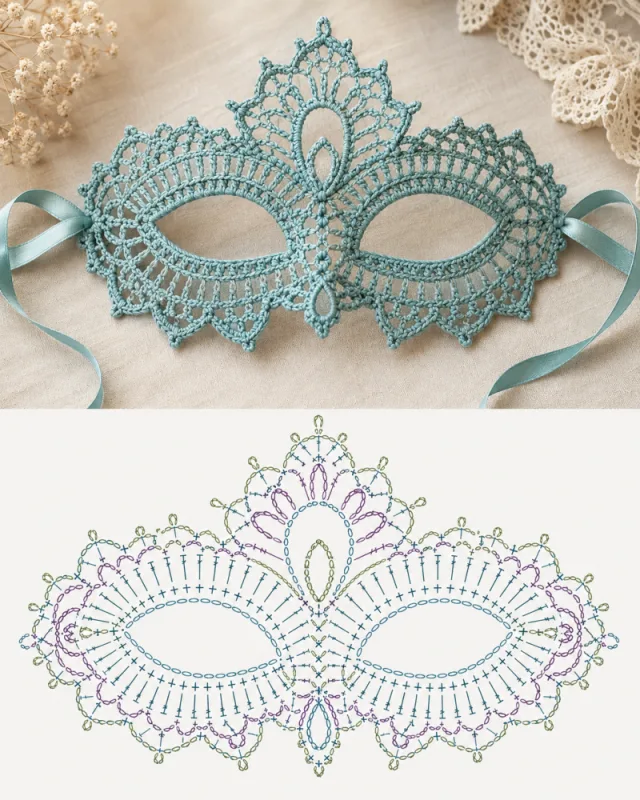
  1. Row 9Half double crochet in the first 8 stitches. Chain 7 and skip 7 stitches (this creates the first eye opening). Half double crochet in the next 7 stitches. Chain 7 and skip 7 stitches (second eye opening). Half double crochet in the remaining 8 stitches.The chain spaces form the top of each eye opening. Make sure your chains aren't too tight, as this area needs to maintain its shape.
  2. Row 10Half double crochet across, working half double crochet stitches into each chain stitch from the previous row. You should have 37 stitches again. This row closes the bottom of the eye openings.
  3. Row 11Half double crochet decrease over the first 2 stitches, half double crochet in each stitch until 2 stitches remain, half double crochet decrease over the last 2 stitches (35 stitches). This begins tapering the lower portion of your mask.
  4. Round 1Work one round of single crochet around each eye opening to reinforce and define the edges. Insert your hook into the edge stitches and work evenly spaced single crochet stitches all the way around. Join with a slip stitch to your first stitch.This reinforcement prevents stretching during wear and creates a clean, finished look. Work tightly enough to firm up the edges but not so tight that the opening puckers. You should use approximately 20-24 single crochet stitches around each eye opening.

Finishing and Securing Your Mask

The finishing touches elevate your mask from a simple crochet piece to a polished accessory. These final steps add decorative elements and practical features that make your mask comfortable to wear. Take your time with these details for the best results.

Work a single crochet border around the entire perimeter of your mask. Start at one side edge and work single crochet stitches evenly along the top, around both eye openings (if not already bordered), across the bottom, and up the other side.

Place 3 single crochet stitches in each corner to help the mask curve naturally. This creates smooth corners rather than sharp angles. Join your border with a slip stitch when you return to your starting point.

For a fancier edge, work a picot border by alternating (1 single crochet, chain 3, slip stitch in first chain of the chain-3, skip 1 stitch) around the entire mask. This creates small decorative points that add elegance.

Adding Ties or Elastic Bands

Cut two pieces of ribbon or elastic, each 12 inches long . Position one piece at each side edge of your mask, approximately at the widest point. This placement ensures comfortable wear without pulling.

Attach the ties by folding each ribbon end over about 1 inch and sewing it securely to the mask edge. Use a yarn needle and matching thread or yarn to stitch through both layers of ribbon and through the crochet fabric. Make several passes to ensure the ties won't pull away during use.

If using elastic, measure the band around your head before cutting to ensure a comfortable fit. The elastic should hold the mask in place without being too tight. Sew the elastic securely using the same method as ribbon ties.

Weave in all remaining yarn ends using your tapestry needle. Your crochet masquerade mask is now complete and ready to wear or embellish further!
Marlene's notes

Note 01

A G/4.0mm or H/5.0mm hook keeps this worsted weight fabric firm enough to hold its mask shape; check your yarn label if you're substituting a different weight.

Note 02

Count your stitches at the end of every row through row 8—catching a stray increase or dropped stitch early keeps the 35-to-37 stitch shaping accurate by the time you reach the eye openings.

Note 03

If you want extra structure, apply fabric stiffener after you finish crocheting and before you add any beads or sequins, so the embellishments don't get stiff or misshapen.

Note 04

Chain 36 to start the foundation for an adult-sized mask (35 stitches after row 1). For a child or teen, reduce the starting chain to 30 stitches instead.

Porch photos

Before you sit down

  • Check that you have enough worsted weight yarn for a solid 35-stitch-wide foundation plus eight rows before you sit down, so you're not hunting for a second skein mid-mask.
  • Set aside a stitch marker or two—row 9's eye openings only work out evenly if you keep count through the chain-7, skip-7 sequences.
  • Work up a small swatch with your G/4.0mm or H/5.0mm hook first to confirm your gauge lands close to 35 stitches, since a too-loose or too-tight fabric changes how the mask sits on your face.
  • Read through row 9 before you start it—the two eye openings happen in one row, and it helps to know where the 8-7-7-7-8 stitch breakdown falls before your hook gets there.

How the hours go

Foundation chain through row 8 (upper body)
about 45 to 60 minutes because you're working eight rows of single and half double crochet across 35 to 37 stitches before any shaping starts
Eye openings and decreasing, rows 9 to 11
about 30 to 40 minutes because the chain-7, skip-7 eye openings and the half double crochet decreases need careful counting, not just repetition
Edges, border, and ties
about 20 to 30 minutes because reinforcing the edges and attaching elastic cord or ribbon is finishing work rather than new stitch counts

Looking after it

  • Hand wash your mask gently in cool water if needed, since fabric stiffener and any beads or sequins won't hold up well in a washing machine; press out excess water in a towel rather than wringing it.
  • Let the mask dry flat away from direct heat, and reshape the eye openings and curved lower edge with your fingers while it's still damp so it dries with the shape you crocheted into it; store it flat so the fabric stiffener doesn't crease.
FAQs

Asked on the glider

the ones that come up on the glider

Can I make this mask without fabric stiffener?

Yes, the fabric stiffener is optional and only adds extra structure. The half double crochet fabric from the main pattern holds its shape reasonably well on its own, especially if your tension is snug.

What hook size should I use?

worsted weight yarn, reach for a G/4.0mm or H/5.0mm hook, checking your yarn label for its recommended size. Either hook gives you a firm fabric suited to a mask that needs to hold its shape.

How do the eye openings actually form?

row 9 you half double crochet across a set number of stitches, chain 7 and skip 7 to leave a gap, then repeat for the second eye before finishing the row. Row 10 closes the top of each opening by working half double crochet stitches right into those chains.

Should I use elastic or ribbon for the ties?

Either works, and it comes down to how you plan to wear the mask. Elastic cord fits a range of head sizes comfortably, while satin ribbon ties add a more elegant, dressed-up look.

How long does this mask take to make?

Most crocheters finish in about two to three hours, from the foundation chain through the border and ties. That makes it a realistic one-sitting project rather than a multi-day undertaking.

My eye openings came out uneven, what happened?

This usually comes from inconsistent chain tension on row 9 or miscounting the skipped stitches. Recount your 8-7-7-7-8 stitch breakdown before you finish the row, and keep your chain stitches loose enough to hold their shape but not sloppy.