Intermediate 4-6 hours Worsted yarn

Worked on the glider, counted out loud —

Cozy fingerless gloves in easy moss stitch crochet

Beginner fingerless gloves worked flat and seamed, about 4-6 hours for a warm, giftable pair.

Jump to the rounds

What this one is

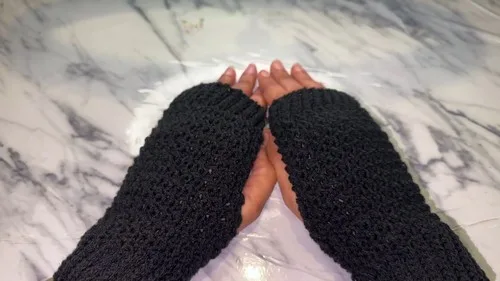
You know that stretch of the day when your hands go cold but you still need your fingers free -- typing, holding a mug, turning a page. These gloves are made for exactly that stretch, and for the person in your life who complains about chilly hands every year without fail. One flat panel, folded and seamed, and you've got a pair that actually gets worn.

Your hands spend most of the work chaining a foundation of 40, then moving through wrist ribbing, a moss stitch body, and finger ribbing before you fold the piece in half and seam it closed. It's a project you can pick up for an hour here and there -- plan on about 4 to 6 hours from slip knot to a finished pair, most of it easy, repeatable stitching.

Try it another way

The easiest change to make is sizing: since the whole panel starts from a chain of 40, you can add or subtract a few stitches to loosen or tighten the fit around your wrist before you even touch the moss stitch body. If you want a chunkier pair, try a heavier 3-ply held double, or swap in a different fiber altogether and adjust your hook up from the 3.5 mm called for here to match. Color placement is another easy lever -- work the wrist ribbing and finger ribbing in a contrasting shade from the 26-stitch moss stitch body, so the texture change and the color change land in the same place and reinforce each other. You could also make the thumb hole slightly wider or narrower than the 7 skipped stitches specified, if you know your thumb runs larger or smaller than average. And once you've made one pair for cold-hand chores, consider a second pair sized up as a gift, or a shorter version with just the wrist ribbing and moss stitch body left un-hemmed at the fingers for a plain cuff style.

There's something quietly satisfying about a pattern that gives you three distinct textures in one flat panel -- the ribbed give of the SC sections at wrist and fingers, and the bumpy, forgiving texture of the even moss stitch (that SS, HDC combination) filling the body between them. You're not juggling charts or counting increases; you're just following the rhythm row by row, and watching the ribbing tighten up naturally as you go. The real payoff comes at assembly, when a single flat rectangle folds in half and, with a bit of careful seaming and a deliberately placed gap for your thumb, turns into something that actually fits a hand. It's a good project for proving to yourself that simple stitches, placed with intention, can look like more than the sum of their parts.
The rounds, in full

Written out, round by round

Intermediate4-6 hours3.5 mmWorsted

Bring to the porch

Everything this one takes, in the order you will reach for it.

  • 3-ply yarn
  • 3.5 mm hook
  • Stitch markers
  • Scissors

The Main Panel

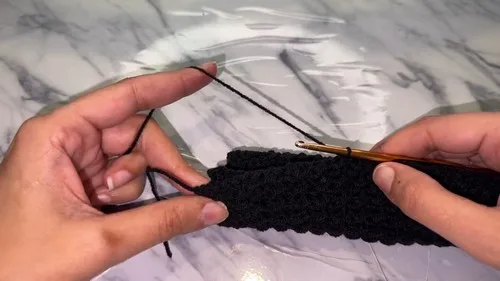
Make a slip knot and chain 40.

Chain 1 as turning chain.

  1. Round 1Work 9 SC for wrist ribbing, place marker. Work Even Moss Stitch (SS, HDC) for 26 stitches. Work 5 SC for finger ribbing.
  2. Round 2Chain 1 and turn. Work SS in BLO for finger ribbing. Continue Even Moss Stitch in body section starting with SS and ending with HDC. Work SS in BLO for wrist ribbing. Move marker to last stitch.
  3. Round 3Chain 1 and turn. Work SC in BLO for wrist ribbing. Continue Even Moss Stitch starting with SS and ending with HDC. Work SC in BLO for finger ribbing.Repeat Rows 2 and 3 until panel fits wrist.For small size, make 42 rows.

Putting it together

Step 1

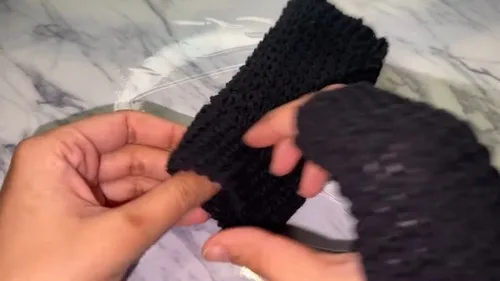
Fold panel in half with right sides together.

Step 2

Seam finger ribbing with SS.

Step 3

Seam 9 stitches of body section with SS.

Step 4

Create thumb hole by working 1 SS on one side only, skip 7 stitches on opposite side, join on 8th stitch with SS.

Step 5

Continue seaming across remaining wrist ribbing with SS.

Step 6

Fasten off yarn and weave in ends.

Step 7

Turn glove right side out and repeat for second glove.

Marlene's notes

Note 01

Use a 3.5 mm hook throughout; going up or down a size will change how snugly the ribbing hugs your wrist and fingers.

Note 02

Keep your marker in place after the wrist ribbing on Row 1 -- it's your reference point for where the moss stitch body starts on every following row.

Note 03

Watch your tension through the moss stitch body especially, since an even SS and HDC rhythm is what keeps the texture looking consistent across all 3 rounds.

Porch photos

Before you sit down

  • Check how much of your 3-ply yarn you have on hand -- this pattern uses one flat panel per glove, so you'll need enough for two.
  • Have your stitch markers ready before Row 1; you'll place one right after the wrist ribbing section to mark where the moss stitch body begins.
  • Work a small swatch in the even moss stitch (SS, HDC) with your 3.5 mm hook first, just to see how the texture behaves in your yarn.

How the hours go

Foundation chain and wrist ribbing
about 20-30 minutes because it's just the chain of 40 and the first 9 SC stitches, plus placing your marker
Moss stitch body and finger ribbing (3 rounds)
about 2-3 hours because the even moss stitch takes a bit of care to keep consistent across all three rounds and both ribbed edges
Folding, seaming, and the thumb hole
about 1-2 hours because the seven assembly steps include a deliberately placed thumb gap that's worth doing slowly

Looking after it

  • Hand wash your finished gloves in cool water with a gentle detergent, since a 3-ply fiber can felt or shrink if you agitate it too much or use hot water.
  • Lay the gloves flat to dry and reshape the ribbing gently with your fingers while damp, then store them flat or loosely folded rather than hung, so the wrist ribbing keeps its stretch.
FAQs

Asked on the glider

the ones that come up on the glider

Can I make these gloves bigger or smaller?

Yes, the pattern starts with a chain of 40, so you can add or remove a few stitches from that foundation to adjust the wrist size. Just keep the ribbing and moss stitch sections proportional so the texture still lines up when you fold and seam the panel.

How does the thumb hole get made if there's no separate thumb piece?

During assembly you seam most of the folded panel closed, but at one point you work a single SS on one side, skip 7 stitches on the other, and join back in on the 8th stitch. That skipped gap becomes your thumb opening once the glove is turned right side out.

Do I need to make two identical panels?

No, each glove is a single Main Panel that gets folded in half with right sides together, so you only make one flat piece per glove. You'll repeat the whole panel and assembly process a second time for the matching glove.

Is this pattern really beginner friendly given the moss stitch section?

Yes, the even moss stitch here is just a repeating SS and HDC combination, so once you find the rhythm it becomes quite mechanical to work. The trickiest part for most people is the seaming and thumb hole placement rather than the stitches themselves.