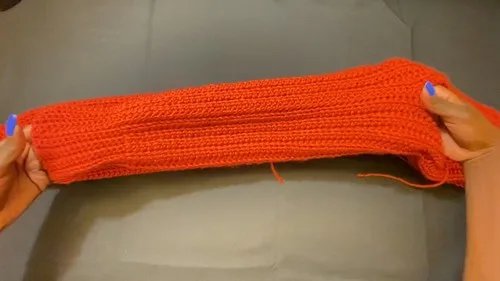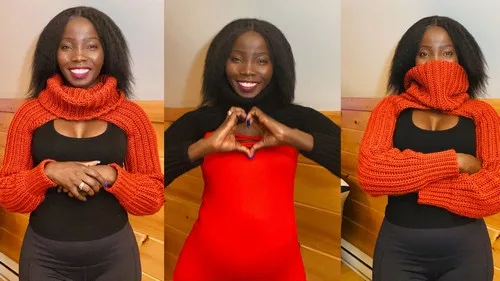
Intermediate 4-6 hours Worsted yarn

Worked on the glider, counted out loud —

Arm Warmers With a Built-In Turtleneck Collar

Wrist-to-shoulder arm warmers with a cozy turtleneck join, sized to you. About 4-6 hours for an intermediate crocheter.

Jump to the rounds

What this one is

You know that stretch of the year when a sweater feels like too much but bare arms feel like too little. That's who this is for. These arm warmers run wrist to shoulder, so you get real coverage, and the built-in turtleneck ties the whole thing together instead of looking like an afterthought. It's a piece for layering over a tank or a sleeveless dress when you want warmth without bulk.

Your hands spend most of the time in one long half double crochet rhythm, with a short single crochet section worked first and marked before the taller stitches take over. Because you're working straight chains and rows rather than shaping in the round, it's steady, portable work. Between the two sleeve panels and the separate neck panel, plan on a few sittings rather than one marathon evening.
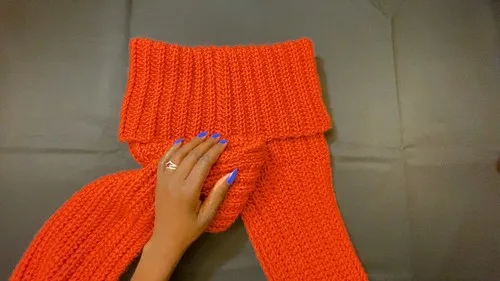
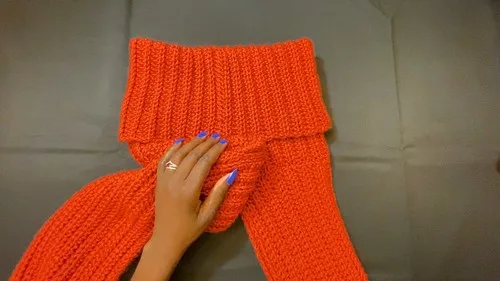
The rounds, in full

Written out, round by round

Intermediate4-6 hours5.5 mmWorsted

Bring to the porch

Everything this one takes, in the order you will reach for it.

  • Craft Smart Value Yarn
  • 5.5 mm Crochet Hook
  • Darning Needle
  • Tape Measure
  • Scissors

Main Pattern

  1. Round 1Skip the 91st chain. Single crochet in the back loop of the next 15 chains. Place a stitch marker in the 15th stitch.Half double crochet in the back loop of the remaining 75 chains.
  2. Round 2And all subsequent rows Chain 1 and turn. Half double crochet in the back loop for 75 stitches.Remove the stitch marker.Single crochet in the back loop for the next 15 stitches.In the final stitch, crochet through both loops.Chain 1 and turn.Repeat until you have 30 rows or reach your desired sleeve width.

Fasten Off

Leave a long tail for sewing.

Neck Panel Foundation Chain: Create a slip knot.

Chain 51 (50 for width + 1 for turning).

This sets the turtleneck’s looseness.

  1. Round 1Half double crochet in the back loop of each chain.
  2. Round 2And all subsequent rows Chain 1 and turn. Half double crochet in the back loop of each stitch.Crochet through both loops on the final stitch.Repeat until you complete 60 rows (or double the sleeve panel count).

Putting it together

Step 1

Join Neck Panel:: Fold the neck panel in half lengthwise.

Step 2

Sew the short ends together to create a tube.

Step 3

Join Sleeves:: Fold each sleeve panel in half lengthwise (wrong sides together).

Step 4

Sew along the edge, leaving an 8-inch gap for the armhole (adjust as needed).

Step 5

Attach Sleeves to Neck Panel:: Align the top edge of each sleeve with the edge of the neck tube.

Step 6

Ensure the sleeve seam matches the neck seam.

Step 7

Sew the sleeve to the neck tube.

Step 8

Repeat for the second sleeve.

Step 9

Finishing Touches: Weave in all loose ends securely.

Step 10

Fold the neck panel down to create a cozy turtleneck effect.

Marlene's notes

Note 01

Work every stitch in the back loop only throughout, including the neck panel rows, since that's what gives the fabric its ridged texture and keeps the two sections looking uniform.

Note 02

Chain 91 is written for a full wrist-to-shoulder sleeve, but the pattern is meant to flex, so adjust your starting chain up or down and keep the 15-stitch single crochet section proportional to your total.

Porch photos

Before you sit down

  • Measure from wrist to shoulder on the arm you're making the sleeve for, since your chain-91 foundation is meant to be adjusted to that number.
  • Have your stitch marker ready before you start the foundation row, since it goes into the 15th stitch to flag where single crochet ends and half double crochet begins.
  • Check your yarn amount against two sleeve panels plus the neck panel before you start, since running short partway through a panel means an awkward join.
  • Read through the Main Pattern row once fully so you know the back-loop-only instruction applies to both the single crochet and half double crochet sections, not just one.

How the hours go

Main Pattern (sleeve panel)
about 1.5-2 hours because you're working 75 half double crochet stitches plus 15 single crochet across several rows, and you need two matching panels
Fasten Off and Neck Panel
about 45-60 minutes because the chain-51 neck panel is narrower but still needs several half double crochet rows worked evenly
Assembly (seaming and joining)
about 1-1.5 hours because folding, matching seams, and sewing three tubes together with an armhole gap takes a careful hand

Looking after it

  • Hand wash in cool water and lay the arm warmers flat to dry, since acrylic craft yarn holds its shape best without being hung or wrung.
  • If a panel looks stretched after wear, reshape it by hand while damp and let it dry flat, then store folded rather than on a hanger to keep the turtleneck collar from sagging.
FAQs

Asked on the glider

the ones that come up on the glider

Can I make these arm warmers shorter than wrist to shoulder?

Yes, that's exactly what the flexible chain length is for. Just chain fewer stitches than 91 for your foundation and adjust the single crochet cuff and half double crochet body proportionally.

Why work in the back loop only instead of both loops?

Working the back loop only gives the fabric a ridged texture and keeps it consistent across both the single crochet and half double crochet sections. It also makes the fabric a bit more stretchy, which helps with fit.

Do I need to make both sleeve panels identical?

Yes, since they're joined to the same neck panel and meant to sit symmetrically. Use the same chain length and stitch marker placement for both so the finished pair matches.

How do I know if my armhole gap is the right size?

The pattern leaves about an 8 inches gap when sewing the sleeve seam, but you can adjust that to fit your own shoulder width. Try the panel on before sewing fully if you're unsure, and adjust the gap before joining it to the neck tube.

What hook and yarn does this pattern use?

It's worked with a 5.5 mm hook and a craft-weight acrylic yarn, along with a darning needle for seaming and a tape measure for getting your chain lengths right. A stitch marker and scissors round out what you need.