Intermediate 2-3 hours Lace (Crochet Thread) yarn

Worked on the glider, counted out loud —

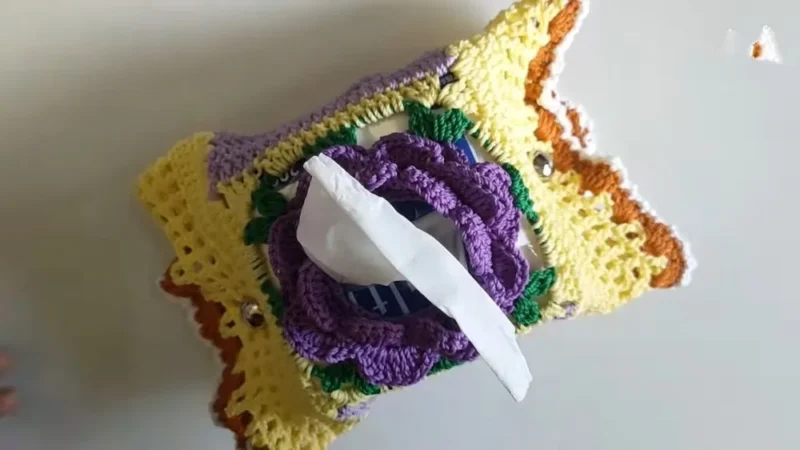
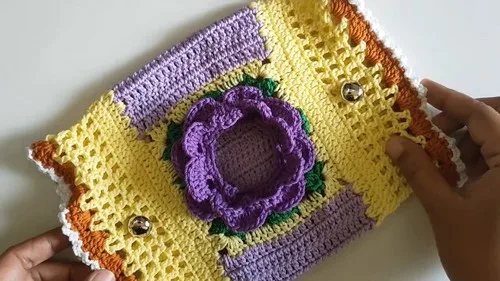
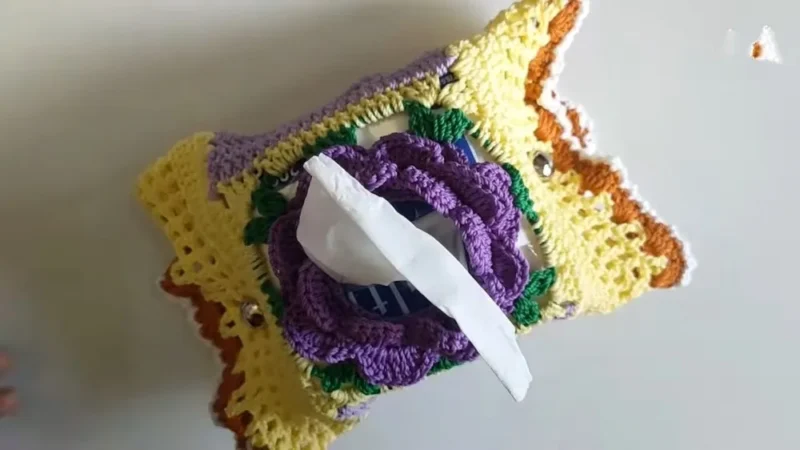
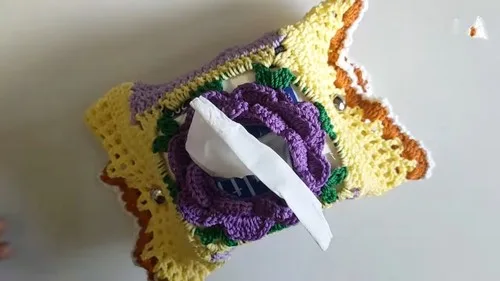
Crochet flower tissue holder with an eight-petal trim

A quick crochet tissue holder topped with eight petals, great for confident beginners with a few hours to spare.

Jump to the rounds

What this one is

This one is for anyone who keeps a box of tissues on the counter and would rather look at something pretty than plain cardboard. I think of it as an evening project, the kind you pick up when the house has gone quiet and your hands want something small and repetitive to do. It works up from a simple ring of single crochet, so it is forgiving for anyone who has joined a round before but hasn't tried shaping a flower on top yet.

Your hands spend most of the time repeating single crochet in joined rounds, building the body up in back loops so the sides stand straight, then shift to shaping eight petals with half double and double crochet worked right into the top edge. Between chaining 36 to start and sealing the last thread with a lighter, you're looking at a few focused hours, most of it that easy, rhythmic single crochet before the petal round asks for a bit more attention.
Try it another way

There's something satisfying about watching a flat circle of 48 single crochets turn into a tidy cylinder just by working in the back loop only, that one choice is what gives the sides their crisp, ribbed stand instead of a floppy curl. The real payoff comes at the top, where each petal is built from a half double crochet, a pair of double crochets with an increase tucked in the middle, and another half double crochet, all closed with a chain and a slip stitch before you move to the next. Repeat that eight times and you get a ring of petals that looks far more complicated than it actually is. Sealing every thread end with a flame instead of weaving it in feels like a neat little trick to have up your sleeve.

The rounds, in full

Written out, round by round

Intermediate2-3 hoursLace (Crochet Thread)

Bring to the porch

Everything this one takes, in the order you will reach for it.

  • Onitsuga polycherry thread
  • 4/0 hook from Tulip
  • Lighter
  • Needle and sewing thread (for attaching the button)
  • Green thread (for the round 4 leaf detail)
  • Light yellow thread (for round 5's petal cavities and the final rows)
  • Light purple thread (for rounds 6 through 13)
  • Copper thread (for the final decorative trim edge)

Foundation Row

Make a slip knot.

Chain 36.

Slip stitch into the first chain to form a circle.

  1. Round 1Chain 1. Do 2 single crochets into each stitch until the end of the round. Slip stitch to join. You should have 48 single crochets.
  2. Round 2Chain 1 (only in the back loop). Single crochet in each stitch around. Slip stitch to join.
  3. Round 3Flower Pattern Chain 1. HDC into the next stitch, then 1 double crochet, 1 double crochet increase (2 double crochets in one stitch), 1 double crochet, 1 HDC. Chain 1, slip stitch into the same stitch. This completes one flower petal. Repeat around to make 8 petals in total. Join with a slip stitch and cut the thread. Secure the end with a lighter.
  4. Round 4Change to green thread. From a flower petal, count three stitches from the slip stitch section. Make 3 chains, enter 2 double crochets together in the same stitch. Repeat the pattern around with 6 chains skipping petals to make the leaf pattern. Join with slip stitch and chain one to secure the green thread.
  5. Round 5Change to light yellow thread. Work following patterns into cavities of the petals: 3 chains, 2 double crochets, 3 chains again, then 4 double crochets in each cavity. Continue around and join with slip stitch. Chain one to secure.
  6. Rounds 6–13Continue with light purple thread, working one double crochet in every stitch and creating two double crochets in the cavities. Work till you achieve the desired height, counting rows until you reach 13 rows.
  7. Final RowsContinue using light yellow thread and double crochets as earlier described. For the final pattern before the stitches are secured, switch to copper color in the cavities, creating a chain and skipping sequences to form a detailed edge.

Putting it together

Step 1

Attach a button on the inside of the fourth row using a needle and thread.

Step 2

Trim all excess threads with a lighter.

Step 3

Weave in all loose ends securely and attach the button decoratively.

Marlene's notes

Note 01

Working into the back loop only from row 2 onward is what shapes the sides; if you catch both loops by habit, the holder will cup instead of standing straight.

Note 02

The 4/0 hook is sized for Onitsuga polycherry thread specifically, so swap to a different thread weight and you'll likely need to size the hook up or down to keep the fabric firm.

Note 03

Keep your tension even through the 48-single-crochet round, since any stitch pulled too tight there will throw off the spacing when you get to the eight petals.

Note 04

The piece runs through several color changes as you go: green highlights round 4's leaf detail, light yellow fills round 5's petal cavities and returns for the final rows, light purple carries rounds 6 through 13, and copper forms the last decorative trim edge.

Porch photos

Before you sit down

  • Check you have enough Onitsuga polycherry thread wound off before you begin chaining 36, since there's no natural pause to restock mid-round.
  • Have your 4/0 Tulip hook and a lighter within reach from the first chain, since you'll use the lighter again at the very end to seal threads.
  • Read through row 1 and row 2 before you start, so the shift from increasing into each stitch to working back-loop-only single crochet doesn't catch you mid-round.
  • Thread a needle with sewing thread and set the button aside now, so attaching it to the fourth row is a quick finish rather than a separate errand later.

How the hours go

Foundation rounds
about 1 to 1.5 hours because you're working 48 single crochets per round across several rounds before any shaping starts
Finishing
about 15 minutes because sewing on the button and sealing threads with a lighter is quick once the crochet itself is done

Looking after it

  • Hand wash the finished holder in cool water if it needs a refresh, then reshape it over the tissue box itself while damp so the rounds dry sitting straight.
  • Store it flat or sitting upright rather than folded, since a sharp crease in polycherry thread can be slow to work back out.
FAQs

Asked on the glider

the ones that come up on the glider

What size tissue box does this holder fit?

Based on the 36-chain foundation worked up to 48 single crochets, this pattern is sized for a standard square tissue box. If your box is a different size, adjust the starting chain in multiples of 8 so the petal round still divides evenly.

Can I use a different thread instead of Onitsuga polycherry?

Yes, though you should match your hook to the new thread's weight rather than sticking with the 4/0. A thread that's much thicker or thinner than polycherry will change the finished size of your stitch counts.

Why does the pattern call for a lighter?

The lighter seals the cut ends of this thread instead of weaving them in, which keeps the inside of the holder neat. It also stops the ends from fraying over time.

Do I need stitch markers for this pattern?

You don't strictly need them, but placing one in the first stitch of each round can help you keep track of where the round starts. This is especially handy once you're working back-loop-only single crochet, where the stitches look similar round to round.

Where exactly does the button go?

The button attaches to the inside of the fourth row using a needle and sewing thread. It acts as the closure that finishes off that part of the holder.

How many petals should the top have?

You're working toward 8 petals total, each built from a half double crochet, two double crochets with an increase, and another half double crochet, joined with a slip stitch before repeating around.