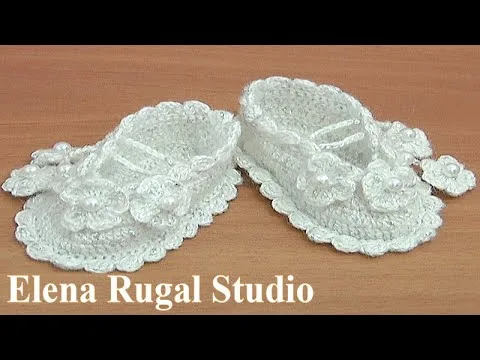
Beginner 2-3 Hours DK/Light Worsted yarn

Worked on the glider, counted out loud —

Crochet Cutest Baby Booties: A Beginner-Friendly Pattern

Learn to crochet the cutest baby booties with this beginner-friendly pattern. Customize with pastels, bold colors, bows, buttons, or pom-poms for a sweet handmade gift.

Jump to the rounds

Before you sit down

Begin by crocheting the sole in two rounds to form the oval base of the bootie.

Count your stitches carefully at the end of each sole round to keep the shape even.

Keep tension consistent through the side rounds so the bootie walls stand up neatly.

Move on to the top of the bootie, working two rounds to form the ankle opening.

Fasten off and weave in all loose ends securely for a clean, comfortable finish.

Choose your yarn color, from soft pastels to bold brights, before or after stitching.

Finish by sewing on an optional bow, button, or pom-pom for a personalized touch.

What this one is

These crochet baby booties are the perfect small-scale project that delivers big charm. Worked up in just three simple pattern parts — the sole, the sides, and the top — they come together quickly while still looking irresistibly polished. This pattern is ideal for anyone hunting for a meaningful handmade gift, whether you're stitching for your own little one, a baby shower, or a friend expecting soon. The compact size means you don't need much yarn, making it a lovely stash-buster too.

This pattern is written with beginners in mind, so if you're newer to crochet, you'll feel right at home working through the rounds. The structure builds logically: start with a flat sole, shape the sides upward, then finish with the top of the bootie, all using a small hook between 3mm and 4.5mm for tight, secure stitches. Most crocheters can finish a pair in a single sitting or two, making this a satisfying weekend project with visible progress at every stage.

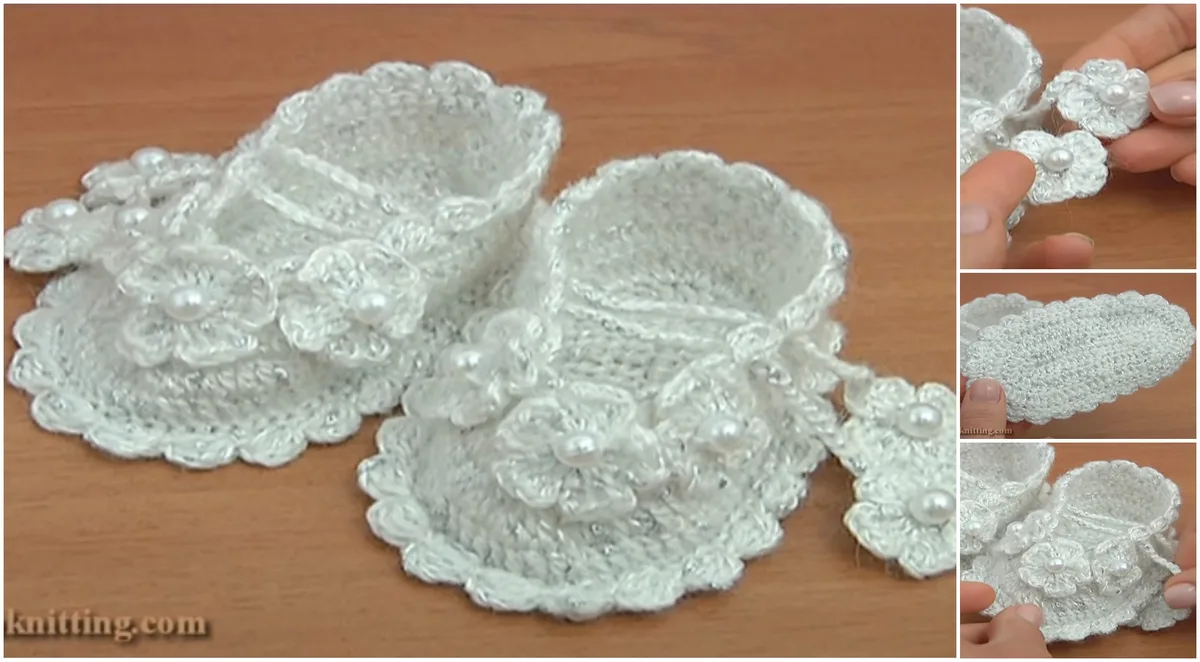
The finished booties are soft, snug, and sized just right for tiny feet, with a rounded toe and cozy ankle opening that hugs baby's foot comfortably. Made in gentle cotton or acrylic yarn, they feel soft against delicate skin and hold their shape beautifully. Whether left simple in soothing pastels or dressed up with a bow, button, or pom-pom, these booties make an heirloom-quality gift that new parents will treasure long after baby has outgrown them.

Variations

The beauty of this pattern is how endlessly customizable it is! For a gender-neutral baby shower gift, try soft sage green or golden mustard yarn instead of traditional pink or blue. If you're making these for a baby boy, navy with a small wooden button on the front looks sharp and masculine, while a bright red pair with a cheerful pom-pom feels fun and festive for a playful personality. For girls, pale pink with a tiny crocheted bow at the ankle is a timeless combination that never goes out of style. Try 24/7 Cotton or Soft Baby Steps yarn for a gentle, machine-washable option that's perfect for sensitive newborn skin. If you want a more rustic, neutral aesthetic, oatmeal or heather gray paired with natural wood buttons gives the booties an earthy, Scandinavian-inspired look that pairs beautifully with neutral nursery decor. For a striped variation, alternate two contrasting colors every round while working the sides for a fun, graphic effect without needing to learn new stitches. Want an extra-plush feel? Work with a slightly fuzzy baby yarn like Bernat Baby Blanket for a soft, textured finish that adds visual interest. You can also mix and match embellishments — try a bow on one bootie and a button on the other for a whimsical, asymmetrical set. Since the pattern uses a small hook range (3mm to 4.5mm), sizing up slightly with a thicker yarn and larger hook can create a bootie better suited for a slightly older baby, while sizing down with a finer cotton thread and smaller hook makes an even more delicate newborn version. These small adjustments let you make endless variations from the same simple three-part structure.

There's something so satisfying about watching a flat little sole turn into a fully-formed bootie in just three parts! I love how this pattern builds logically — you start with the sole, shape the sides, and finish with the top, so you always know exactly where you are in the process. It's forgiving for beginners but still feels rewarding, especially once you add your own personal touch. I'm obsessed with playing with color combos here: soft pastels for a classic baby-shower gift, or bold navy and red for a playful pop. The best part, though, is the embellishment stage — sewing on a tiny bow, a wooden button, or a fluffy pom-pom instantly transforms a simple bootie into something that feels custom-made. It's a project you can finish in an afternoon, but it doesn't look like a quick make. Every time I finish a pair, I'm struck by how something so small can feel so special. These are the kind of booties that end up in keepsake boxes, not the diaper bag.
Common mistakes

  • Using a hook that's too largeStick within the recommended 3mm to 4.5mm hook range and always work a quick swatch first to check that your stitches are tight enough to hold their shape.
  • Not keeping stitch counts consistentCount your stitches at the end of every round before moving on, especially when transitioning from the sole to the sides, so the shaping stays even.
  • Choosing a scratchy or stiff yarnSelect a soft, lightweight cotton or acrylic yarn specifically labeled as baby-safe or hypoallergenic for the most comfortable finished bootie.
  • Leaving yarn tails untrimmedWeave in every end thoroughly using your yarn needle, running it through several stitches in different directions before trimming close to the fabric.
  • Attaching decorations like buttonsIf the booties are for a very young baby, opt for crocheted bows or embroidered details instead of small removable buttons, and always sew decorations on extra securely.
  • Rushing the transition from the sidesTake it slow through the final two rounds, checking that the stitch count matches the pattern before fastening off so the opening sits neatly around baby's ankle.

The rounds, in full

Written out, round by round

Beginner2-3 Hours3 mmDK/Light Worsted

Materials

Everything this one takes, in the order you will reach for it.

Yarn

  • Soft, lightweight yarn like cotton or acrylic is gentle on a baby’s skin.

Crochet hook

  • A small hook size, typically between 3mm to 4.5mm, works well for tighter stitches.

Scissors

  • For trimming yarn ends.

Darning needle

  • To weave in any loose ends.

Optional embellishments

  • Buttons, beads, bows, or pom-poms can add an extra special touch.

keep this to hand

Abbreviations

US crochet terms, as used in this pattern.

  1. chChain
  2. scSingle Crochet
  3. dcDouble Crochet
  4. sl stSlip Stitch
  5. st(s)Stitch(es)
  6. incIncrease

Step 1: Crochet the Sole

The sole forms the base of the bootie.

Foundation Chain : Ch 12.

  1. Round 1Dc in the 3rd ch from hook, dc in each ch across, turn and work around the opposite side of the chain with dc. Sl st to join (24 sts).(24)
  2. Round 2Inc in first st, dc in next 10 sts, inc in next 3 sts, dc in next 10 sts, inc in last st (30 sts).(30)

This completes the sole, creating a soft and stable base for the bootie.

Step 2: Form the Sides

  1. Round 3Sc in each st around, working in the back loop only to create a raised edge.
  2. Round 4-5Sc in each st around, keeping your tension even to maintain the shape.

Step 3: Create the Top of the Bootie

  1. Row 6Sc in the next 10 sts, skip the next 10 sts, sc in last 10 sts.
  2. Row 7Dc in each sc across, fasten off and weave in ends.

This creates a basic baby bootie structure. Now, let's move on to some fun customizations!

Important notes

Note 01

💡 Use a hook between 3mm and 4.5mm to keep your stitches tight — baby booties need firm fabric so they hold their shape and don't sag.

Note 02

💡 Choose soft, lightweight cotton or acrylic yarn that's gentle on delicate newborn skin; avoid anything scratchy or heavily textured.

Note 03

💡 If you're adding a bow, button, or pom-pom, sew it on securely with a few extra stitches for safety, especially for very young babies.

Note 04

💡 Weave in all loose ends thoroughly before your booties are finished — this keeps the inside smooth and comfortable against baby's foot.

Note 05

💡 Since this pattern has only three parts (sole, sides, top), keep a stitch marker on your first stitch of each round to avoid losing track of where rounds begin.

Note 06

💡 Make a matching pair by working both booties side by side, one round at a time, so your tension and stitch counts stay consistent between the two.

More photos

FAQs

Asked on the glider

the ones that come up on the glider

What size baby will these booties fit?

This pattern is designed as a beginner-friendly newborn-to-small-infant size using a 3mm to 4.5mm hook. You can adjust the yarn weight and hook size slightly to size up for an older baby.

Can I use acrylic yarn instead of cotton?

Yes, both cotton and acrylic work well for this pattern as long as they're soft and lightweight. Acrylic is a great budget-friendly, machine-washable option that's still gentle on baby's skin.

How long does it take to make one pair?

Since the pattern only has three simple parts — the sole, sides, and top — most beginners can finish a pair in about 2-3 hours. It's a great project to complete in a single sitting.

Are buttons safe to use as decorations for baby booties?

Buttons can be used but should always be sewn on very securely, especially for younger infants who may put things in their mouths. For extra safety, consider a crocheted bow or embroidered detail instead.

Can I make these booties in different colors for a themed gift set?

Absolutely, this pattern is very color-friendly. Try pastels for a classic look, bold colors for a playful set, or neutral shades like gray and beige for a versatile gift that suits any nursery.