Intermediate 1-2 hours Worsted yarn

Worked on the glider, counted out loud —

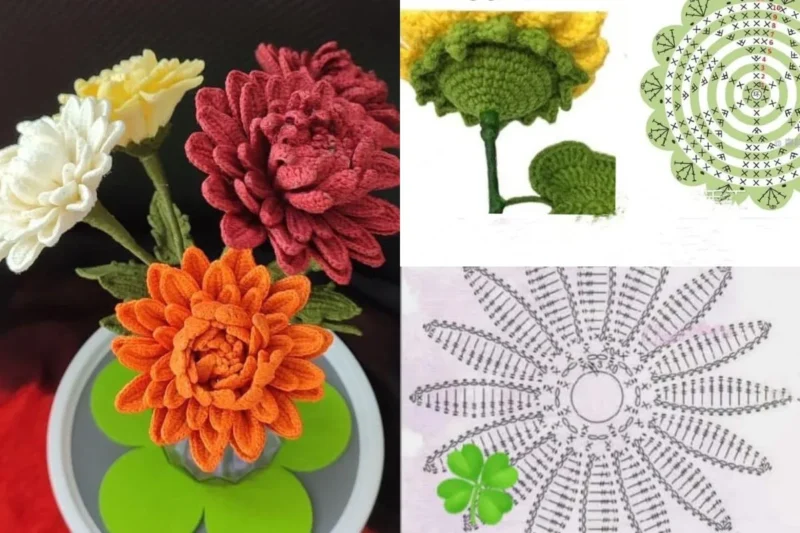
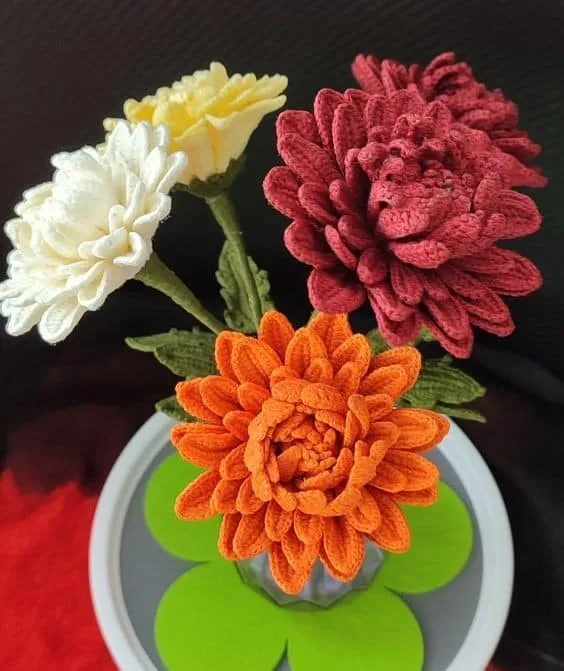
Crochet chrysanthemum flowers with simple layered petals

A quick worsted-weight bloom with a 12-stitch center and layered petals - about 1-2 hours for confident beginners.

Jump to the rounds

What this one is

You know that stretch of the day when you want your hands busy but your mind free to wander -- this little chrysanthemum is built for exactly that. It comes together fast enough for a single sitting, which makes it the sort of project you reach for when you want something finished, not just started. Whether it ends up on a bag, pinned to a hat, or gathered into a small bunch on the windowsill, it asks for very little and gives back a lot.

Your hands start at the center, working two quick rounds into a magic ring until you've got a firm little disc of 12 stitches to build from. From there, you turn to the petals, chaining and shaping each one in a short back-and-forth rhythm -- dc, hdc, sc -- until five or six petals ring the center. All told, you're looking at about an hour or two, most of it spent in that easy, repeating petal motion.

Try it another way

The easiest change is color: work the center in yellow or white and the petals in orange, red, or a pastel for a classic two-tone bloom, or run a multicolored yarn straight through both parts for something more painterly. If you want a fuller flower, the pattern already invites you to go past six petals -- just keep adding them evenly around the 12-stitch center ring until the shape feels full rather than sparse. For a sturdier flower that holds its shape in a bouquet or headpiece, work the floral wire in along the back before you sew the petals down. A beaded center dresses the same flower up considerably: swap in a contrasting or metallic thread and stitch a small cluster of beads right into the middle once the petals are attached. You can also make several in a run of related colors -- yellow, orange, red -- and group them together for a single bunch that reads as one arrangement rather than separate flowers. Since the whole piece is quick to repeat, it's a good one for using up worsted weight scraps, with each flower taking only a small amount of yarn from your stash.

There's something quietly satisfying about a magic ring that actually pulls tight and holds -- you get that little click of confidence right at round one, then watch the center double from 6 to 12 stitches in a single round. The petals are where this pattern earns its keep: each one is its own tiny exercise in graduated stitch height, dc tapering down through hdc to sc, so you can watch the petal curl and narrow as you crochet it. Repeating that shape five or six times builds real muscle memory fast, and by the last petal your hands know exactly where they're going without you thinking about it. Then comes the sewing -- anchoring each petal to the ring with the leftover center tail, arranging them with gaps for a natural, unfussy look. It's a small piece, but it moves through several different skills in a short amount of time.
The rounds, in full

Written out, round by round

Intermediate1-2 hours4 mmWorsted

Bring to the porch

Everything this one takes, in the order you will reach for it.

  • Yarn: a medium weight yarn (such as worsted weight) in the colors you want for your chrysanthemum -- common choices are yellow, orange, red, and white, or experiment with pastels or multicolored yarn for a modern twist
  • Crochet Hook: typically a 4mm to 5mm crochet hook works well for this project, but make sure it matches your yarn weight
  • Yarn Needle: to sew in ends and attach parts of the flower together
  • Scissors: for cutting your yarn
  • Beads (optional): small beads for the center of the flower to add texture and sparkle
  • Floral Wire (optional): if you want a sturdier flower or plan to make a bouquet, floral wire helps keep your chrysanthemum standing tall

Flower Center

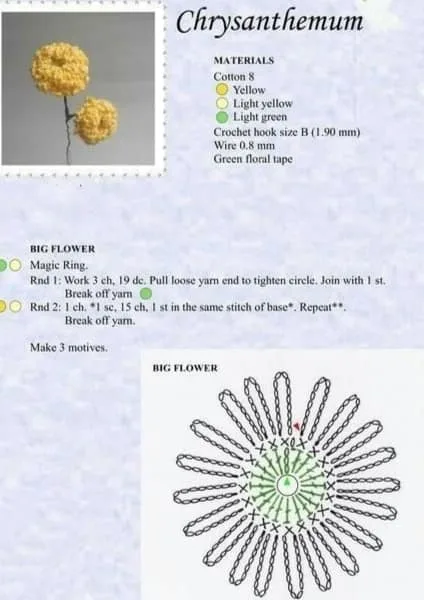
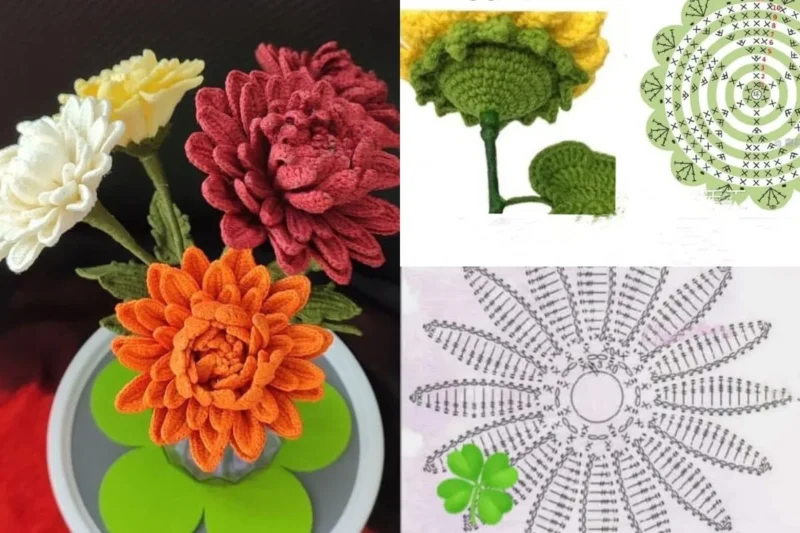
Create a Magic Ring: the first step to crocheting a chrysanthemum flower is making a magic ring -- create a loop with the yarn and crochet into it to form a circle. This ring will serve as the center of the flower, and it's ideal for a neat, tight start.

Round 1 -- Forming the Center: crochet 6 single crochet (sc) stitches into the magic ring, then pull the loop tight to close the ring.

  1. Round 16 sc into the magic ring. Pull the ring tight. (6)Round 2 -- Creating a Larger Base: for the next round, increase each stitch by working 2 single crochet (sc) stitches into each stitch from the previous round. This will create a wider base for the petals to attach to.
  2. Round 22 sc in each stitch. (12 stitches total)Fasten Off: once the center is complete, cut the yarn and leave a tail for sewing it onto the petals.(12)

Petals

Create Petal Base: now it's time to crochet the petals. To do this, start by slip stitching into the first stitch of the second round of the center to attach the petal base.

  1. Round 1Slip stitch into the first stitch of the second round of the center to attach the petal base; chain 4, turn; 1 double crochet (DC) into the second chain from the hook, 1 half double crochet (HDC) into the next chain, 1 single crochet (SC) into the last chain. Repeat this process to crochet 5 to 6 petals in total (more petals can be added for a fuller bloom).

Step by step: chain 4, turn; work 1 double crochet (DC) into the second chain from the hook, 1 half double crochet (HDC) into the next chain, and 1 single crochet (SC) into the last chain -- this gives the petal a nice, elongated shape. Repeat this process to crochet 5 to 6 petals in total; you can create more petals if you prefer a fuller bloom.

Putting it together

Step 1

Arrange the petals around the center of the flower, leaving some space between each one for a natural look.

Step 2

Use a yarn needle and the tail from the center to sew each petal securely to the ring, making sure the petals are evenly spaced and well fastened. Sew the petals tightly around the center so the flower retains its shape.

Step 3

To add a beaded center, thread a needle with a contrasting yarn color or metallic thread and sew small beads into the center of the flower for sparkle and realism. Alternatively, crochet a small circle in the same color as the petals and sew it into the middle.

Step 4

Weave in any loose yarn ends using a yarn needle to finish off the flower.

Step 5

Optionally, add floral wire to the back of the flower if you want it to stand up on its own, especially useful for bouquets or wreaths.

Marlene's notes

Note 01

Keep your tension slightly snug on the center rounds so the magic ring stays tight and the 12-stitch round two doesn't gape at the middle.

Note 02

A stitch marker in the first stitch of round two of the center makes it easy to find your attachment point when you start the first petal.

Note 03

If you're using floral wire, thread it in before you sew the petals on, tucking it along the back of the center where the sewing will hold it in place.

Porch photos

Before you sit down

  • Set aside a small amount of worsted weight yarn in your chosen color plus a scrap of a second color if you want a contrasting center or beaded detail.
  • Check that your 4mm to 5mm hook gives you a magic ring that pulls closed all the way -- a loose ring will show through the center of the finished flower.
  • Read through the petal round once before you start it, since the dc-hdc-sc sequence happens inside just three chains and it's easy to lose your place the first time.
  • Decide now whether you're adding floral wire or beads, since both are easiest to plan for before the petals are sewn on rather than after.

How the hours go

Flower Center
about 10-15 minutes because it's only 2 rounds worked into a magic ring
Petals
about 30-45 minutes because each of the 5 to 6 petals repeats the same short dc-hdc-sc shaping
Assembly and finishing
about 15-20 minutes because sewing each petal on evenly, plus optional beads or wire, takes a steady hand

Looking after it

  • Hand wash your finished chrysanthemum in cool water if it needs freshening up, since most worsted weight fibers hold their shape best without machine agitation.
  • Reshape the petals gently while damp and let the flower air dry flat, then store it away from direct sun so the color stays true over time.
FAQs

Asked on the glider

the ones that come up on the glider

How many petals do I actually need to make?

The pattern calls for 5 to 6 petals for a standard bloom, though you can add more if you want a fuller look. Just keep spacing them evenly around the 12-stitch center as you sew.

What hook size should I use?

A 4mm to 5mm hook works for this pattern, and either end of that range is fine depending on how tightly you crochet. Pick the one that lets your magic ring close snugly.

Can I skip the beads and floral wire?

Yes, both are listed as optional. The flower is complete and sturdy with just the center and petals sewn together.

My magic ring keeps slipping loose -- what am I doing wrong?

This usually means the ring isn't being pulled tight enough after the first round of single crochets. Give the tail a firm, steady pull right after round 1 before you move into round 2.

How much yarn do I need for one flower?

Because the center is only 2 short rounds and the petals are worked from small chains, one flower uses a small amount of worsted weight yarn, easily well within a single skein with plenty left over for more flowers.

What can I attach the finished flower to?

floral wire added, it works well in a small bouquet or as a stem accent. Without wire, it sews or pins nicely onto bags, hats, or headbands using the leftover tail from the center.