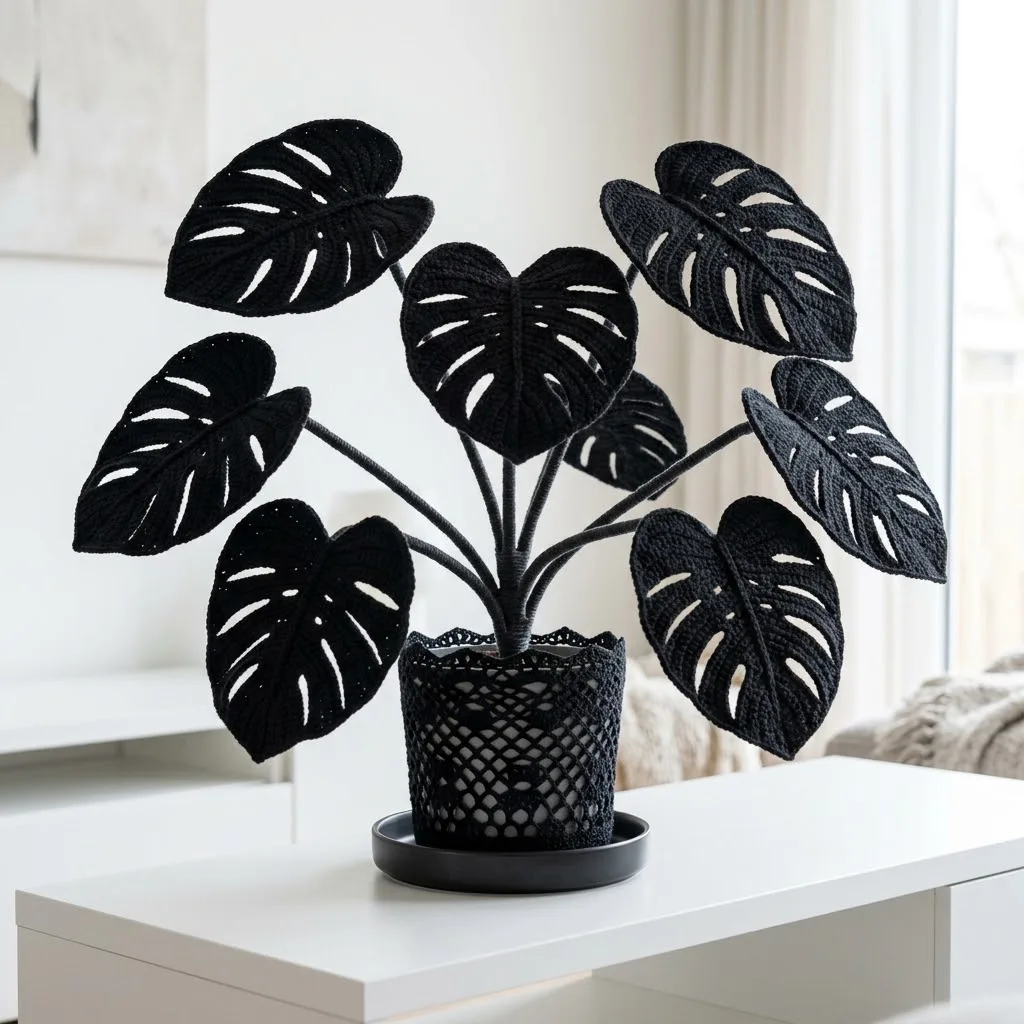
Intermediate 6-9 Hours Worsted yarn

Worked on the glider, counted out loud —

Crochet Black Monstera Plant Pattern for Modern Decor

Crochet a striking black monstera plant with wire-posed leaves and a matching pot cover. A modern statement piece for any low-maintenance plant lover's she

Jump to the rounds

Before you sit down

Crochet the three large leaves first, shaping them flat with increases until you reach the fenestration rows near the top.

Split each large leaf's top edge into separate lobes, rejoining yarn and skipping stitches at the center as directed to create the classic monstera splits.

Work the three medium leaves the same way as the large ones, but stop the body rows earlier for a smaller fenestrated shape.

Crochet the two small leaves with a simple heart-shaped top instead of fenestrations, since these represent younger monstera growth.

Cut and tape floral wire lengths for each leaf, then whip stitch a wire down the back of every leaf along its central vein.

Crochet the pot cover using the smaller hook for a tighter, neater mesh that will hide the base underneath.

Fill your pot with polyfill or a foam block, then fit the crocheted pot cover over the outside.

Insert the wired leaves into the stuffed base and bend each one into a natural pose to complete the arrangement.

What this one is

This pattern builds a full black monstera plant — three large fenestrated leaves, three medium leaves, two small heart-shaped leaves, wired stems, and a coordinating pot cover — all worked in black worsted weight cotton. It's a striking twist on the usual green faux-plant trend, perfect for anyone who loves moody, modern interiors, low-maintenance greenery that never needs watering, or a bold statement piece for a shelf, mantel, or reading nook that's currently missing a little drama.

You'll practice flat single crochet increases and decreases to shape each leaf, then split the top edges into lobes to mimic monstera's signature fenestrations on the large and medium leaves. Floral wire gets whip-stitched down the back of each leaf so you can bend and pose them naturally, and a tighter-gauge pot cover rounds things out. If you're comfortable with basic sc, inc, and dec, this is a satisfying intermediate build — expect roughly 6 to 9 hours from first chain to finished arrangement.

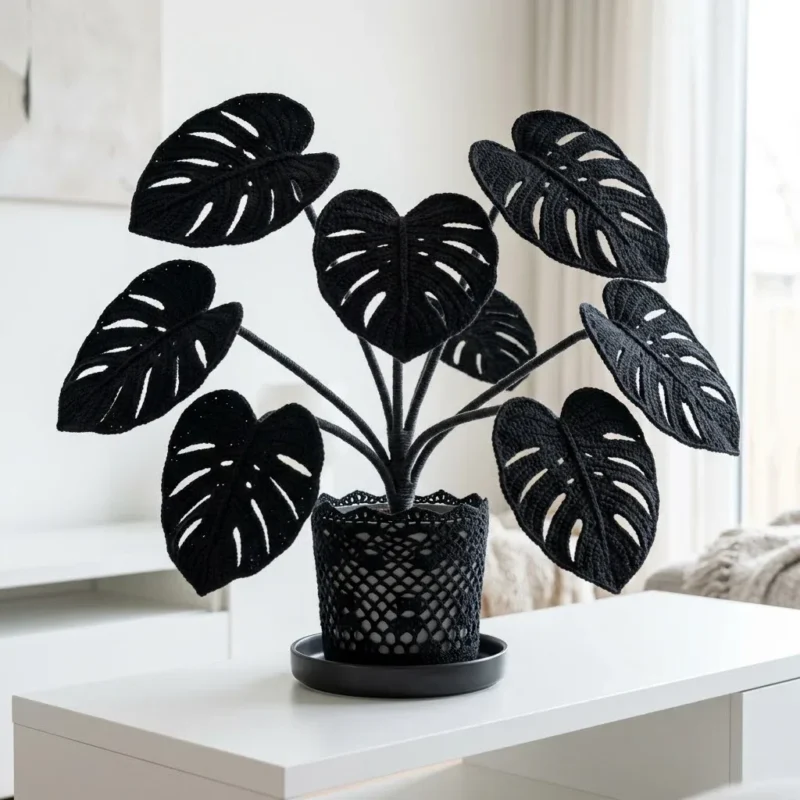
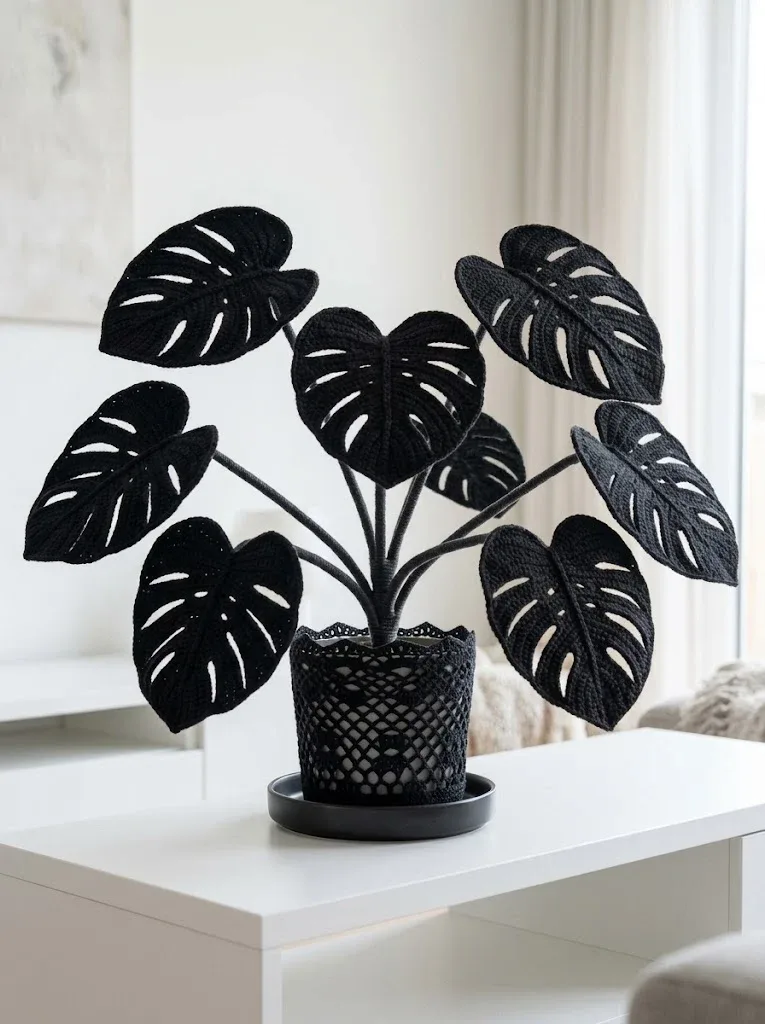
The finished piece stands as an arranged bouquet of eight black leaves in three graduated sizes, wired for natural bends and nestled into a 6-inch pot with its own crocheted cover. It has real sculptural presence — matte, textured, and unapologetically monochrome — and looks equally at home on a desk, console table, or gifted to someone who's tired of keeping actual plants alive.
Variations

I designed this monstera because I wanted a plant that felt like decor first, plant second — something with real edge for a modern living room. What I love most is the fenestration technique on the large leaves: working three separate lobes off one base row and watching that iconic split-leaf shape emerge stitch by stitch feels like a genuine reveal moment. The wired stems are the other highlight for me — once you whip stitch that floral wire down the back of a leaf, you can bend it mid-arch or angle it toward the light just like a real monstera leaf would grow, and suddenly the whole arrangement looks alive. Working three sizes of leaves also keeps the process from feeling repetitive; by the time you've built muscle memory on the large leaves, the mediums and smalls fly by fast. And finishing with a tight, neat pot cover on a smaller hook is such a satisfying way to wrap up a project — it makes the whole thing look intentional and finished, not just a pile of crocheted leaves in a pot.

Common mistakes

  • Skipping the gauge swatch before starting the large leaves.Check gauge with the 4.0mm hook first — 16 sc and 18 rows should equal 4 inches. Off-gauge leaves will make fenestrations look disproportionate to the leaf body.
  • Losing track of stitch counts during the increase rows on the large and medium leaves.Use a stitch marker at the start of each row and count after every increase row before moving on, since a missed increase compounds by the time you reach the fenestration rows.
  • Not skipping the correct number of stitches when rejoining yarn between lobes.Follow the gap instructions carefully — skipping too few or too many stitches at the center will make the lobes uneven in width when the leaf is finished.
  • Attaching the wire stem after the leaf is fully finished and stiff from handling.Whip stitch the wire down the back of the leaf while it's still fresh off the hook and flexible, working along the central vein line for a clean, secure line about 2 inches long.
  • Forgetting to weigh down the pot base before arranging the leaves.Fill the pot with polyfill or a foam block first so the finished arrangement has enough stability to hold the wired leaves upright without tipping.

The rounds, in full

Written out, round by round

Intermediate6-9 Hours4.0 mmWorsted

Materials

Everything this one takes, in the order you will reach for it.

Yarn

  • 200g black worsted weight cotton yarn (weight 4) for leaves and stems
  • Small amount of black yarn for pot cover
  • Cotton or cotton blend yarn works best for structure and stitch definition

Hook

  • 4.0mm (G/6) crochet hook for leaves
  • 3.5mm (E/4) crochet hook for pot cover (creates tighter mesh)

Additional Supplies

  • 18 gauge floral wire (approximately 3 feet per leaf)
  • Wire cutters
  • Green floral tape or black electrical tape
  • 6 inch decorative pot or plastic pot
  • Polyfill stuffing or foam block for pot base
  • Tapestry needle
  • Stitch markers
  • Skill Level
  • Intermediate Beginner to Intermediate
  • Finished Measurements

Large Leaf

  • Approximately 8 inches long by 6 inches wide

Medium Leaf

  • Approximately 6 inches long by 5 inches wide

Small Leaf

  • Approximately 4 inches long by 3 inches wide

Stem Length

  • 8 to 12 inches each
  • Finished Plant Height: Approximately 18 to 22 inches

keep this to hand

Abbreviations

US crochet terms, as used in this pattern.

  1. ChChain: Yarn over, pull through loop on hook.
  2. Sl stSlip stitch: Insert hook, yarn over, pull through stitch and loop on hook in one motion.
  3. ScSingle crochet: Insert hook, yarn over, pull up a loop (2 loops on hook), yarn over, pull through both loops.
  4. IncIncrease: Work 2 single crochet stitches into the same stitch.
  5. DecDecrease (invisible decrease): Insert hook through front loops only of next 2 stitches, yarn over, pull through both stitches (2 loops on hook), yarn over, pull through both loops.
  6. SkSkip: Miss the indicated number of stitches and work into the next one.

Large Monstera Leaf

Make 3

Row 14: Work on this section only, leaving remaining stitches unworked.

Rejoin yarn at the center after skipping 2 sts from Row 14.

Rejoin yarn and repeat for third lobe on remaining stitches.

With the leaf facing you, work a line of slip stitches from the bottom point up through the center to create the raised central vein. This adds dimension and realism.

  1. Round 1Ch 2, work 3 sc in second ch from hook, turn. (3 sts)
  2. Round 2Ch 1, inc in first st, sc in next st, inc in last st, turn. (5 sts)
  3. Round 3Ch 1, inc in first st, sc across to last st, inc in last st, turn. (7 sts)
  4. Round 4-6Repeat Row 3, increasing at both ends. (13 sts after Row 6)
  5. Round 7Ch 1, sc in each st across, turn. (13 sts)
  6. Round 8Ch 1, inc in first st, sc in next 5 sts, inc in next st, sc in next 5 sts, inc in last st, turn. (16 sts)
  7. Round 9Ch 1, sc in first 4 sts, ch 3, sk 3, sc in next 2 sts, ch 3, sk 3, sc in last 4 sts, turn. (8 sc, 2 ch-3 spaces)
  8. Round 10Ch 1, sc in first 4 sts, 3 sc in ch-3 space, sc in next 2 sts, 3 sc in ch-3 space, sc in last 4 sts, turn. (16 sts)
  9. Round 11Ch 1, sc in first 3 sts, ch 4, sk 4, sc in next 2 sts, ch 4, sk 4, sc in last 3 sts, turn. (8 sc, 2 ch-4 spaces)
  10. Round 12Ch 1, sc in first 3 sts, 4 sc in ch-4 space, sc in next 2 sts, 4 sc in ch-4 space, sc in last 3 sts, turn. (16 sts)
  11. Round 13Ch 1, inc in first st, sc in next 6 sts, inc in next 2 sts, sc in next 6 sts, inc in last st, turn. (20 sts)
  12. Round 14Ch 1, sc in first 5 sts, turn, leaving remaining sts unworked.
  13. Round 15Ch 1, sc in each st across, turn. (5 sts)
  14. Round 16Ch 1, dec, sc in next st, dec, turn. (3 sts)
  15. Round 17Ch 1, sc3tog. Fasten off. (1 st)
  16. Round 14b: Sc in next 6 sts, turn.
  17. Round 15b-17b: Work even, then decrease to point as above.Central Vein Row 1: Join yarn at bottom point, sl st loosely in each row end up the center of the leaf to the top. Fasten off.

Small Leaf

Make 2

These younger leaves have no fenestrations, just the classic heart shape.

Add central vein with slip stitches as before.

  1. Round 1Ch 2, 3 sc in second ch from hook, turn. (3 sts)
  2. Round 2-8Increase at both ends every row. (17 sts after Row 8)
  3. Round 9-10Work even. (17 sts)
  4. Round 11Begin working in two sections for the heart indent at the top.Work first 8 sts, decreasing to a point over 3 rows. Fasten off.Rejoin yarn, sk 1 st at center, work remaining 8 sts to match.

Structured Stems

Cut floral wire to desired stem length plus 4 inches. Fold one end into a small loop.

Fasten off, leaving a long tail to attach to the leaf.

Tip: Work slowly and push stitches together for complete coverage. The wire should not show through.

  1. Round 1Ch 2, work 6 sc around the wire loop to anchor, join with sl st. (6 sts)
  2. Round 2and onward: Working in continuous rounds, sc in each st around the wire, keeping stitches snug. Continue until the entire wire is covered.

Pot Cover

  1. Round 1Using 3.5mm hook, ch 4, join with sl st to form ring. (4 ch)(4)
  2. Round 2Ch 3 (counts as dc), 11 dc in ring, join with sl st to top of ch-3. (12 sts)
  3. Round 3Ch 5, skip 1 st, *dc in next st, ch 2, skip 1 st* around, join with sl st to 3rd ch of ch-5. (6 dc, 6 ch-2 spaces)
  4. Round 4-10Continue in open mesh pattern, increasing as needed to fit your pot. Work ch 2 spaces between dc stitches, adding extra dc stitches every other round for gradual widening.
  5. Round 11-15Work even in mesh pattern without increases for the pot sides.Top edge: Sc evenly around the opening for a finished look. Fasten off.

Medium Monstera Leaf

Make 3

Work the same as the large leaf but stop after Row 12, then work the edge splits with fewer rows. Omit one fenestration row for a slightly simpler leaf.

Shape lobes over 3 rows each, decreasing to a point.

  1. Round 1-10Work as for large leaf.
  2. Round 11Ch 1, sc across, increasing at center. (18 sts)
  3. Round 12Begin edge splits as for large leaf, working 3 lobes with 4 sts each.

Assembly

Step 1

Position the covered wire along the back of the leaf, following the central vein line. Using the yarn tail, whip stitch the stem to the leaf back, securing firmly at the base and along the vein for about 2 inches.

Step 2

The wire allows you to bend and pose each leaf naturally.

Step 3

Step 1: Fill your pot with polyfill stuffing or insert a foam block. The base needs weight for stability.

Step 4

Step 2: Cover the pot with your crocheted pot cover, tucking edges under if needed.

Step 5

Step 3: Arrange stems in the pot center, pushing wire ends into the foam or stuffing. Start with small leaves in the center, medium leaves around them, and large leaves on the outside.

Step 6

Step 4: Bend and pose each leaf. Real monsteras have leaves that face different directions and sit at various heights. Some droop slightly, others reach upward. Play with positioning until it looks natural.

Step 7

Step 5: If leaves feel wobbly, add a small amount of hot glue at the base where stems enter the pot.

Important notes

Note 01

Cut floral wire pieces about 3 feet long per leaf before you start assembly, so you have enough length to run along the full central vein plus extra to anchor into the stuffing or foam base.

Note 02

Wrap each wire length in floral tape or black electrical tape before attaching it to the leaf back, both for a neater finish and to keep the sharp wire ends from poking through the stitches.

Note 03

Work all three large leaves, then all three medium leaves, then both small leaves in batches rather than one at a time — it keeps your gauge and lobe shaping more consistent across matching pieces.

Note 04

When splitting the large leaf into lobes, work on one section at a time and leave the remaining stitches unworked exactly as instructed, since trying to work all three lobes simultaneously will tangle your yarn tails.

Note 05

Save your longest yarn tails from each leaf for the whip stitch attachment step — trimming them too short means you'll have to rejoin yarn just to attach the stem.

Note 06

Arrange the wired leaves in the pot before deciding on final bends; it's easier to angle and re-pose wire while the leaves are still loosely placed than after they're pressed firmly into the stuffing.

Note 07

Gauge: 16 sc and 18 rows = 4 inches in single crochet with 4.0mm hook. Gauge matters for achieving the right leaf size and ensuring your fenestrations are proportional. Take time to check this.

Note 08

Color variations: Try deep forest green for a traditional look, white for a minimalist vibe, or variegated yarn for a trendy Thai constellation effect.

Note 09

Size adjustments: Add more rows before fenestrations for larger leaves, or stop earlier for smaller ones. This pattern scales easily.

Note 10

Pot styling: Use a ceramic pot, a macrame hanger, or a woven basket. The black leaves look dramatic against natural textures.

Note 11

Mixed arrangements: Combine with other crochet plants like pothos vines or snake plants for a full indoor jungle.

Note 12

Leaves curling? Your tension may be too tight. Try going up a hook size. Cotton yarn also relaxes after blocking.

More photos

FAQs

Asked on the glider

the ones that come up on the glider

Can I make this monstera pattern in a color other than black?

Absolutely — the shaping and fenestration technique work the same in any worsted weight cotton. Forest green gives a classic houseplant look, while white or variegated yarn creates a completely different aesthetic.

Do I need floral wire, or can I skip the wiring step?

The wire is what lets each leaf hold a natural bend and pose, so it's worth including for the intended look. If you skip it, the leaves will lie flatter and won't have that lifelike arch.

Why does the pot cover use a smaller hook than the leaves?

The 3.5mm hook creates a tighter mesh on the pot cover, which hides the stuffing or foam base underneath and gives the cover a neater, more finished appearance than the looser leaf gauge would.

How many total leaves does this pattern make?

The finished arrangement includes three large leaves, three medium leaves, and two small heart-shaped leaves, plus the wired stems and one pot cover — eight leaves total.

What size pot should I use for this project?

The pattern is designed around a 6-inch decorative or plastic pot, filled with polyfill stuffing or a foam block for weight and stability to support the wired leaves.